Hi all, it's Gabrielle here with you today to share some Shabby-chic wall art that I made using the new (and gorgeous) Juliet collection!
Shabby-chic Wall Art by Gabrielle Pollacco
I've had this chipboard frame in my stash for quite some time now and when I saw the beautiful Misc Me pocket squares that coordinate with the Juliet collection, I knew I'd finally get to using it. The pocket squares fit perfectly into the little windows, so I didn't have to mess around with measuring anything....the hardest part was choosing which of the pretty designs I was going to feature in each square. For the frame, I just painted the whole thing with a cream color acrylic paint and then stamped on it randomly with an older BoBunny stamp (Enchanted).
Once I had decided where I would place each little vignette, I got down to the fun part of adding little bits of ephemera to each of the windows. I began by choosing a couple of the new laser-cut chippies that BoBunny came out with at the last CHA. I did a little bit of machine stitching to each of the pocket squares (give's a nice homespun feel)...glued down my accent and added some dots of BoBunny Glitter paste.
Another new laser-cut chipboard pack is the clocks designs, I added some Glitter paste as well to this one (Gold, Wasabi....love that green color!) and added a pearl accent, then applied the piece with some foam adhesive dots to create a nice 3D effect. In this close-up you can see a floral sticker strip I used from the coordinating Juliet sticker sheet, that I used to frame the outside of my wall art.
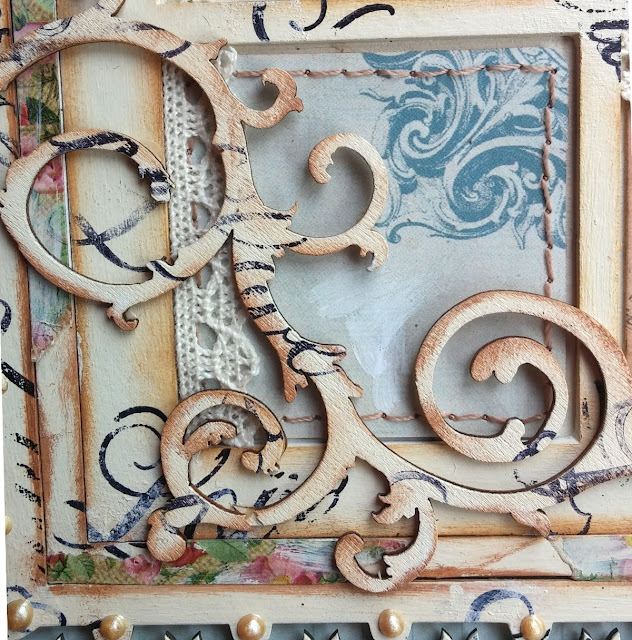
I added snippets of cheesecloth and some old mother of pearl buttons for a aged tattered look in the corner of one of the pocket square designs.
I chose a cool wood accent from Bo Bunny's Iron Work wood designs for another of my squares, and topped up the design with that eye-catching brad from the coordinating brads packet.
I just love the vintage images on these pocket squares, so I left this particular one, as is....just above that design, I used a floral piece from the layered chipboard at a topper for my wall art.
In the bottom corner I used another wood piece, a flourish from the Clockworks collection. I gave this piece the same finish (as well as the piece in the top right corner) as I gave the frame, some painting with cream color acrylic paint and some random stamping with a scripty word stamp from the older Enchanted collection. Finally I added some finishing touches like dots of pearls all around the framework using BoBunny's Butterscotch Pearlescents.
I hope you enjoyed today's Bo Bunny project and hope you will give the gorgeous Juliet collection a try on your next home decor project!
Bo Bunny Products used on this project:
Misc Me Pocket Squares: Juliet
12x12 Combo Stickers Sheet: Juliet
Layered Chipboard: Juliet
Wood Embellishments: Iron Works, Clockworks
Stamp: Enchanted
Jewels: Mocha Double Dot Jewels
Pearlescents: Butterscotch, Chocolate (on key)
Glitter Paste: Gold, Wasabi, Frost
Brads: Juliet


Beautifully detailed project. Love, love.
ReplyDeleteThis comment has been removed by the author.
DeleteThanks Diane ! xo
DeleteI just love this amazing project Gabrielle! The details and beautiful extra touches are just incredible!!!
ReplyDelete