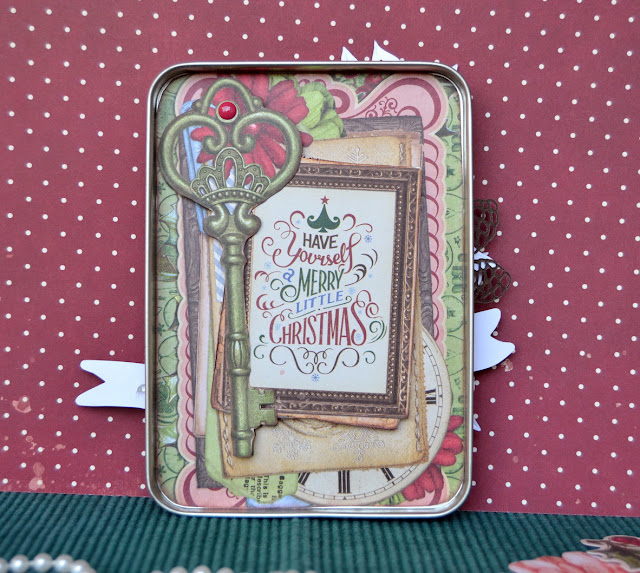
It's Denise here today to share a Christmas altered tin with you.
I really had so much fun creating this little feature, that I know I will be creating a few more of these.
 This photo above is the front of the tin and I used noteworthy pieces, fussy cut pieces and die-cut pieces to create this, along with some striped patterned paper. I added some white gel pen highlights and some pearlescent to the poinsettia center.
Now to the inside of this little tin. This is the other side of the front cover. I cut some bits from the patterned papers and then layered them up, ending with the gorgeous key on the top.
In the actual tin inside, I used lots of tiny Christmas foliage die-cuts, along with some noteworthy pieces, some berries and texture bits, which were all layered and given dimension so that it looks 3d.
Here's a closer look at some of those bits.
Again, I added some white gel pen highlights and also used pearlescents for details and interest.
On the bottom of the tin, I cut some patterned paper to size and glued this in place. This completed the little tin.
I am definitely going to use this as a decoration piece and feature at Christmas time and I have a few other tins that I am going to decorate also and give away as gifts.
Time is moving quickly towards Christmas time and if one is going to make handmade gifts and cards, then I guess we had better get cracking on these projects!
Thanks ever so much for stopping by the BoBunny blog today! I hope you were inspired and might try a little Christmas tin yourself.
Have a fabulous day!
BoBunny Supplies:
Patterned Paper: Shopping, Tinsel, Advent, Candy Cane, Dear Santa, Holly, Reindeer / Christmas Treasures
Patterned Paper: Shopping, Tinsel, Advent, Candy Cane, Dear Santa, Holly, Reindeer / Christmas Treasures
Cardstock: Coffee Double DotNoteworthy: Christmas Treasures
Candy Dots: Christmas Treasures
Washi Tape: Celebrating Freedom
Candy Dots: Christmas Treasures
Washi Tape: Celebrating Freedom
Pearlescents: Sugar, Brilliant Blue, Gold


No comments:
Post a Comment