Hello dear BoBunny fans,
Angela back here. Today, I would like to share with you some pretty tags featuring BoBunny stamps. I am going to show you some easy and fun ways to use them and make your creations unique.
The tags are 3 1/8 x 6 1/4 inch and are made out of white card-stock. They come with a their own tag holder made with Double Dot papers from Lace collection.
1 - Create your own patterns with stamps:
To make each tag holder special, I decided to create a unique pattern on the paper. I stamped all over the front pocket and heat embossed with white embossing powder.
The first tag has a fun window shaker on top, very easy to make with the adhesive vellum windows by EK Success. The shaker is round and filled with sequins and round paper confetti. So, I chose the Bubbles from Terrific Textures Stamp as a pattern for the pocket.
For the sentiment I used the 'Congratulations!' from Sweet Celebrations Stamp and a layered chipboard banner and a few confetti to embellish the tag.
2 - Create your own embellishments:
The pink tag holder is featuring Beautiful Butterflies Stamp. Again, I stamped on the pocket all the different shapes and sizes of butterflies. Moreover, I fussy cut a few other butterflies and layered one on the other to create a decoration. Just combine the different shapes of stamps on different kind of paper, fussy cut them and you'll obtain special embellishments!
I repeated the same pattern on the tag too. I first colored the white tag with pink watercolors, giving an ombre effect, then I tamped the butterflies and heat embossed in white.
3 - Use stamps as a stitching guide:
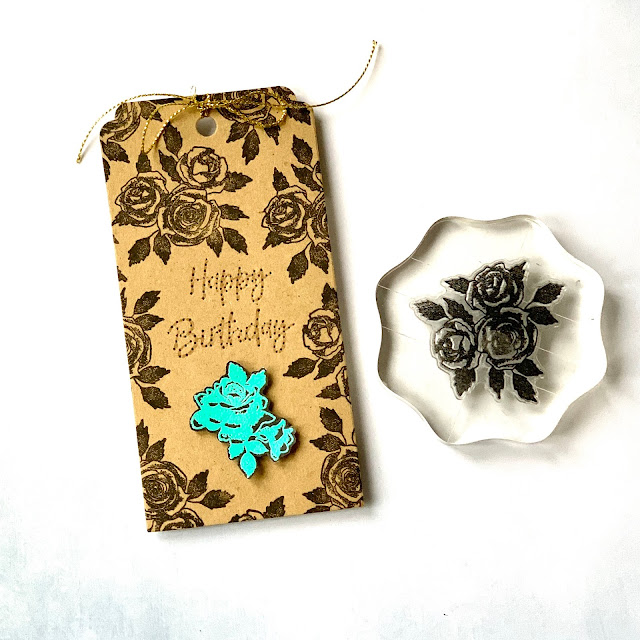
For those who love hand stitching, another way to use stamps is to use them as a guide for stitching. Here, I stitched the sentiment 'Happy Birthday'. I first stamped the sentiment using Versamark Ink on a piece of craft card-stock, which is a kind of transparent ink. Then, I punched the holes, following the lines and finally I stitched the 'Happy Birthday' with a thin needle.
This is my preferred tag, maybe because of the flowers. The tag holder has a beautiful rose pattern on the front made with Garden Grove Stamp. I stamped the roses changing direction each time and avoiding overlapping.
4 - Dimensional Pattern
This is a combination of the above techniques. What I have done here is to stamp some rose bouquets on a white piece of card-stock and fussy cut them. I adhered them on the tag using square foam adhesives so to create a dimensional pattern. I cut with scissors the parts exceeding from the tag and voilà.
5 - Punched Stamps
Here is another idea on how to use our stamps.
If you don't like stitching or are too lazy to do it, what about just punching holes along the stamped image?
If you don't like stitching or are too lazy to do it, what about just punching holes along the stamped image?
Thank you so much for stopping by. I hope you liked the stamping ideas I shared with you. Just keep in mind that you can always take these ideas, change the color scheme and the papers and make them perfect for any occasion you are creating. Happy stamping!
BoBunny Supplies:
Patterned Paper: Double Dot Lace Lavender/ Flamingo/ Island Mist
Chipboards: Count The Ways
Layered Chipboards: Garden Grove
Candy Dots: Garden Grove
Stamps: Sweet Celebrations/ Garden Grove/ Of Time Past/ Beautiful Butterflies/ Terrific Textures
Other Supplies:
AC: card-stock white/ craft
AC Sticky Thumb dimensional foam adhesive/ sticky dots
EK Success: adhesive vellum windows
WRMK Precision 5" scissors


No comments:
Post a Comment