 And wowzers! Have a seat, grab a cup of Joe, and get ready for some super projects with tons of sewing inspiration!!
How do I love thee? Wall Hanging
Agnieszka Piskorz
Agnieszka Piskorz
 Supplies Used: One card album - Cascading Chipboard Album, Crush Dimensional Stickers, Crush Brads, Crush Chipboard, Crush Cut Outs, Crush Hot Lips die Cut, Crush Flirt, Crush 6x6 Pad, Bo Bunny White Rose Trim, Bo Bunny Ribbon Polka Dots
 Winter Weather
Sandra Rupp
Sandra Rupp
 Supplies Used: Midnight Frost Ice, Dark Denim Dot, Frost Dot
You-er Than You
Tara Orr
Tara Orr
 Supplies Used: Cambridge Cut Outs, Cambridge Cardstock Stickers Strength & Honor, Cambridge Post, Cambridge Crown Die Cut, Cambridge Chess, Cambridge Stripe, Cambridge Chipboard Stickers, Cambridge Combo Stickers, Noel Postcards, Newsprint Wraps, Antique Lace Petal
Designer's Tip: I used faux stitching around the die cut as well as on my handmade tags. I find the white shows up very well with the darker colored patterned papers. I also took one of Bo Bunny's fantastic petals and 'unstitched' it creating a length of lace to which I applied to the outer rim of some of my die cut as well as at the bottom of my page.
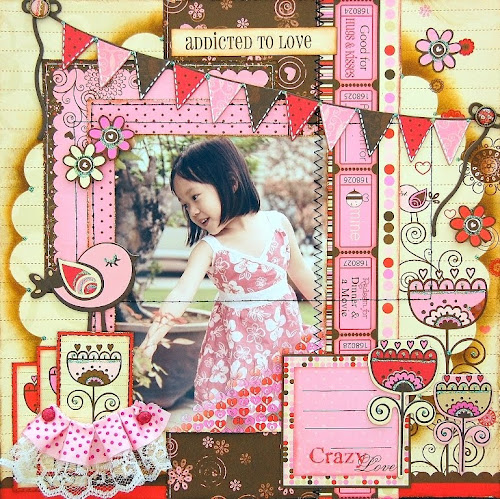
Addicted to Love
Irene Tan
Irene Tan
 Supplies Used: Crazy Love Happy Together, Crazy Love More Than Words, Crazy Love Cut Outs, Crazy Love Fudge & Flowers, Crazy Love Story, Crazy Love Chipboard, Crazy Love brads
Glitter Crazy Love Layered Chipboard, Pink Rose Wrap, Crazy Love Rub-On
Christmas Tree Frame
Robbie Herring
Robbie Herring
 Supplies Used: Noel Collection Memories, Noel 12"Chipboard, Noel iCandy Glitter Stickers, Double Dot Harvest Dot Ribbon, Double Dot Olive Dot Ribbon, Bo Bunny Buttons and Bling
Designer's Tip: For the stitched border, I used all 6 strands of floss for the green border and only 3 strands for the red border. It is a subtle difference, but adds a touch more interest. The Christmas tree was created with the double dot ribbon. I just stitched underneath the folds to hold it in place. I then sewed the buttons directly to the paper. Just be sure to poke your holes first.

All so gorgeous!!!
ReplyDeleteGreat stuff!!! Thank you for showing it!
ReplyDeleteLove these!! Fabulous job ladies. :)
ReplyDelete- April W
love them all!
ReplyDeleteWow amazing projects to share today!!
ReplyDeleteI do not like to sew... but this post has convinced me to try again.
ReplyDeleteMaybe I'll like it on paper! These layouts and projects are so great. I love to see what you girls come up with.
Beautiful work girls! :)
ReplyDeleteTotally love these! I just adore the texture stitching/sewing adds to things!!!
ReplyDeleteWow girls! Fabulous!
ReplyDeletewhauw girls great job....
ReplyDeleteand I love the sewing on the layouts it gives them something extra's have a great day Jolanda
Your style of presentation is very impressive. The meaningful contribution of your mind reflects on those people who are looking for new ideas and information regarding blog creation. I would like to tweet on it and keep spying at every moment you blogging.
ReplyDeleteThese are all so beautiful - each in their own way!
ReplyDelete