
Life is good by Agnieszka Bellaidea

One of my bigger regrets in life is the fact I had just a regular camera for 36 shots when my children were small. I wish I had so many more photos. Better quality too.... But then, if this is one of my bigger regrets my life is not so bad . At least my memory is good and I remember how much fun we had the day this photo was taken. I remember how much my daughter was enjoying walks between all these beautiful flowers, big pool with salty water , great meals and so much more. This special photo was waiting for me many years and the very first day I got all the Primrose collection I knew what I wanted to do for my project. I love fussy cutting so this will be another favorite collection for me, so many lovely elements to cut off!


Bo Bunny Supplies:
Patterned Paper: Primrose Bliss, Primrose Garden, Primrose Gate, Primrose Memories / Primrose;
Cardstock: Blush Dot
Noteworthy: Primrose
Buttons: Primrose
Brads: Primrose
Chipboard: Primrose 12x12, Primrose Layerd Chipboard,
Blossoms: Blush Zinna
Washi Tape: Primrose
Beautiful Hair by Gabrielle Pollacco


The first thing I did when I got my collection was sit down with a few of the patterned papers (while watching TV) and fussy cut the butterflies and labels from the Bliss and Garden papers. This way I was ready to roll when I started in on my layouts. I also went a little crazy with the new Washi Tapes! I used a whole bunch of strips to outline the framework of my background paper, then added random strips here and there as finishing touches.
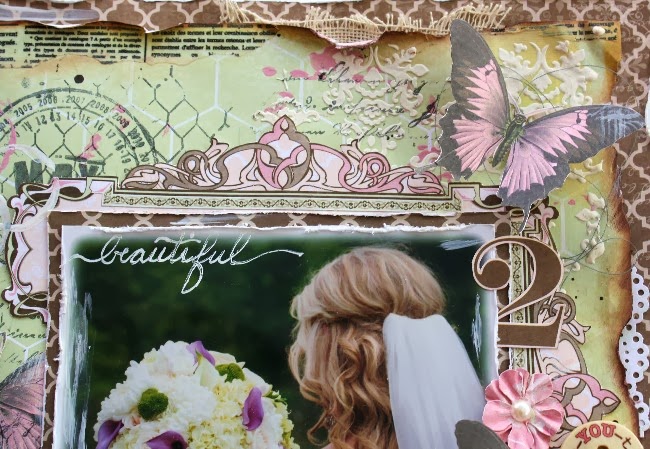
I wanted to go for an artsy/mixed media style background on this one, so I used lots of Bo Bunny texture and background stamps along with inks and texture paste. The small pink blooms where made from one of the patterned papers using a flower die. I wrote part of the title on my photo using a white Signo Unibal gel pen, this one writes very well on photos.
Bo Bunny Supplies:
Patterned Paper: Bliss, Garden, Gate, Breath-taking, Memories/Primrose
Buttons: Primrose
Washi Tape: Primrose, Modern Miss, Black and White
Stamps: Distressed Textures, It is Written, On this Day, Mama-razzi 2
These lay-outs are both truly breathtaking! I'm amazed by your gorgeous work with this gorgeous collection!
ReplyDeleteThese are beautiful.. I just got these papers today and am looking forward to creating with them...
ReplyDeleteThese projects are very beautiful!!!!
ReplyDeleteTotally stunning photos! Gorgeous!
ReplyDeleteThese are amazingly gorgeous!
ReplyDeleteso beautiful, such a great imagination!!! love it, thank you for sharing.
ReplyDeleteBeautiful projects. Gabrielle your work is amazing.... always!! Hugs ~~ Abbygirl sb.com
ReplyDeleteDo you add a varnish or hodpodge to your fussy cut butterflies? They look like their wings are stiff, so how did you do that? I've also seen pages that describe using clear or sparkle type of finish. Thanks so much, they look nice!
ReplyDeleteHi Karen, if you are refering to my l/o (Gabrielle's), I usually just give them a little fold to make the wings pop up, and that's it! The Bo Bunny papers are a very good heavy quality paper so they hold their shape just fine like that. I have on occasion used some Stickles glitter glue along the edges of the wings but that is mainly for accent, not so much for stability. But adding glossy accents or mod podge would give them a nice dimension as well, I'm sure! :)
ReplyDelete