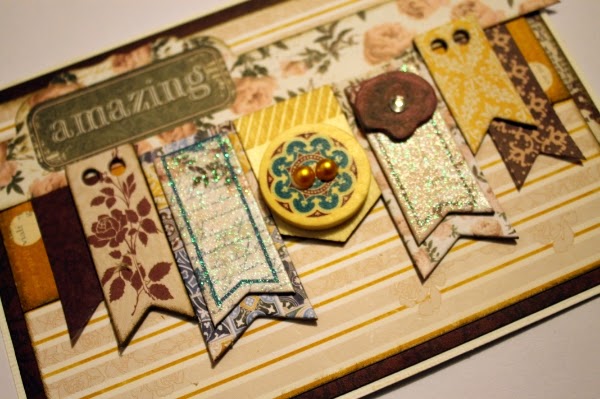
The Rose Cafe collection is such a wonderful vintage collection that is perfect for so many occasions. I decided to make two neutral cards with these papers and will show you step by step how I made them.
Wonderful - Romy Veul
Use two sheets of paper from the 6x6 Rose Cafe pad for the background of the card. Ink the edges of the papers and attach them on top of a kraft cardstock card.
Stamp with the 'Stitches Stamps' alongside the edges of the beige paper to create a stitched look.
Stamp a couple of tiny hearts from the 'Stitches Stamps' sheet with embossing ink. Sprinkle some brown embossing powder on the hearts and use a heat tool to melt the powder.
Cut out a doily or use a pre-made doily and attach it onto the card. Also take the 'Happy Bird' die-cut from the Noteworthy package and add it in the center of the card as well.
Take the bird sticker from the Layered Chipboard package and attach it onto the card. Add the 'Wonderful' chipboard title on top of the bird.
Finally, add a few chipboard buttons, some jewels and Pearlescents to finish off the card.
The second card features a banner of chipboard and die-cut flags.
The base of this card is a folded sheet of white card stock. Cut out two rectangles from two different sheets of the 6x6 paper pad, ink the edges and attach them on top of the card. Also add a border from Double Dot cardstock and three die-cut flags from the Noteworthy package to the card.
Then attach several banners onto the card. I used two flags from the Layered Chipboard package, two flags from the Buttons package and two paper flags from the Noteworthy package. I also added a wood embellishment from the "That's Life Wood Shapes" package. Add a button on top of this wood embellishment.
Add some stitched edges by stamping alongside the edges of the card with the "Stitches Stamps".
Gently take off the 'Love' text from one of the Star-Crossed Layered Chipboard Stickers, so you can use only this text on your card.
Further decorate the card with the Love title, a couple of buttons, a trinket, two punched butterflies and some jewels.
Also add some Pearlescents to the card as a final finishing touch.
6x6 Pad: Rose Cafe
Chipboard: Rose Cafe Layered Chipboard, Star-Crossed Layered Chipboard
Buttons: Rose Cafe, Love Letters
Noteworthy: Rose Cafe
Stamps: Large Stamps Stitches
Double Dot Jewels: Citrus
Wood Shapes: That's Life
Pearlescents: Chocolate
I hope you enjoyed my step-by-step card tutorials. I also hope I inspired you to work with the gorgeous Rose Cafe collection. It's a truly stunning range of papers and embellishments and I promise you will have loads of fun working with it.


.jpg)


Beautiful! Thanks for the tutorial.
ReplyDelete