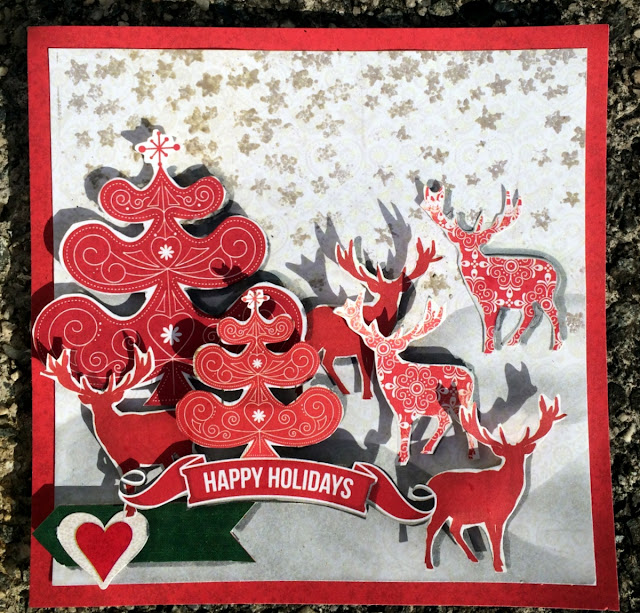
Showing posts with label Clearly Stamps. Show all posts

Wednesday, September 14, 2016

1 Layout 3 Ways with Merry & Bright!


Love This Scrapbook Page by Katherine Sutton using BoBunny Merry and Bright

Hello - Katherine here continuing with the Christmas feeling on the blog this week.  I love this collection of Nordic style papers in Merry and Bright. I wanted to show you 3 versions of my layout from clean and simple to paintier and glittery with the new glitter pastes and masks.

 Love This - Katherine Sutton

Love This Scrapbook Page by Katherine Sutton using BoBunny Merry and Bright

Here is the first version of my page, I pulled in some green from the Double Dot Chevron 6" pad to match the colours in my Christmas tree and used the reds, greys and whites in Merry and Bright.  I also had a little bit of a stamping accident - it is always a risk when you stamp directly on the page, I didn't ink my stamp well enough before applying my embossing powder....and this is what happened.


Love This Scrapbook Page by Katherine Sutton using BoBunny Merry and Bright

So I dug out a piece of vellum and re- stamped it - and stuck it just under my paper mats - problem fixed and I really like the introduction of some vellum! You'll notice that this 'mistake' led to more vellum layers on the page, so it shaped my project.

Love This Scrapbook Page by Katherine Sutton using BoBunny Merry and Bright


Love This Scrapbook Page by Katherine Sutton using BoBunny Merry and Bright

For the next version I stitched around all my pieces of paper.  I stitch around them individually and then layer them up.  I added some embossed little stars behind my red Christmas tree (from the Noteworthy collection) with some red pearls, then added another Noteworthy tree and little heart tag.  At the top of the page I created a cluster around one of the glittered 3D chipboard stickers and added some more vellum.

Love This Scrapbook Page by Katherine Sutton using BoBunny Merry and Bright

For the final steps I dug out my paints and also the beautiful snow flake stencil and some silver glitter paste. The stencil is just under 6", I didn't paste through the full stencil, I pulled out particular snowflakes, I created a denser layer of snowflakes at the top of the page, and picked out fewer snowflakes as I went down the page.  I added a few flakes going off the edges of the page to make it look more natural.  

Around the areas where my papers were going to go I added a layer of gesso using a palette knife, I also added some paint, just on my finger,  over the edges of my stitched papers and the embellishments.  Once the gesso was dry I painted on some of the Mint and Gold mist and a little bit of Sugar mist in some places too, I just squirted a few spritz into a little pot and picked it up on my brush.  Next were some flowers that I created using the Perfect Petals dies, I layered and curled then and then added pearls as well as some of the gold mist and a bit of silver glitter paste too.

Love This Scrapbook Page by Katherine Sutton using BoBunny Merry and Bright

I used some of the Ruby Red glitter paste to add sparkle to the poinsettia on the tree (it matches perfectly with the 3D chipboard glitter you can see below) and also some sugar pearlescent to the little dots of snow on the tree.

Love This Scrapbook Page by Katherine Sutton using BoBunny Merry and Bright

I made a vellum flower as well as one out of the papers and you can see the shimmer from the gold mist.
Love This Scrapbook Page by Katherine Sutton using BoBunny Merry and Bright

Here is a closer look at the flowers and Fanciful die swirl.

BoBunny Supplies:
Patterned Paper: Peppermint and Festive.
6 x 6 Paper Pad: Double Dot Chevronand Merry and Bright.
Stamps: Captured (Love This!) and Amen (stars).
Noteworthy: Merry and Bright.
Jewels: Ruby Red and Tuxedo.
3D Chipboard: Merry and Bright.
Stickable Stencil: Winter Delight
Glimmer Sprays: Gold, Mint and Sugar
Pearlescents: Silver and Sugar
Glitter Pastes: Ruby Red and Silver
Gesso: White
Dies: Perfect Petals and Fanciful

Tuesday, September 13, 2016

Merry & Bright Technique!


Hi everyone, here's Solange again and today I'll share with you some cards and  techniques.

The Merry & Bright collection is amazing and I love to make cards with those papers.

Card by Solange Marques featuring BoBunny Merry & Bright collection photo 01

On these cards I used  the 3D technique. It's so simple, but with a great effect.

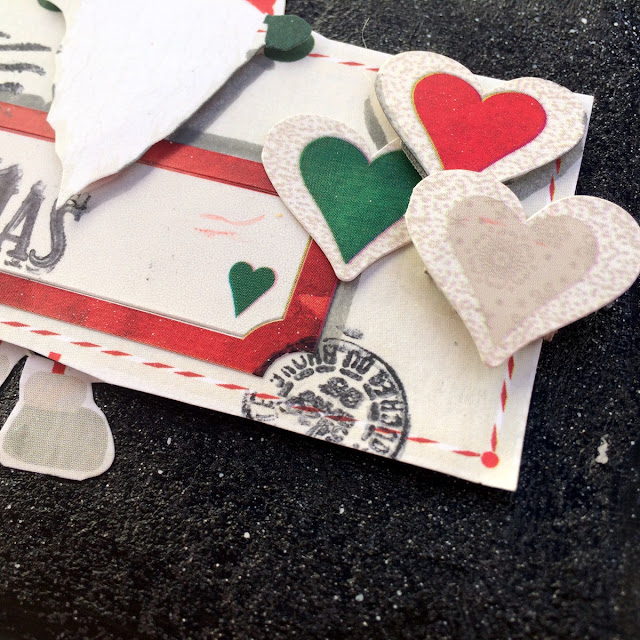
I cut out the Santa and then fussy cutting each piece. Then it's only glue little rests of chipboard behind each  piece, you must glue more layers of the chipboard on some pieces to get dimension.

Card by Solange Marques featuring BoBunny Merry & Bright collection photo 02


Card by Solange Marques featuring BoBunny Merry & Bright collection photo 03

 Here more one example using this technique:

Card by Solange Marques featuring BoBunny Merry & Bright collection photo 04

I cut out several houses and I glued chipboard pieces on the verse:

Card by Solange Marques featuring BoBunny Merry & Bright collection photo 05

I covered the background using black glitter paste.

Card by Solange Marques featuring BoBunny Merry & Bright collection photo 06

 Using a black pen you can shadow the pieces:

Card by Solange Marques featuring BoBunny Merry & Bright collection photo 07

I can't stop to make cards with this collection...one more :

Card by Solange Marques featuring BoBunny Merry & Bright collection photo 08

Card by Solange Marques featuring BoBunny Merry & Bright collection photo 09

BoBunny Supplies:
Patterned Paper: Father Christmas, Holidays, Reindeer Games, Specila Delivery/Merry & Bright  Stickers: Merry & Bright Combo Sticker, Merry & Bright layered chipboard
Stamps: Postale Stamps, I Heart Stars, Holiday Wishes
6 x 6 Paper Pad: Merry & Bright
Glitter Paste: Licorice

Wednesday, August 31, 2016

1 Layout 3 Ways with Bella Rosa!


Hi! It's Ulrika here to bring you no less than THREE layouts today! Well, actually it's one layout in three different ways. Let's begin with the first step. Very clean & simple, right?!

I have been working with the gorgeous Bella Rosa collection.  Look at those colors! Yummie!

Lilla hjärtat (Sweetheart) by Ulrika Wandler


In my second step I worked with some mediums like gesso, spray and ink.


And finnaly, in my third step I added some beautiful embellishments made with some of BoBunny's newest dies. I also added some dots using Pearlescents, and a sweet paper piece to mat my picture.


Here is a collage of the three steps:


A detail picture of the stamping. You can also see how I used some gesso on the paper.


The beautiful flowers and flourishes in combination with brads.


BoBunny Supplies:
Patterned Paper: Bella Rosa / Aryia, Athena, Damask, Delicate, Reflection
Double Dot:   Whisper Dot, Ocean Flourish, Tangerine Double Dot
Stickers: Double Dot Alpha Stickers
Brads: Double Dot Aqua Brads
Pearlescents: Coral, Island Mist
Dies: Fanciful, Perfect Petals
Glimmer Spray: Sugar
White Gesso
Stamps: Amen, Stained Textures, Stitches

Tuesday, August 23, 2016

Technique Tuesday With Farmers Market


Hello BoBunny friends!

It's Angela here today and I'm so excited to share with you my very first project.

I'm a big fan of scrapbook pages that's why I've chosen to start my DT adventure with a scrapbook layout.

I had this photo of my son Francesco that I took during a sunny autumn day, a few years ago and the beautiful colors of Farmers Market collection seam to be created to match it.

Fall Notes, Technique Tuesday by Angela Tombari
Fall Notes Scrapbook Page by Angela Tombari using BoBunny Farmers Market Collection

I started choosing Country Blue Double Dot paper as cold base for the layout and then I built the page in stripes. The idea was to create a border of falling leaves around the photo, so I cut out a few leaves, well many leaves and I grabbed all the die cut leaves of the collection!

To tone down their vibrant colors, I drew each leave with a white gel pen. That also helps to give more dimension to the page. Look at them, aren't they cute?

Fall Notes Scrapbook Page by Angela Tombari using BoBunny Farmers Market Collection


Keeping the same mood, I drew a false stitch line along the paper stripes.

Fall Notes Scrapbook Page by Angela Tombari using BoBunny Farmers Market Collection

and along the banner.

Fall Notes Scrapbook Page by Angela Tombari using BoBunny Farmers Market Collection

I added a few stamps with white ink to decorate my blue background and the journaling all around the right side of the page, as if it was a frame.

Fall Notes Scrapbook Page by Angela Tombari using BoBunny Farmers Market Collection

Finally I added the title, using the brown alpha stickers of the collection; I highlighted the letters with the withe gel pen and stitched them in place with my sewing machine.

Fall Notes Scrapbook Page by Angela Tombari using BoBunny Farmers Market Collection

I hope you like this layout and that it inspires you to create a beautiful fall scrapbook page.

Thank you so much for stopping by.

Love,

Angela

BoBunny Supplies:
Patterned Paper: Farmers Market / Sunflowers, Autumn, Barn Wood, Bountiful, Foil vellum
Double Dot: Country Blue
Stickers: Farmers Market Combo
Noteworthy: Farmers Market
Chipboard: Farmers Market 51PC, Farmers Market Layered Chipboards
Stamps: Captured
Pearlescents: Sugar
Other Supplies:
White stamp ink

Sunday, July 10, 2016

Flipping For Flip Flops With Beach Therapy!


Flip Flop Invitation and Gift Bag by Rhonda Van Ginkel

Happy Sunday to you! I have a couple of whimsical and happy projects to share with you featuring the Beach Therapy collection paired with some of the beautiful BoBunny Dies.


I thought it would be fun to create an invitation using a dollar store flip flop as the foundation. To create my base layer, first I took off the top part of the plastic by pushing gently through the holes.

I then traced around the flip flop in pencil on my paper, and trimmed about a quarter inch inside of the line. A bit of ink helped finish the edges. I then tacked it down with a bit of dry adhesive and marked the holes on the back. I then punched the holes out.


Because the flip flop is dimensional, I thought it might be easier to create a bunch of these using our Nested Terrific Tag dies, stamp the invitation information on them, then attach. Once I had the tag cut and stamping completed, I aligned it on top of the shoe at an angle and marked the holes for the tag as well.

After doing this, I would suggest you perhaps thread through one hole and not two. I trimmed the plastic really well to thread it back through without ripping the paper.


For this gift bag, I used a foundation bag sized 8" x 10.25". I used an Elegant Border die and trimmed to anchor the bottom across the bag. Next, I cut a Picture This die and layered it with a Noteworthy Sentiment, Tab and Chipboard surfboards. 


A Flutter butterfly was die cut and accents the surfboards. The final touch was to add the Bike Ride cut from the Adventure patterned paper and inked to coordinate. A button and a few Dot Jewels were the perfect finishing touches.

What are your favorite BoBunny dies? I love them all!

BoBunny Supplies:
Patterned Paper: Adventure, Beach Therapy, Destination, Get Away, Relax and Paradise / Beach Therapy
Foil Vellum Paper: Beach Therapy
Noteworthy: Beach Therapy
Stickers: Combo Sticker / Beach Therapy
Chipboard: 6x12 Chipboard / Beach Therapy
Buttons: Beach Therapy
Dot Jewels: DoubleDot Blue Hues,
Stamps: Sentiments, You're Invited
Dies: Bike Ride, Elegant Border, Flutter, Lovely Leaf, Nested Terrific Tags, Ornate Doilies and Picture This

Thursday, June 2, 2016

Mixin' It Up With Butterfly Kisses!


Hi Everyone and Welcome to Mixed Media Thursday! Today I am sharing a layout for you done with all kinds of mixed media goodies!

 Moment Layout by Lynn Shokoples
Moment Layout by Lynn Shokoples for BoBunny featuring the Butterfly Kisses Collection.

This layout is about my daughter Nicole. She had just cut her long hair and sent me this photo! I just had to use it in a layout! When she sees this I know I'm getting the "OH Mom" phone call, lol.

I love doing mixed media layouts and using all the fun products from BoBunny. To start my layout I used the Flower Power Stickable Stencil and the TuTu Glimmer Spray to add some flowers to the background. Then I started layering the pieces. I used vellum, noteworthy, and some of the cards from the Patterned Papers. Then some combo stickers and layered chipboard to finish off the design. Then it was time to do a little more mixed media! Out came the Lots of Love stickable stencil and some glitter paste. Then came the stamps and the Pink Punch Ink. I also used the Pink Punch to distress all my photos. It's the first time I've ever tried it and loved the look it gave all the elements.


Thank you so much for joining me today! I hope you all have a Scrapfabulous Day!

BoBunny Supplies:
Patterned Paper: Sunlit,Peaceful,Bliss,Delight/ Butterfly Kisses
Vellum: Butterfly Kisses
Combo Stickers: Butterfly Kisses
Layered Chipboard: Butterfly Kisses
Noteworthy: Butterfly Kisses
Stencils: Flower Power, Lots of Love
Stamps: Dreamer, 1 Heart Stars
Glitter Paste, Graphite, Tutu
Glimmer Spray: Tutu
Double Dot Ink: Pink Punch

Sunday, December 6, 2015

Boardwalk Beach Party Decor!


Hello Everyone!

It's Denise here again today, to share some party decor ideas with you, using the super, summery Board Walk Collection and Party Supplies.

Party Decor by Denise van Deventer using BoBunny Boardwalk Collection and Party Supplies

I love all things nautical and so had a few things around the house which I could add to this party scene.  I also created a shell wreath, from shells that have been collected by myself and my family over many years.

Party Decor by Denise van Deventer using BoBunny Boardwalk Collection and Party Supplies

I layered up some thick cardboard for the base and then thoroughly covered this in glue.  I then sprinkled it with sand.  I then added the shells and paper pieces, using silicone glue.  Lastly I added some brown paint for definition. Here's a closer look.

Party Decor by Denise van Deventer using BoBunny Boardwalk Collection and Party Supplies

I also made some coasters,  Again, I layered up some cardboard.  I added a think layer of gesso and allowed it to dry.  I tore paper rounds, inked the edges and then stuck this down. I added some more ink on the edges and then covered it all with some modge podge.

Party Decor by Denise van Deventer using BoBunny Boardwalk Collection and Party Supplies

For the little scene I also used some mason jars, straws and labels from the party supply kit. These little labels and straws are just so super.

Party Decor by Denise van Deventer using BoBunny Boardwalk Collection and Party Supplies

The invitations are wonderful, I just added some mixed media touches, to add a little more dimension to them and give them a more shabby and worn look.  I first stamped with a fish net stamp and then spritzed them with white paint and also edged them with white acrylic paint.

Party Decor by Denise van Deventer using BoBunny Boardwalk Collection and Party Supplies

Maybe you will be hosting a summer party soon and can create a "splash" with some Boardwalk Party Goodies! ;-)

Thanks for stopping by the BoBunny blog.

Have a super, splashy day!

Denise x

BoBunny Supplies:
Boardwalk Party in a Box
Noteworthy: Boardwalk
Stamps: Distressed Textures
Patterned Paper: Beach Bliss/ Boardwalk