Showing posts with label Crafting. Show all posts

Tuesday, March 24, 2020

Neutral Scrapbook Layout with Elisa


Hi Crafty Friends!!

Today I share with my my new LO!!! A clean and simple project.  Do you recognize the collection!? Yes, it's Garden Grove!! There are many colorful card stock papers in this collection, but there are also some vintage neutral ones... let me show you the project!!


For the base of the LO I used the black and white striped side of the "Lovely"card stock.
On the left side of the page, you can see a piece of the "Remember" card stock (ivory side, with handwritten words...).


The other side of "Remember" card stock is purple, with some wonderful white roses!! I fussy cut them and I created a base for the picture.
For the title I used one of the Family Heirlooms Layered Chipboard pieces.


White roses are so beautiful! On the "Remember" stripe on the left I glued a long die cut (Coffee Lace Double Dots)


I also used some pearls (Garden Grove Candy Dots) to highlight the main part of the LO (around the picture).


Here you can see the layering.


And here you can see the Tuxedo Brads!! Three different sizes, three different shapes!


On the left higher corner I create a banner composition with the cardstock I used in this project.
I glue on the a Butterfly Laser Cut Chipboard. So elegant!!


Here you can see the banner and the pearls too...


BoBunny Supplies:
Garden Grove 12x12 Cardstock "Lovely"
Garden Grove 12x12 Cardstock "Remember"
Double Dots 12x12 Cardstock "Coffee Lace"
Garden Grove Candy Dots
Family Heirlooms Layered Chipboard
Double Dot Tuxedo Brads
Elegant Border Die
Butterfly Laser Cut Chipboard


Hope you enjoy this project!!


Till next time!


Elisa

Tuesday, February 25, 2020

Wedding Scrapbook Layout with Family Heirlooms

Hello, crafty friends!!!

Elisa here today and I want to share with you my new Layout with the "Family Heirlooms" collection by BoBunny.
The color palette of this collection is one of my favourite: brown, peach, rose, mint, amber... it is wonderful! 
Peach is one of my fave colors. I love it so much (My wedding dress was peach too!!!). So I decided to chose one of our W-Day pictures...This is so cute and full of love!!!
This is the LO:


Well, let me tell you something about the Layout!!
I chose four cardstocks:
"Lineage" as the background; "History" for fussy cutting the roses;
"Generations" for fussy cutting the press fonts; and"Documented" for fussy cutting the typewriter letters.


I also used the chipboard stickers with copper foil and the enamel dots peach and rose.


One of the main characteristics of this project is the layering - 
the press fonts, the roses, the picture..lots of layers, one on top of the other.


I also chose another element: white gauze..


I love how roses look in this collection... Realistic and vintage at the same time!!!!


On the left lower corner I create another composition of numbers, brads, chipboard stickers and typewriter letters.


A closer look on details:


Here you can better see all the layers!!!


BoBunny Supplies:
Family Heirlooms 12x12 cardstock Lineage
Family Heirlooms 12x12 cardstock History
Family Heirlooms 12x12 cardstock Generations
Family Heirlooms 12x12 cardstock Documented
Family Heirlooms Brads
Family Heirlooms Chipboard Stickers with Foil
Family Heirlooms Enamel Dots


Hope you enjoy this project!!!


Wednesday, February 19, 2020

Vintage Envelope Folio by Denise

Hello BoBunny Fans

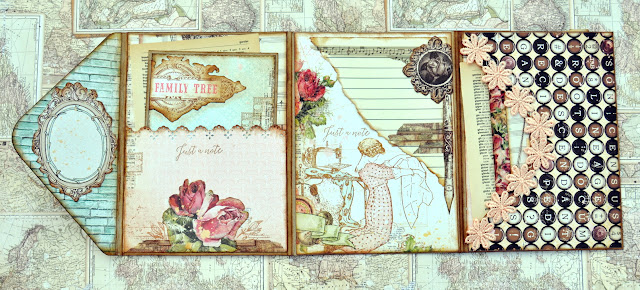
It's Denise here today to share a Vintage Envelope Folio with you, using the Family Heirlooms collection.

Since this collection has a gorgeous vintage feel, I really wanted to make something vintage and aged.

Family Heirlooms_Vintage Envelope Folio_Denise_19 Feb 01


This folio is made up of 3 envelopes joined together to create a fold-out-folder, with lots of little slots, pockets, inserts, flaps etc. It is based on some junk journalling principles.

Family Heirlooms_Vintage Envelope Folio_Denise_19 Feb 02

Here is a look at the first pocket, where I also used some of the gorgeous, new BoBunny stamps.

Family Heirlooms_Vintage Envelope Folio_Denise_19 Feb 03

The insert below fits in this pocket and has a front and a back to it.

Family Heirlooms_Vintage Envelope Folio_Denise_19 Feb 04

Family Heirlooms_Vintage Envelope Folio_Denise_19 Feb 05

On the next section I added a little piece of paper, that I have probably had for 30 plus years. It was the line paper that went inside a paper pad to guide your writing and ensure your writing was straight.
I used some washi tape to add detail and attach it.

Family Heirlooms_Vintage Envelope Folio_Denise_19 Feb 06

Family Heirlooms_Vintage Envelope Folio_Denise_19 Feb 08

On the next section, you can clearly see the envelope usage and insert, where I also added some lace and made a little booklet to sit inside the insert.

Family Heirlooms_Vintage Envelope Folio_Denise_19 Feb 09

Family Heirlooms_Vintage Envelope Folio_Denise_19 Feb 10

I used washi tape on the outside and the inside of this little booklet to add interest and give the little book a spine.

Family Heirlooms_Vintage Envelope Folio_Denise_19 Feb 11

Lastly, I wanted to show you the last pocket and insert. This is a corner pocket and large tag insert.

Family Heirlooms_Vintage Envelope Folio_Denise_19 Feb 12

I can't wait to get all my photo's together and add these to this folio!

Thanks so much for stopping by the BoBunny blog today and I hope you were inspired. Vintage doesn't have to be dull and brown and love how this collection shows that perfectly.

Have a fabulous day!
Denise x


BoBunny Supplies:


Patterned Paper: Family Heirlooms, Keepsakes, Pedigree, Trinkets, Generations, History, Documented, Lineage, Traditions/ Family Heirlooms
Stamps: Garden Grove, Family Heirlooms, Of Times Past, Newsprint
Washi Tape: Family Heirlooms

Friday, November 29, 2019

DIY Recipe Book with BoBunny Papers

Hello BoBunny Friends, it's Elena here today!

 I hope you had a wonderful Thanksgiving Day with your family. So I thought it's time for celebrating the harvest too. The Cook Book is a good idea to collect all your favorite recipes.

Cook_Book_Time_and_Place_Elena_Nov29_1.JPG

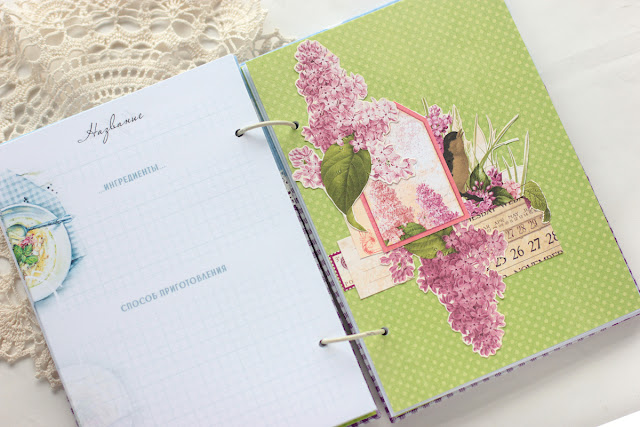
I made a fabric cover that I decorated and sewed the elements from the Time and Place collection .

Cook_Book_Time_and_Place_Elena_Nov29_2.JPG

 It was easy to do and to stitch everything to the cover.

Cook_Book_Time_and_Place_Elena_Nov29_3.JPG

I also made a few dividers to separate the recipes and again, was very busy fussy cutting. 

Cook_Book_Time_and_Place_Elena_Nov29_4.JPG

 I combined only 3 papers sheets - February, April and November

Cook_Book_Time_and_Place_Elena_Nov29_5.JPG

For my background I used Double Dot papers.

Cook_Book_Time_and_Place_Elena_Nov29_6.JPG

But I also added a few scraps left the Christmas cards I made from December paper sheet.

Cook_Book_Time_and_Place_Elena_Nov29_7.JPG

The flowers and the berries are so wonderful to use for the cook book, of course!

Cook_Book_Time_and_Place_Elena_Nov29_8.JPG

Cook_Book_Time_and_Place_Elena_Nov29_9.JPG

Cook_Book_Time_and_Place_Elena_Nov29_10.JPG

I hope you enjoyed my project! Until next time!


BoBunny Supplies:
Patterned Papers: Time and Place/ February, April, November, Deecember.
Double Dot - Mint, Powder Blue.


Thursday, November 21, 2019

Blessed Art Journal Page with Denise

Hello BoBunny Fans

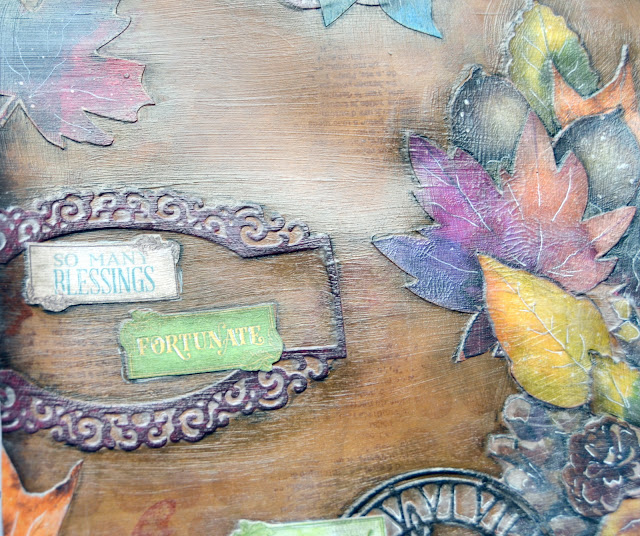
It's Denise here today with a Blessed art journal page, in the spirit of Thanksgiving.

Dreams of Autumn & Time and Place_ Thanksgiving Blessed Art Journal Page_Denise_21 Nov 01

I used an older BoBunny collection, Dreams of Autumn, along with the new and fabulous Time and Place collection.

Dreams of Autumn & Time and Place_ Thanksgiving Blessed Art Journal Page_Denise_21 Nov 02

I used some BoBunny dies along with lots of fussy cut and noteworthy pieces.

Dreams of Autumn & Time and Place_ Thanksgiving Blessed Art Journal Page_Denise_21 Nov 03

For the foundation of the page, I used distress paint and then stenciled and stamped to add the first layers to this page.

Dreams of Autumn & Time and Place_ Thanksgiving Blessed Art Journal Page_Denise_21 Nov 04

I then placed and positioned all the bits and pieces and adhered them to the page with gel medium.

Dreams of Autumn & Time and Place_ Thanksgiving Blessed Art Journal Page_Denise_21 Nov 05

Once everything was adhered down and had dried, I then added shadows around all the items to make sure they were grounded on the page and did not look like they were floating.

Dreams of Autumn & Time and Place_ Thanksgiving Blessed Art Journal Page_Denise_21 Nov 06

Lastly, I used a white gel pen to add highlights and also add details to the various items. This is really something that just completes an art journal page and finishes it off perfectly.

I made a video to show you the creative process and would love it if you had a look. I hope you are inspired and might try to create one yourself.


Thanks ever so much for stopping by the BoBunny blog today. 
We hope to see you back tomorrow and wish you a blessed day.
Denise x


Patterned Paper: Noteworthy Paper /Dreams of Autumn; March, July, November/ Time and Place
Noteworthy: Dreams of Autumn
Stencils: Brocade
Stamps: It is written, Falling Leaves
Dies: Congratulations, Mandala, Tick Tock