Hi there!
Today I have a little fall layout to show you. We took down a bird nest in our garden and of course I had to take some pictures of it. It was a really big nest!
We did some trimming on the trees and bushes at the same time and it turned out so nice. But as you can guess the bird nest was a big one to transport away!
Unfortunately, the birds have started to build a new bird nest in front of the yard in another tree LOL We will have to deal with that in springtime!
But here are is the layout I made of it and I hope you like it!
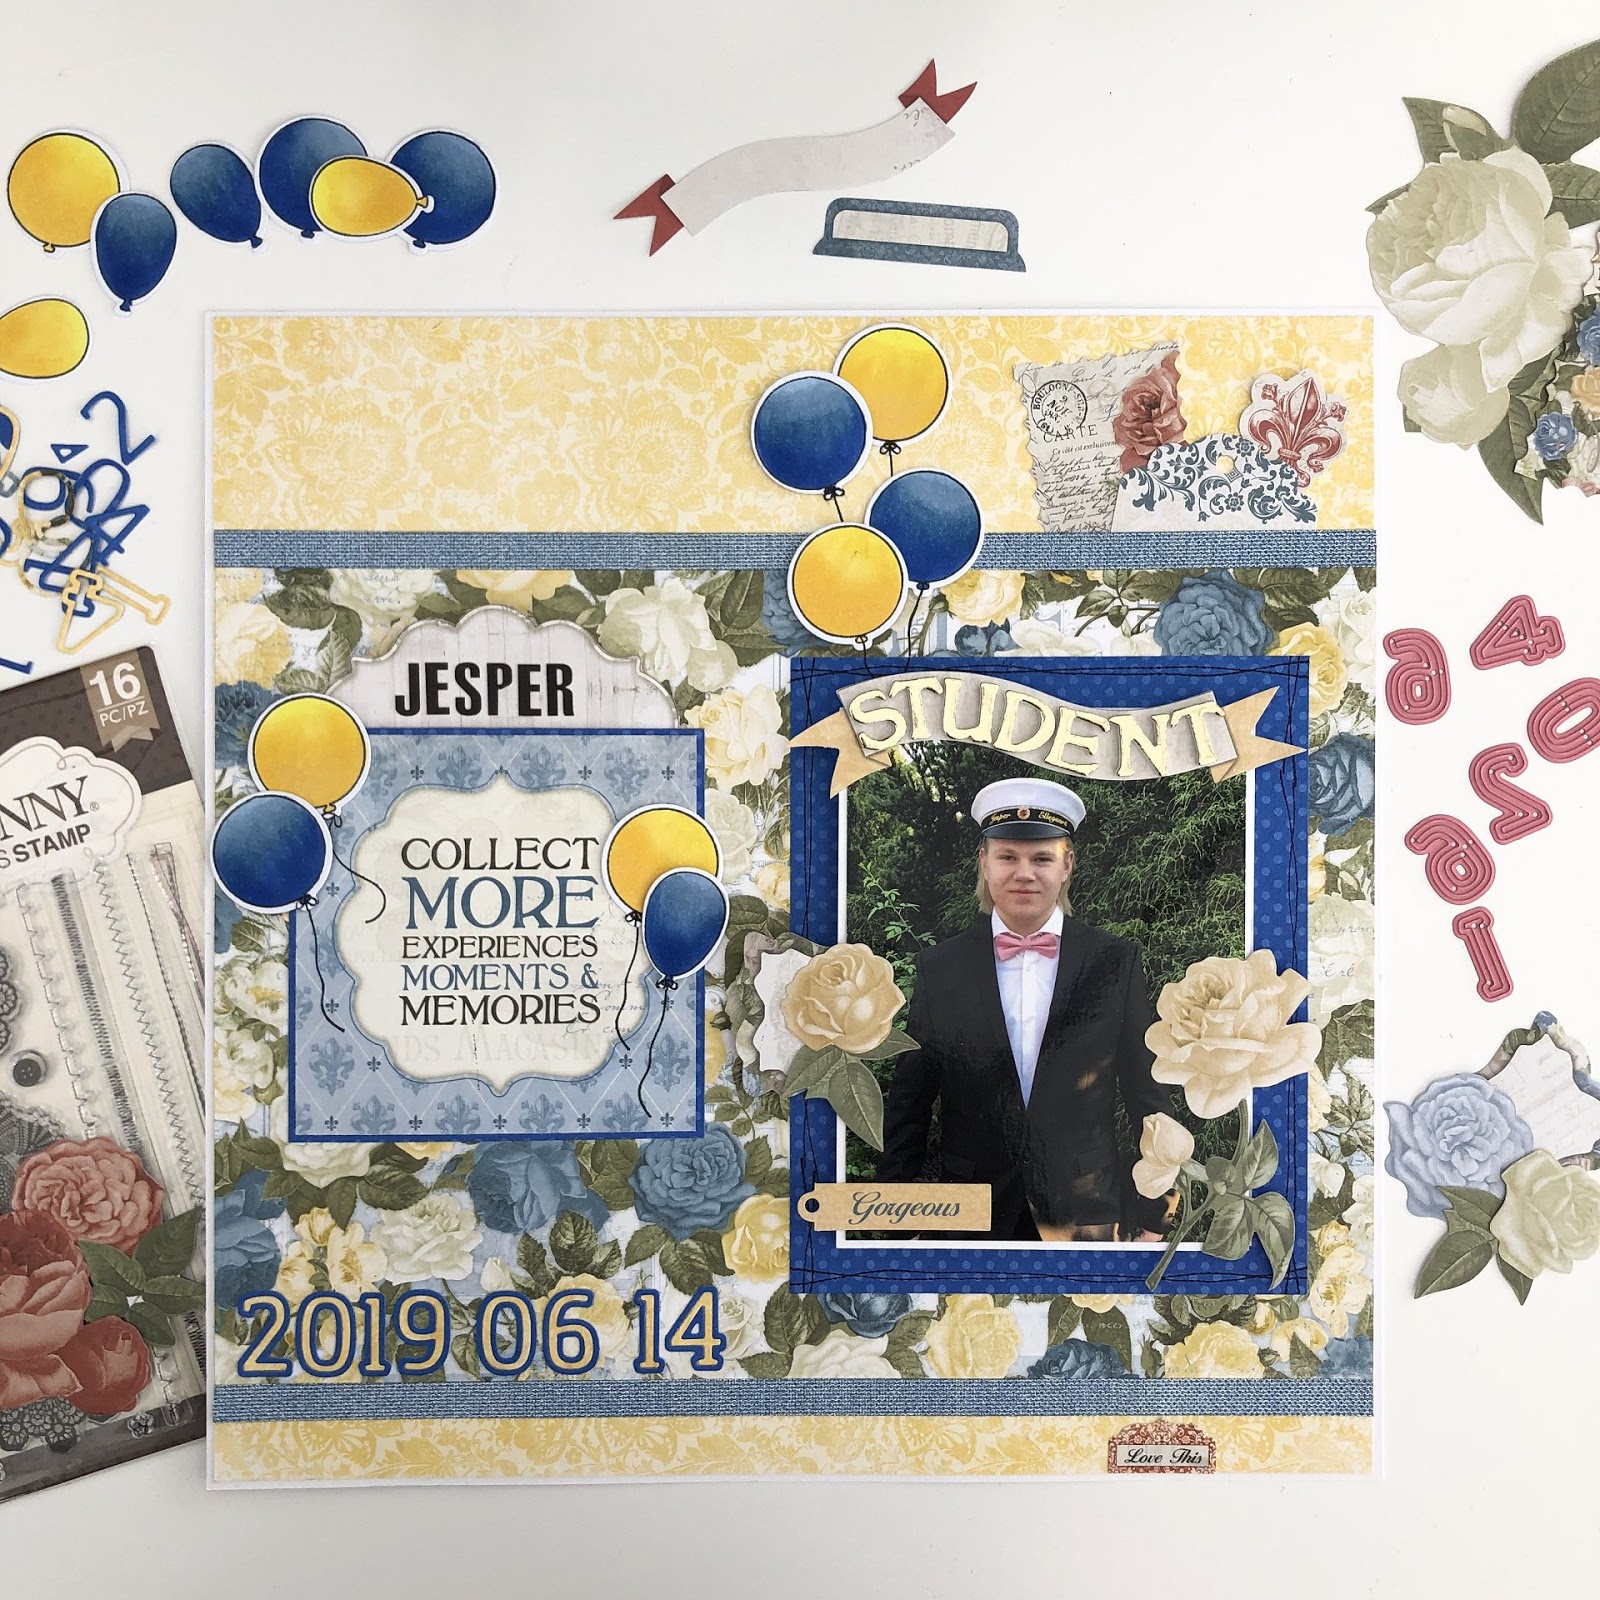
Today I want to share with you a layout I made from my son's graduation day here in Sweden.
I used 6 images on this layout but when you first look at it
you will only see one of them. I have been "hiding" the other ones on
the layout since I wanted to have so many of them on it. So if you look
at the pictures ( and the movie on youtube) you can see where I did hide
the other ones.
I have been using the collection Boulevard that I just LOVE LOVE LOVE!! On this layout I useda lot of
the papers in the collection that have blue and yellow because of our Swedish flag and when the kids graduate
here ,we put up a lot of balloons in our colors and have the flag
on the tables and so on. You can see a little bit of it in the images if
you look carefully.
I hope this gives you a little bit of
inspiration to use more than one or two images on a layout. It is also
perfect to do like this if you have some photos you want to have on it
but just don´t want others to see directly ( or at all if you have it in
a photo protector ), but you still want to have it there for your
memories, and for you to pull out and look at whenever you feel like. Enjoy!
Products I Used:
Boulevard paper collection
One yellow paper from "On this day" September , #22501254
I'm so happy these days because it's July! And July is my month!! Ok yes, the weather is hot. But, I love summer and I love to celebrate it everyday!
I started thinking..on summer every trip, every walk, every coffee with friends.. they could all become a tale! This is way I decided to use the first pictures of this month to create a LO entitled Summer Tales!
I used the BoBunny Celebrating Freedom collection and I had a lot of fun with the pictures. I didn't want to use their real color and was searching for a vintage look, so I applied a 50% Black & White Mask before stamping them. Since my images were vintage, I wanted a funny background to pair them with! So, I thought about something that could seem a watermelon.
To create the watermelon effect, I chose the Damask Double Dot Dusty Rose Cardstock and the Watermelon Paper by Celebrate Freedom to assemble my watermelon background. For the black seeds I decided so stamp some little flowers here and there in the center of some dots in the dusty rose cardstock.
And now let me show you some pictures of the details:
Near the main picture, I used the bigger embellishment. The two pinwheels (of course in pink and green) and some embossed flowers made with Simply Flowers Stamp Set.
On the other side, I used a pick butterfly, a little red flower, and a a red resin star. Behind the pictures I created some layers using the "Celebrating Freedom" and the "Happy" 12x12 papers.
Of course I also used some of the Noteworthy Flowers (I cut a branch of flowers into single ones) and the little glittered dots you see are in the Celebrating Freedom Thicker Alpha.
For the title I used two Thicker Alpha: Celebrating Freedom (red glittered) and Sweet Clementine (pink with red foiled center).
Scrapbooking Tip: I really love writing my journaling with a gray pen. Black is really too strong and I don't love it on my LO. Thanks for following along! Until next time,
BoBunny Supplies List:
Damask Double Dot Dusty Rose 12x12" Cardstock
Celebrating Freedom Watermelon 12x12" paper
Celebrating Freedom 12x12" paper
Celebrating Freedom Happy 12x12" paper
Celebrating Freedom Chipboard Stickers