Showing posts with label Double Dot jewels.. Show all posts

Monday, May 28, 2018

Destination Happiness Mini Album with Ginny

Well hello there friends and BoBunny fans!
Today I'm sharing a fun mini album created with the World Traveler collection.

Word Traveler_Mini Album_Ginny_May28_01
A mini album is such a great way to document a special trip. It's a walk down memory lane and can also be used as home decor propped on a shelf or table. That way your friends and family know they are invited to flip through and enjoy your pictures and journaling.
Word Traveler_Mini Album_Ginny_May28_012
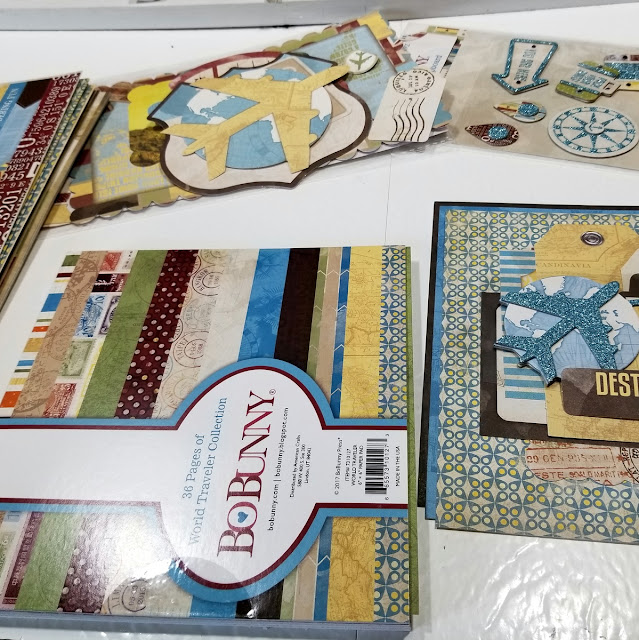
I started by gathering the collection and embellishments.  This is where the layering process really begins for me as I'm choosing elements that fit my project and look good together.
Word Traveler_Mini Album_Ginny_May28_013
I originally thought I would create a card...but once I started layering I decided that I could make this a layout for the cover of a mini album.
Word Traveler_Mini Album_Ginny_May28_014
I created a mini album base so I would have the perfect size for these elements. Mat board works great for the cover as it's easy to cut but still very sturdy.
Word Traveler_Mini Album_Ginny_May28_02
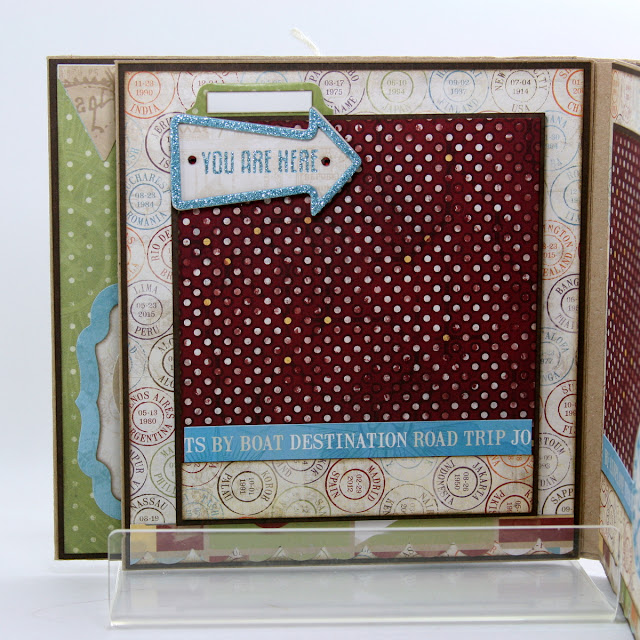
The inside cover has a nice large area for bigger pictures. The little tag is from the Combo Sticker sheet. I used foam tabs to pop this up to build dimension. The banner is also from the sticker sheet.
Word Traveler_Mini Album_Ginny_May28_03
The cut apart sheet has fabby postcard images that I used to create a pocket. There's a uniquely shaped die cut from the Noteworthy collection to provide a place to add journaling.
Word Traveler_Mini Album_Ginny_May28_04
I'm alternating the patterns and scale to create raised sections for pictures.
Word Traveler_Mini Album_Ginny_May28_05
Tabbed topped stickers and Layered Chipboard Stickers are great accents for this set of pages.
Word Traveler_Mini Album_Ginny_May28_07
This pocket is created by layering a strip of tags cut from the patterned papers onto the stripe. Matting is very important to keep this from looking busy.
Word Traveler_Mini Album_Ginny_May28_09
I fussy cut a few of the tags and popped them up just for a little extra detail. The tag in the pocket is a section of the large die cut from Noteworthy.
Word Traveler_Mini Album_Ginny_May28_010
You can never have enough pockets in a mini to tuck in all the little bits and pieces so here's another for the last page.  Those tiny suitcase stickers are so charming! One more die cut in the pocket for journaling.
Word Traveler_Mini Album_Ginny_May28_011
The back cover is finished similar to the front with a tag and some stickers and twine.

Wishing you all a happy and productive day : ) Ginny

BoBunny supplies:Patterned Paper- Word Traveler-Wanderlust, Culture, Foreign, Postage, JourneyNoteworthy- World TravelerCombo Stickers- World Traveler Layered Chipboard Sticker- World Traveler6x6 Paper Pad- World TravelerDouble Dot Jewels- AquaDouble Dot Brads- Blue HuesDies- Ornate DoiliesBoBunny Blossoms- Natural Earth BouquetAmerican Craft:Sticky Thumb Adhesive RunnerSticky Thumb foam dots 

Friday, March 31, 2017

Fine Arts Friday using make a Splash and Iron Paste from Pentart with Ginny


Hey There BoBunny Peeps! Ginny here and  I'm just dropping in to share a pretty and nautically inspired wall hanging that I created with Make A Splash.  I wanted it to be a subtle theme....something you could hang in your powder room as an accent or maybe be a jumping off point for decorative towels and other accessories.

NauticalWall Hanging Fine Art By Ginny Nemchak For BoBunny using Make A Splash

I started by recycling a small frame that had a generous sized ledge and was deep enough to add spacers between the layers of papers. I love lots of texture!  I added a quick sketch line to give me an even amount of the existing frame showing then painted the rest with Pentart Iron Paste. Why did I choose that over just the regular acrylic paint? Because it leaves a fabulous texture and a subtle thick sparkle behind.  And, if you're careful with your brush marks it can resemble rustic wood grain.  Very cool.

NauticalWall Hanging Fine Art By Ginny Nemchak For BoBunny using Make A Splash

Applying some chunky hemp type roping in coordinating colors definitely adds some texture. That faux "cabochon" was easy peasy to create simply by attaching the small guards meant to be used to protect furniture from knick knacks right onto the patterned paper and fussy cutting them out. A little matching bling adds detail to the corner of the cut apart.

NauticalWall Hanging Fine Art By Ginny Nemchak For BoBunny using Make A Splash

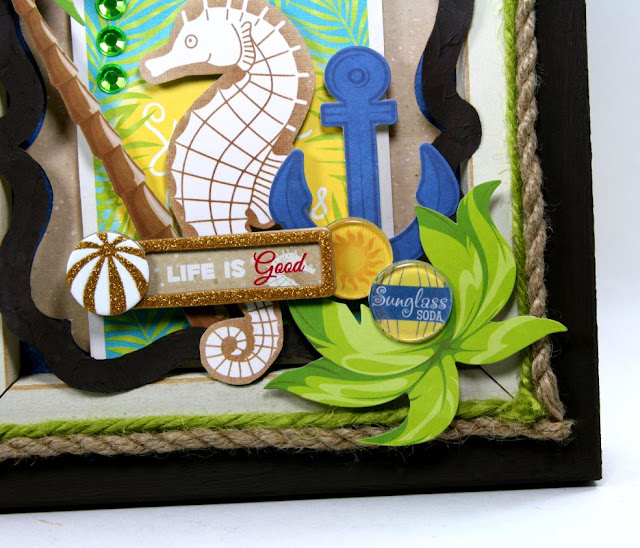
Once I got on a roll with those faux cabochons I decided to add them to the bottom corner as well.  To balance the palm tree on the top I secured another one to the bottom...but just utilizing the foliage. A little anchor and fussy cut seahorse become the paired focal point and are topped off with the layered chipboard sticker. I selected the die cut and background from the Noteworthy set to help frame the focal images. To help the die cut coordinate I gave it a coat of the Iron Paste as well. I love the texture it adds.

NauticalWall Hanging Fine Art By Ginny Nemchak For BoBunny using Make A Splash

Okay that's all for me. Wishing all of you a happy and productive day with lots of time to be creative

Ginny :)


BoBunny Supplies:
Patterned Paper: Make A Splash/ Ocean, Summertime
Chipboard: Make A Splash, Layered Chipboard
6 x 6 Paper Pad: Make A Splash
Noteworthy: Make A Splash
Double Dot Jewels/ Emerald

Pentart Supplies:
Iron Paste


Tuesday, February 14, 2017

Make a Splash and Pentart Lasur for Indoor/Outdoor with Irene


Hello BoBunny Fans! It's Irene here!. For today's Technique Tuesday post, I will share a very simple technique using gesso as a resist paint. I've created a canvas to demonstrate this technique.

Travel The World Altered Canvas by Irene Tan using BoBunny Make A Splash Collection

I've used the fun and beautiful "Make A Splash" collection by BoBunny to create this canvas. This canvas is filled with textures and dimensions. Here are some details on it.

Travel The World Altered Canvas by Irene Tan using BoBunny Make A Splash Collection


Travel The World Altered Canvas by Irene Tan using BoBunny Make A Splash Collection

Now, let's move on to the step by step tutorial on how to create the background for this canvas using the gesso as resist technique.

Travel The World Altered Canvas by Irene Tan using BoBunny Make A Splash Collection

Step 1) You will need some white gesso, a palette paint knife, a canvas and the "Under The Sea" stickable stencil. Put the stencil on top of the canvas and use a palette knife to apply some white gesso on top of it. To get a more dimensional and textured image, apply a generous amount of gesso. Let it dry completely. 

Travel The World Altered Canvas by Irene Tan using BoBunny Make A Splash Collection

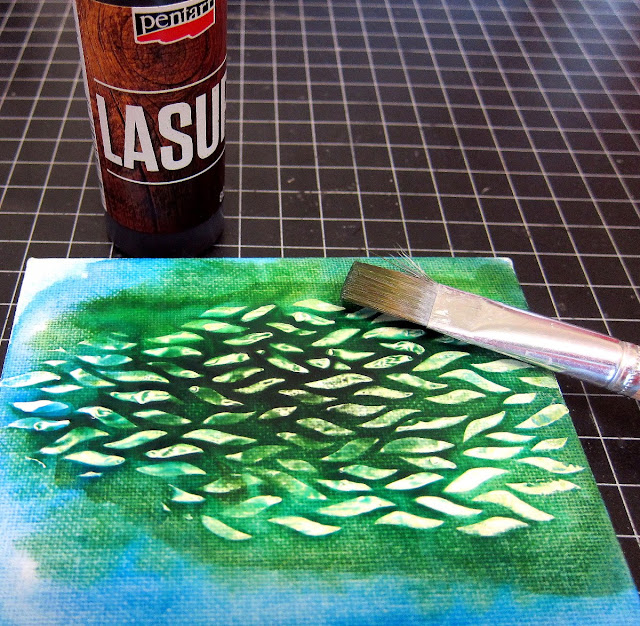
Step 2) When the gesso is all dried, use a brush to apply some Pentart Lasur Outdoor and Indoor Paint on it. I've used the color olive for this step.

Travel The World Altered Canvas by Irene Tan using BoBunny Make A Splash Collection

Step 3) Next, mist some BoBunny's frost glimmer spray on top of the canvas. While it is still wet, also mist some water over it to create some blending.


Travel The World Altered Canvas by Irene Tan using BoBunny Make A Splash Collection

Step 4) For more depth, I've used a brush to add some Pentart Lasur Indoor and Outdoor paint (Ebony) in the middle of the canvas. Then, I've mist it again with water for blending.


Travel The World Altered Canvas by Irene Tan using BoBunny Make A Splash Collection

Step 5) Use a wet tissue and light dab on the areas with white gesso. This will remove some of the paint on top of it. I did not remove all of the paint because I want a more natural blending look for this canvas. You can dry the whole canvas with a heating tool.

Travel The World Altered Canvas by Irene Tan using BoBunny Make A Splash Collection


Travel The World Altered Canvas by Irene Tan using BoBunny Make A Splash Collection

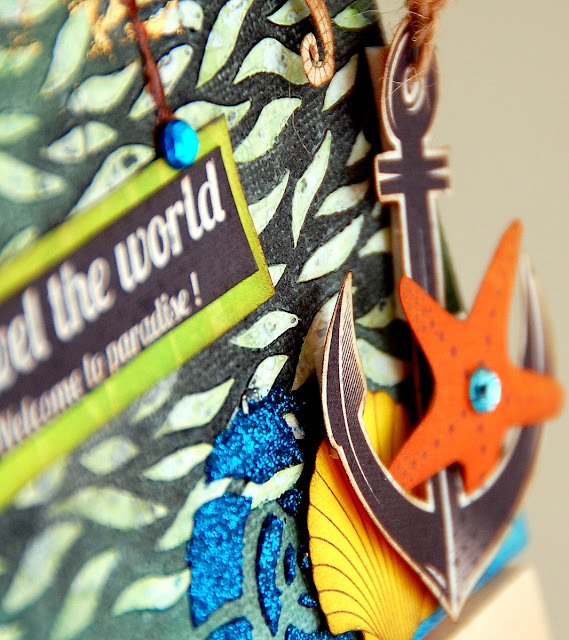
Step 6) For the last step, to create the dimensional shell on the bottom of the canvas, I've used a stencil from the "Under the Sea" stencil, a palette knife and some BoBunny Caribbean glitter paste. Put the stencil over the canvas and apply the glitter paste over it generously. You will have a nice sparkly dimensional shell when it is dry.

BoBunny Supplies:
Patterned Paper: Make A Splash, Happy/Make A Splash
Stickers: Make A Splash Clear Stickers
Noteworthy: Make A Splash
Stamps: Life's A Beach
6 x 6 Paper Pad: Make A Splash
Dot Jewels: Aqua
Pearlescent: Chocolate
Ink Pad: Licorice
Glimmer Spray: Frost
Glitter Paste: Caribbean
Stickable Stencils: Under the Sea
Gesso: White
Tools: Flexible Paint Palette Knife

Pentart Supplies:
Lasur Indoor and Outdoor Paint: Olive, Ebony

Hope you all like this simple tutorial and have fun experimenting!

Saturday, February 11, 2017

Petal Lane and Pentart Lasur for Interiors with Elena O


Hello, this is Elena with you here today, and I've a got a couple of simple Valentine's Day Cards to share.

Valentine Day Cards, by Elena Olinevich product by BoBunny

While creating the cards, I wanted to try the new Pentart Lasur for Interiors treatment. I read the instructions thoroughly and realized that it works perfectly on wooden surfaces. The paint is quite liquid, however I wanted to create a papercraft project.  This is how it turned out...

Valentine Day Cards, by Elena Olinevich product by BoBunny

So, to start, I decided to try the paint on a piece of a cork. Why not? It's quite porous, and I wondered how the paint would absorb into the cork.

Valentine Day Cards, by Elena Olinevich product by BoBunny

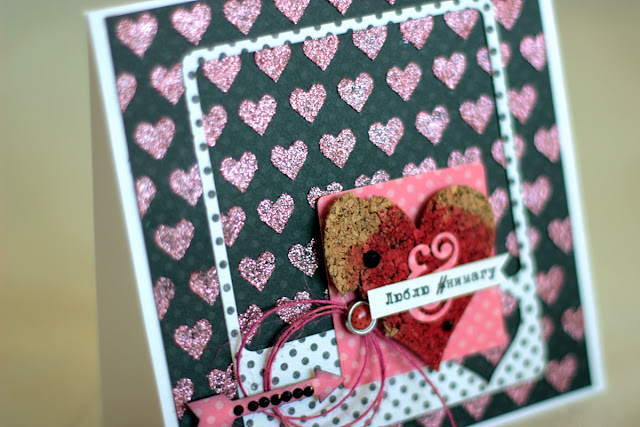
I colored the heart shape piece of cork, the whole piece for the first card and most of the half of it for the second card.

Valentine Day Cards, by Elena Olinevich product by BoBunny

  What I have found is that the paint soaked nicely the cork and you still can see the texture of it. I    think it's great and I'm sure it works perfectly on the wood surface too.

 I also applied the glitter paste on the black background using the hearts stencil.

Valentine Day Cards, by Elena Olinevich product by BoBunny

And I used the Selfie Dies to make the frames and the arrows.

Valentine Day Cards, by Elena Olinevich product by BoBunny

The Glitter Paste creates a texture on the background, and actually the cork adds the dimension too.

Valentine Day Cards, by Elena Olinevich product by BoBunny

To make it look more festive I added the Hearts Foil Transfers.

Thanks for stopping in today.

Elena

BoBunny Supplies:
Double Dot - Licorice Dot, Sugar Dot, Blush Dot.
Selfie Dies
Lots of Love Stickable Stencil
Accents Copper Foil Transfers
Blush Glitter paste
Ruby Red Brads
Tuxedo Jewels

Pentart Supplies:
Lasur for Interiors-Red