Blessed and Thankful canvas by Rhonda Van Ginkel
Today I am sharing my mixed media fall themed project featuring the all new Leaf Stickable Stencils along with the Enchanted Harvest collection. I wanted to share with you how versatile the Stickable Stencils are with our Glitter Paste and Pearlescents.
The project base is a 9x12 canvas from my local craft store, it was primed with gesso already so I didn't have to do a thing to it.
To begin, I used the Leaf Stickable Stencil with some Copper Glitter Paste sparsely. For this technique, you want to leave some open space to blend your colors. Wipe your blending tool clean.
Next I added the Gold Glitter Paste, still leaving some space in the stencil pattern open. Wipe off your blending tool. Last, use some Wasabi Glitter Paste and finish blending any open area in the stencils and to your taste. Wipe off your blending tool and clean your stencil once you remove it.
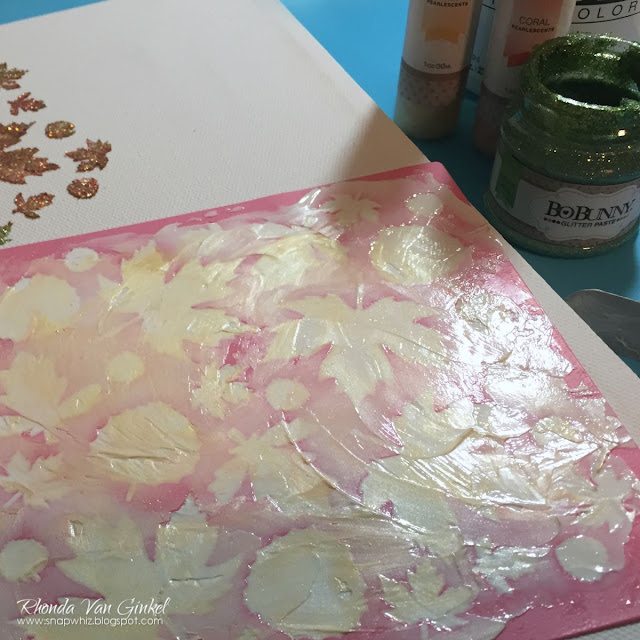
The result of the blended colors on the canvas. I thought it was such a nice effect I decided to try it with some modeling paste and Pearlescents over the top.
I created a light coat of modeling paste over the entire Stickable Stencil.
I added two colors of Pearlescents, Coral and Butterscotch.
Blend them together. I also touched a bit of the Wasabi Glitter Paste in a few random places for fun.
Are you still with me? I hope so because this is when it gets really fun and messy! Take out your Glimmer Spray and start misting a bit. I also added some watercolor to achieve my deeper orange and red colors here. Lightly spray over all with Gold and Sugar Glimmer Sprays. I added some Coral to a few areas as well.
Be sure you work on a craft mat or put your project into a box to protect your working surface from over spray.
If your project base has a gesso coat, no need to panic, you can control how much color you let your project take on. Since this canvas has a nice gesso primer, it is very forgiving.
Here I worked a few paper towels to absorb the extra color that I didn't want.
Once your background design is completed to your liking, you can add your other elements. I started with the Noteworthy elements, then selected my sentiment from the Combo Stickers. Using dimensional square adhesive for my banner and sentiment, created the perfect amount of texture to layer additional elements into.
First, the large vertical noteworthy piece was attached with the adhesive attached about 3/4 of an inch around on all sides. I used a tape runner but you might prefer liquid adhesive for canvas. This allows you to layer other elements without removing the main components.
Then I added the sunflower under on the right, then the main sentiment from the Combo Sticker was adhered with foam square adhesives. I always do this toward the middle so I can layer other elements under. I added the green banner bar at the top with foam adhesive also, topped by the chipboard butterfly.
Next, the Flourish Jewels were attached. I tend to cut mine apart and use it in different areas as you see here. The "Crisp Autumn Days" banner was added, followed by the garden fairy Noteworthy element with foam square adhesives, a Button next to it, adorned with a Mocha DoubleDot Pearl Jewel.
I trimmed a piece of flourish Combo Sticker trim and adhered under my sentiment and behind the Garden Fairy. Final steps were the butterscotch button with Mocha Gem on top, and the Noteworthy butterfly above the sentiment. The upper corner elements were the last items added.
BoBunny Supplies
Patterned Paper: Enchanted Harvest / Enchanted Harvest
Noteworthy: Enchanted Harvest
Chipboard: Enchanted Harvest
Stickers: Combo Sticker / Enchanted Harvest
Buttons: Enchanted Harvest
Glitter Paste: Copper, Gold and Wasabi
Glimmer Spray: Gold, Sugar and Coral
Pearlescents: Butterscotch and Coral
Flourish Jewels: Chocolate
Stickable Stencils: Leaf
Jewels: Double Dot Mocha


Beautiful! ;-)
ReplyDelete