Showing posts with label Glimmer Spray. Show all posts

Tuesday, April 7, 2020

Easter Cards with Garden Grove

Hello BoBunny fans!

Emmy here today sharing a few Easter cards I've created using the lovely Garden Grove collection from BoBunny's newest release. The soft colour palette and the cute bunny images make this collection perfect for the occasion!


For my card base I used smooth white cardstock. I cut off two 20 x 30 cm panels and I folded them in two. Then I cut slightly larger panels from brown cardstock and pattern paper, inked their edges and adhered them to the card bases.


For the main picture I used printed panels from a 12" pattern paper. I matted them on a white cardstock and adhered them using mounting foam tape. Then I used various fussy cut images and die cut shapes to decorate my cards.


I also added paper flowers and die-cut foliage.


As a final touch I added different colors pearls and I sprinkled white glimmer mist on top of all layers.

I hope I managed to inspire you today!

Have a wonderful creative week!


BoBunny Supplies: 
12 x 12 Paper Pad: Garden Grove
Pattern paper: Adorable, Remember, Postcards, Happiness, Ambiance / Garden Grove
Noteworthy: Garden Grove
Washi Tape: Garden Grove
Candy Dots: Garden Grove
Brads: Garden Grove
Essential Dies: Ever After,  Darling Doily
Double Dot Lace Cardstock: Flamingo
6x6" Paper Pad: Natural Necessities

Other: 
American Crafts Permanent Tape Runner and Refill
American Crafts Foam Dimen Dots
White cardstock
Ink pad - brown
White Shimmering Mist
Paper Roses
Easter Rabbits die

Tuesday, April 10, 2018

"Love" - an A4 Styled Layout and Home Decor Piece - featuring Cottontail and We R Mini ABC Punch with Angela


Hello BoBunny Friends,

It's Angela here today and I would like to show you a layout in A4 format made with the Cottontail collection.

cottontail_layout_angela_apr18_01.jpg


I started choosing the papers and, since the photo I wanted to use is a little bit dark, I went for white cardstock adhered on Pastels paper, which has a beautiful peachy color.  I stitched here and there the two papers with my sewing machine, without cutting away the threads of the stitch.


cottontail_layout_angela_apr18_02.jpg

Then, I fussy cut a couple of flowers of the same orangish color from Springtime paper and arranged them at the bottom of the photo.

cottontail_layout_angela_apr18_03.jpg


For the title, I decided to use big letters made using the Mini Alphabet punch board by WRMK.

I made each letter twice, in white cardstock and in peach, using the Pastels paper left-over. White on top and peach color underneath, to give a dimensional look.


cottontail_layout_angela_apr18_04.jpg


To give even more interest to the title, I added a little stitch to each letter, always leaving the long threads of the stitching 'flying' around.

The journaling is a beautiful quote of Henri Matisse that I wrote with my old typewriter.


cottontail_layout_angela_apr18_05.jpg

When I started, I had intended for this to be a layout.  After, I was all finished, I decided it deserved to be framed and displayed as a decoration in my home.

Check out the process video to see how this layout came together and I hope you are inspired in some way.


Thanks for stopping by today.

Love,

Angela Tombari


BoBunny Supplies:

Patterned Paper: Cottontail/ Pastels, Springtime, Hippity Hop

Doilies: Medium size

Pearlescents: Coral

Glimmer Spray: Bronze


Thursday, March 15, 2018

Dessert Cookbook Dividers - Featuring Double Dot Damask and Stay Awhile with Elena


Hello BoBunny Fans,

I used to cook a lot in the past, but now I prefer to create more than spending this time at the kitchen. However I always like making cookbook dividers and recipe notes for my friends, so I get to combine my hobbies!

Today, since I have a go-to Desserts Recipe book for all my favorite sweet recipes,  I've added a few dividers to share that I've made for just this purpose.

Stay_Awhile_Recipe_book_Elena_Mar15_01.jpg

For my background I used the new Double Dot Damask papers. It was so difficult to choose only one color from the range, but since I wanted to make several dividers , it was a good opportunity to use several at once.

Stay_Awhile_Recipe_book_Elena_Mar15_02.jpg

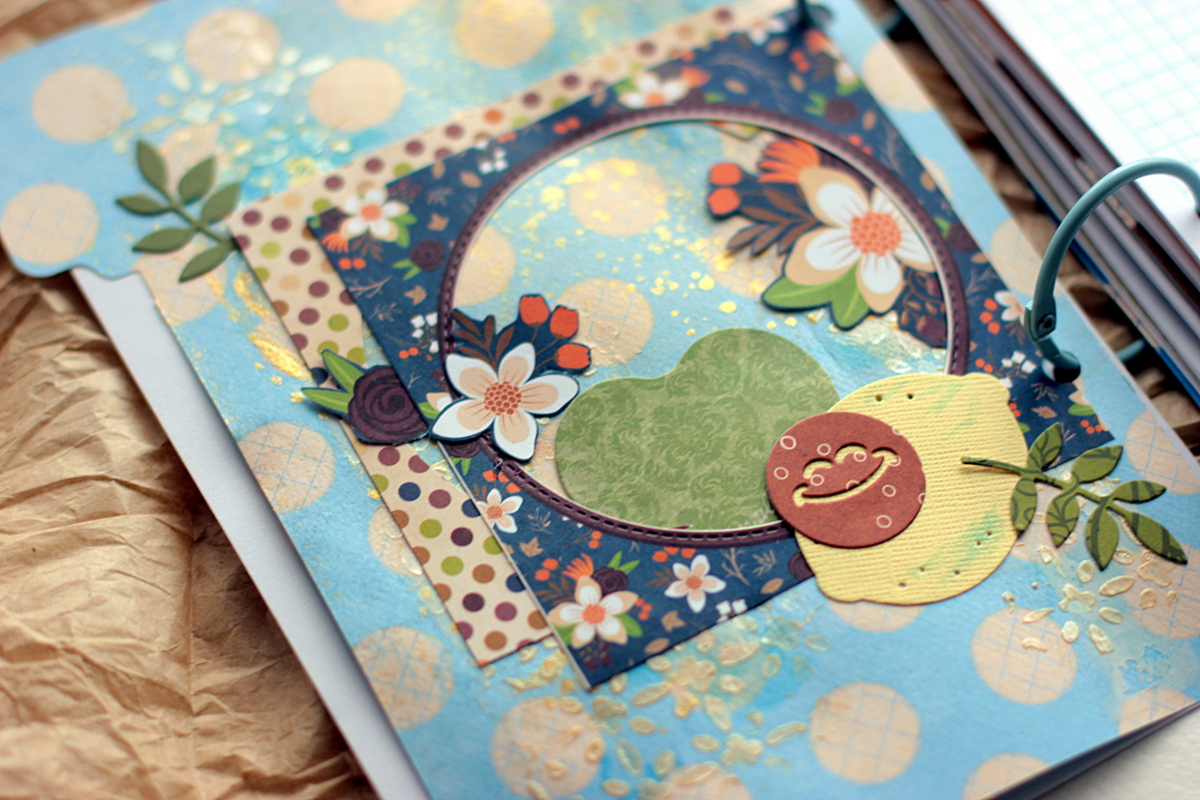
For my embellishments and paper layers I used a lot of fussy cutting from the Stay Awhile papers. There are so many cute houses and flowers there to cut out, and lend itself nicely to the homey feel of the Stay Awhile paper collection.

Stay_Awhile_Recipe_book_Elena_Mar15_03.jpg

However for my pages I made die cutting too , and used a few BoBunny dies, this beautiful Mandala Die that I topped with Emoji Die cut - just for a touch of fun.

Stay_Awhile_Recipe_book_Elena_Mar15_04.jpg

Also I wanted to add some mixed media, so I primed my background with white gesso, then I applied the Stencil Texture Paste using Starling Stickable Stencil.
and misted with Gold Glimmer Spray and added the splatters  of Frost Glimmer Spray with a brush.

Stay_Awhile_Recipe_book_Elena_Mar15_05.jpg

I used the both sides of the Double Dot Damask paper.  As you can see, one side is a classic subtle damask pattern, and the flip side has a medium scale, layered and antiqued dot patteen, so it was fun to mix them.


Stay_Awhile_Recipe_book_Elena_Mar15_06.jpg

  I wanted to maintain the desserts theme of my recipe book, so I played mostly with cupcakes and coffee dies. I made a few cupcakes die cuts using Cupcake Dies.


Stay_Awhile_Recipe_book_Elena_Mar15_07.jpg


Stay_Awhile_Recipe_book_Elena_Mar15_08.jpg

I like the color palette of Stay Awhile collection, it can be used for many occasions, but it really reminds me something cozy and warm, something about the kitchen


Stay_Awhile_Recipe_book_Elena_Mar15_09.jpg

After all my dividers have been done, I added the coloring with my brush and the sprays, just to add some accents


Stay_Awhile_Recipe_book_Elena_Mar15_10.jpg

I like how it looks on the Double Dot Damask papers


Stay_Awhile_Recipe_book_Elena_Mar15_11.jpg

Not only cakes and coffee makes me feel like Sweet Tooth, an ice cream , this what all the kids adore.
I've added the ice cream die cuts that I made using Summer Picnic Dies


Stay_Awhile_Recipe_book_Elena_Mar15_12.jpg


Stay_Awhile_Recipe_book_Elena_Mar15_13.jpg

You can check my video if you are interested how I created one of my pages:


BoBunny Supplies:
Patterned paper: Stay Awhile/ Neighbors, Coffee, Cozy, Lovely, Relax, Together, Welcome, Warm
Stickers: Stay Awhile
Double Dot: Damask/ Powder Blue, Blue, Chocolate, Vanilla, Orange Citrus
Dies: Cupcake, Summer Picnic, Emoji, Mandala
Glimmer Spray: Gold, Frost
Stencil: Starling Stickable
Gesso White

Other

Tuesday, March 13, 2018

Hand-crafted Card & Oversized Tag Set - Features Stay Awhile with Irit


Hello, My Dear Crafty Friends!

Welcome to my new BoBunny craft post.   It's Irit here today with my new BoBunny inspiration.
Today I am going to share a card and a tag made with a new, just released collection named Stay Awhile.  This collection is a bit wintery and cozy, but yet bright and shiny and is perfect for anything home connected (and coffee themed too!). It is trendy, yet classic as you will see as we go along.  I made a card and a tag that show both greens and blue colors of the collection.  I decided not to use mixed media techniques, but instead a simple classic, cardmaking style for all craft levels.


 As you can see the card was made mostly in green and brown colors and the tag was mostly made in blues.
Actually almost each and every cardstock piece of this collection has all colors and you can mix and match them all together.

So here is the tag alone:


 I added a few layers made of BoBunny dies cut from different cardstocks.  The main embellishment cluster is made of hand cut cardstock flowers and one single large flower.  The chipboard heart was painted with BoBunny Frost glimmer spray over the bare chipboard. A few spray drops were also added over the tag.
Everything else is just hand cut cardstock pieces and a lot of Combo stickers from this collection.


And here is a card:


 It's made in the same style with one single die cut frame, a lot of hand cut flowers and quite a lot of Combo stickers. I made the banner with layers by adding one flag over another with 3d foam glue.
One single wood heart was also added to this card as it actually is Home Love card.


You can also see the Coffee to go cup here- it's just a part of sticker image, but fits the cozy and warm home card as well.


 I hope that you like my card and tag and see you soon with new BoBunny collections!


BoBunny Supplies: 
Stay Awhile 12x12'' cardstock: Lovely, Welcome, Thankful, Stay Awhile, Warm, Relax, Neighbors
Stay Awhile Combo Stickers
Congratulations Card dies
Darling Doily die
Ornate Heart die
Clover Bouquet flowers
Clover Pansy flowers
Double Dot Mocha jewels
Double Dot Citrus jewels
Hearts laser cut chipboards
Wooden hearts
Denim blue lace
Frost glimmer spray

Friday, March 2, 2018

Designer's Choice-Double Dot Damask and BoBunny Essentials

.
Hello BoBunny Friends!

Ulrika here today! I made a layout using one of the new cool Double Dot Damask papers.  To start, I chose to use the reverse side of the paper, medium sized polka dots and purposely kept the layout simple and quite linear, so the focus naturally fall on the photo of my son Lukas.

Lukas Scrapbook Page by Ulrika Wandler using BoBunny Double Dot Damask Collection

I stamped and diecut some gears. I think it's so useful to have stamps and dies that are made to fit together as this set does. I also used some well placed machine stitched elements to further enhance the made, mechanical feel of this layout.

Lukas Scrapbook Page by Ulrika Wandler using BoBunny Double Dot Damask Collection

In the background I added some stamping and glimmer spray splashes.

Lukas Scrapbook Page by Ulrika Wandler using BoBunny Double Dot Damask Collection

The Double Dot jewels and pearls matched perfectly with the green background in my photo.

Lukas Scrapbook Page by Ulrika Wandler using BoBunny Double Dot Damask Collection

Thanks for stopping over today!  Hope to see you tomorrow!

Ulrika

BoBunny Supplies:

Double Dot: Damask French Vanilla

Stamps: Stitches, Gearing Up, To The Point

Double Dot Jewels: Emerald

Glimmer Spray: Bronze

Dies: Gearing Up

Friday, February 9, 2018

Vintage Art Journal "Believe in Yourself" featuring Charmed with Denise


Hello BoBunny Fans!

It's Denise here today, to share an art journal page with you, using the gorgeous Charmed Collection.  The rich but subtle color palette and the dainty page elements really speak to me.


Charmed_Art Journal Page_Denise_27 Jan_01


I had started a new smaller art journal and this perfect sentiment with which to start.

Charmed_Art Journal Page_Denise_27 Jan_02


I used patterned papers of Charmed, along with stickable stencils, acrylic paints and distress inks and oxides. I also fussy cut the various elements for these pages, to create the design and lend lots of textures through the layers and the style of the Art Journal itself.

Charmed_Art Journal Page_Denise_27 Jan_03

I love this sentiment and really wanted to use it as the main theme of this project.  With anything art or life in general, one just has to start somewhere and then believe in yourself to get it done and completed. I also believe in a little "magic" and these fairies talk to that too! ;-)

Charmed_Art Journal Page_Denise_27 Jan_04


So have you tried some art journaling? If not...give it a try. Just believe in yourself and start somewhere.

Have a super day and hoping to see you back tomorrow.

Denise x


BoBunny Supplies:

Patterned Paper: Beauty, Perfection, Curious, Petals/ Charmed

Stickable Stencils: Brocade

Designer Notebooks: Juliet Collection

Monday, October 30, 2017

Mixed Media Holiday Cards featuring Carousel Christmas - with Ayumi


Hello BoBunny friends!!
It's Ayumi here. 
Today I'll share with you two cards using the beautiful Carousel Christmas collection!  

Christmas Cards By Ayumi Iwashita.


First,  I prepared the background for the card using stencils and structure paste for the texture on basic white card stock.
Then,  after the stenciled pattern was dry, I applied a few colors of glimmer spray for this nicely marbled look
Then, I made some tiny polka dots by using Sparkling Gold, Copper and Transparent Pentart Contour Liners at the edge of the card.


Then I fussy cut  the Christmas tree, bell and other elements from the paper to finish these cards. GORGEOUS!


The cut-out poinsettia has been layered over other poinsettias to give depth and visual appeal.


Enjoy your happy day!

Thank you.


BoBunny Supplies:
Patterned Paper: Carousel Christmas/ Wonder, Floral, Magic, Greetings
6×6 Paper Pad: Carousel Christmas
Jewels: Think Pink, Mocha Jewels, Glaze Jewel Flourishes
Glimmer Sprays: Tutu, Mint, Gold
Thick Stencils: Timeless, Fancy Flourishes

Pentart Supplies:
Contour Liner: Copper, Transparent, Sparkling Gold
Structure Paste