Saturday, May 23, 2015

Wonderful Wood Shapes and Glimmer Spray!


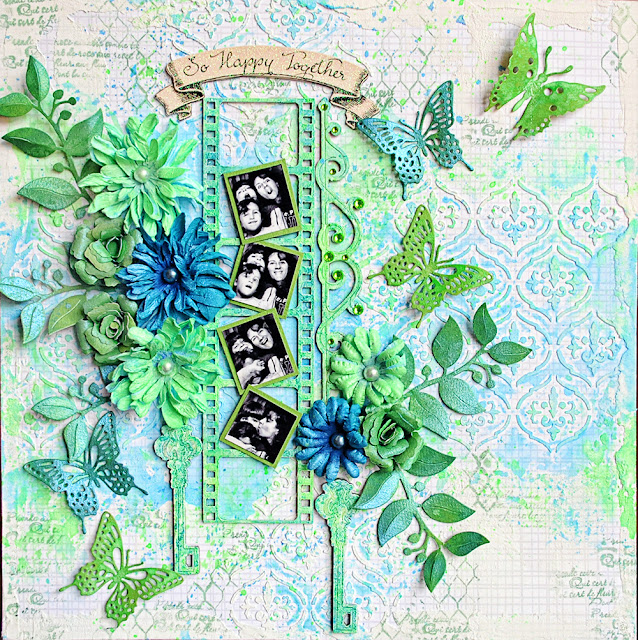
Hi Lisa here to show you that the wood pieces can be primed and sprayed to match your projects! I decided to mix and match some wood pieces from 3 different collections for my layout. I  love the colors of the sea. The blues and greens are just so calming. With just 2 beautiful colors you can create a masterpiece.On this layout I used BoBunny's Glimmer Spray in Frost and Mint.

Layout by Lisa Gregory featuring Forever Young

The background was adhered to a piece of corrugated cardboard. I then used the Brocade Stencil and crackle paste on the background. Once it dried, I sprayed some Glimmer spray in Frost on a piece of plastic bag, then sprayed on a bit of water to water it down and pressed the bag, spay side down onto the background to achieve a watercolor effect. I did this using the Mint as well until I got the coverage I wanted. I also die cut the butterflies from the Flutter dies and sprayed them with Frost and Mint to get a variegated color.  Once they were dry, I adhered them to the background by the body only and slightly folded up the wings.

Layout by Lisa Gregory featuring Forever Young and stencils

For the blossoms, I enhanced the darker blue ones with Glimmer Spray in Frost. For the lighter blue flowers, I sprayed them with Mint to change the color up a bit. I also die cut some blossoms and leaves from the Double Dot paper in Clove, then I sprayed them with the Frost and Mint
Glimmer sprays for a 2 toned effect. They dry to a gorgeous shimmer.

Layout by Lisa Gregory featuring Forever Young and blossoms

The wooden pieces were all primed using white acrylic paint. Once they were dry, I sprayed them with Frost and Mint. I arranged all of the pieces on my layout until I was pleased with the design and then I adhered everything down permanently. I used the stamps around the page in random spots, just for texture.

Layout by Lisa Gregory featuring Forever Young and wood embellishments

Thank you for joining me today on the blog. I will be back soon when we will be showcasing projects with the newest collections. Until then, get out those wooden pieces and give them some color!!

BoBunny Supplies:
12x12 Patterned Paper: Yum/Forever Young
Double Dot Paper: Clover Dot
Blossoms: Denim Blue Daisy
Wood Shapes: That's Life/Ironworks/Kraft Wood Keys and Butterflies
Dies: FlutterDies
Stencils: Brocade
Glimmer Spray: Frost/Mint
Stamps: It is Written/Distressed Textures
Ink Pad: Emerald
Layered Chipboard: Heritage
Double Dot Jewels: Emerald

Friday, May 22, 2015

Giveaway Winners!

Wooohooo! It's time to announce the winners of our FABULOUS Spring 2015 release giveaway contest! Thank you to everyone who entered and played with us! And now, without further a do, the WINNERS!!!


The winner of the Boardwalk Papers is: Linda Chidster!

The winner of the Boardwalk Embellishments is: Janice McLean!

The winner of the Penny Emporium Papers is: Brigitte Wohlfahrt!

The winner of the Penny Emporium Embellishments is: Deborah S.!

The winner of the Juliet Papers is: Geo Chad!

The winner of the Juliet Embellishments is: Jaimie Sunshine! 

The winner of the Misc Me Juliet is: Karin Boschaart!

And finally, the winner of the Misc Me Boardwalk is: Katy Young!

Yay!!!! Congratulations to all of our winners! We will be emailing you! 

Just a reminder.....all this GORGEOUS new product is hitting stores and online NOW! With that said.....Everyone have a wonderful crafty weekend! 


Thursday, May 21, 2015

Marvelous Mixed Media!


Mixed Media Eye-glass Case Tutorial by Gabrielle Pollacco
Mixed Media Glasses Case tutorial by Gabrielle Pollacco using Bo Bunny Ironworks wood accents, Pearlescents, Glitter Paste, Lasercut chipboard and Stickable stencils.


Hi everyone!  Gabrielle here with you today to share a Steampunk style eye-glass case I made using a variety of Bo Bunny's gorgeous mixed media products and one of my favorite wood embellishment collections called Ironworks.   

Mixed Media Glasses Case tutorial by Gabrielle Pollacco using Bo Bunny Ironworks wood accents, Pearlescents, Glitter Paste, Lasercut chipboard and Stickable stencils.

Have you tried these beautiful new lasercut chippies?  I was lucky enough to get my hands on this stunning butterfly chippie, they have such intricate cut-work, love them! So I decided to make this, and a lovely scroll from the Ironworks wood accents collection the centerpiece of my OTP project.  I thought it would be nice to make a video tutorial up to show how this thing went together....so grab a cup of coffee (or tea) click on the arrow below and enjoy!


I just love the way the Pearlescents adhere so well to almost any surface, I didn't even have to pre-coat my piece with Gesso!  Here are a couple of views of this project from other angles...

Mixed Media Glasses Case tutorial by Gabrielle Pollacco using Bo Bunny Ironworks wood accents, Pearlescents, Glitter Paste, Lasercut chipboard and Stickable stencils.

This is the backside of the glasses case, you can see the nice texture I got using the Cascade Stickable Stencil with a combination of  Licorice, Graphite and Chocolate Perlescents streaked across it.

Mixed Media Glasses Case tutorial by Gabrielle Pollacco using Bo Bunny Ironworks wood accents, Pearlescents, Glitter Paste, Lasercut chipboard and Stickable stencils.

I finished my design with some Bo Bunny Trinkets and Mocha Jewels. 

Mixed Media Glasses Case tutorial by Gabrielle Pollacco using Bo Bunny Ironworks wood accents, Pearlescents, Glitter Paste, Lasercut chipboard and Stickable stencils.

A view of the left side.  I also added some little hits of the Bronze Glitter Paste to the wings o the butterfly and on the metal flowers.  This project came together quick and easy and now I have a pretty eye-glass case to keep on my night table.

Product used in this project:
Bo Bunny Stickable Stencil/Cascade
Bo Bunny Pearlescents/Licorice, Graphite, Chocolate
Bo Bunny Glitter Paste/Bronze
Bo Bunny Laser cut chipboard/Butterfly
Bo Bunny Wood Accents/Iron Works
Bo Bunny Double Dot Jewels/Mocha
Bo Bunny Trinkets/Apple Cider collection

Hope you enjoyed my tutorial and hope this has inspired you to use Bo Bunny's fabulous wood accents and mixed media products!


Wednesday, May 20, 2015

A Happy Place With Wood Shapes!


Hello friends! My project today is an altered frame that I've used the Garden Journal collection along with our That's Life Wood Shapes.

Our Happy Place by Rhonda Van Ginkel

Our Happy Place Altered Frame featuring Garden Journal collection and That's Life Wood Shapes by BoBunny designed by Rhonda Van Ginkel

 I've used Pearlescents and Glimmer Sprays as well as stamps. Recently I received a wedding invitation with this lovely photo on it and knew I wanted to create something special with it. 

I thought it would be fun to place this frame on their wedding gift as a little bonus.

Our Happy Place Altered Frame featuring Garden Journal collection and That's Life Wood Shapes by BoBunny designed by Rhonda Van Ginkel

To start, I coated the frame with some cream paint. Once dry I traced the frame shape and trimmed the paper to fit. I stitched around the paper giving myself enough extra space to sand the edges. I traced the heart from the back of the paper and carefully cut it out and adhered my paper to the frame with some Mod Podge.

I sanded all the edges and then dry brushed some of my cream paint on the very borders. I rubbed some Sugar Pearlescent around the heart edges, then brushed a very light layer overall and set aside to dry.

The That's Life Wood Shape chevrons are altered with Pearlescents. The small chevrons are base coated in Silver and then brushed with some Frost. The middle chevron is base coated in Sugar and then dry brushed with Frost.


I collaged the chipboard and used my wood shapes to accent my design. The Elegant Border Die was cut and I folded two segments together to create my flourish heart that is tucked in behind the Layered Chipboard. Some simple stamping and drops of glimmer spray and jewels completed the frame.

How do you like to alter your wood shapes?

BoBunny Supplies:
Patterned Paper: Notebook / Garden Journal
Wood Shapes: That's Life
Chipboard: Layered Chipboard, Chipboard / Garden Journal
Buttons: Garden Journal
Stamps: Distressed Textures, It is Written and Stained Textures
Stamp Block Set
Pearlescents: Brilliant Blue, Silver and Sugar
Glimmer Spray: Bronze, Frost and Sugar
Ink: Licorice
Jewel Flourishes: Glaze
Jewels: Double Dot Blue Hues
Die: Elegant Border Die

Monday, May 18, 2015

Mixed Media & Wood Shapes....WOW!


Hello All!  For this month's project, I am featuring the BoBunny Elegant Wood Shapes.  These gorgeous shapes are indeed elegant, featuring flowers, flourishes, and frames.  They are a perfect match for the Garden Journal collection.

To start, here is a look at how I decorated my 12x12 Misc Me Kraft binder:

At First Sight by Keri Babbitt
At First Sight Misc Me 12x12 by Keri Babbitt using BoBunny Elegant Wood Shapes and Garden Journal Collection

For my smaller binders and mini-albums, I like to add lots of dimensional layers, but since I store my 12x12 albums in a row on a shelf, I like the cover embellishments to be flat layers.  Here, I created a custom background with stamps, glimmer spray, pearlescents, and ink.  The rub-ons and stencils add interest and beauty, but without the bulk.

The spine of the album, however, was a great place to add a wood label frame, that will show up prettily, while the album is shelved:

At First Sight Misc Me 12x12 by Keri Babbitt using BoBunny Elegant Wood Shapes and Garden Journal Collection

This effect is a combination of Island Mist Pearlescents, over sprayed with Silver glimmer spray and then blotted.

And now, here's a look at my 2-page spread:

At First Sight Misc Me 12x12 by Keri Babbitt using BoBunny Elegant Wood Shapes and Garden Journal Collection

I used the Garden Journal Misc Me contents pack, and then embellished with chipboard, die cuts, and of course more wood shapes.

At First Sight Misc Me 12x12 by Keri Babbitt using BoBunny Elegant Wood Shapes and Garden Journal Collection


At First Sight Misc Me 12x12 by Keri Babbitt using BoBunny Elegant Wood Shapes and Garden Journal Collection

The Elegant wood shapes were given a Shabby Chic makeover, with some Island Mist Pearlescents, Silver Glimmer Spray, and Blush Glitter Paste.  The Elegant frames are the perfect little spot to showcase another small embellishment inside.

At First Sight Misc Me 12x12 by Keri Babbitt using BoBunny Elegant Wood Shapes and Garden Journal Collection

At First Sight Misc Me 12x12 by Keri Babbitt using BoBunny Elegant Wood Shapes and Garden Journal Collection

BoBunny Supplies:
Patterned Paper: Carnival/Calliope
Stickers: Garden Journal Stamp Stickers, Head Over Heels Combo Sticker, Somewhere In Time Combo Sticker, Woodland Winter Combo Sticker
Noteworthy: Garden Journal
Brads: Garden Journal
Foil Transfers: Alphabet Gold, Filigree Gold
Chipboard: Garden Journal Chipboard, Garden Journal Layered Chipboard, Sweet Life Layered Chipboard
Stamps: Floral, Flutter
6x6 Paper Pad: Garden Journal
Misc Me Binder: 12x12 Kraft
Misc Me Contents: Garden Journal
Wood: Elegant Wood Shapes
Dot Jewels: Tuxedo
Pearlescents: Blush, Gold, Island Mist
Ink: Blueberry, Licorice, Sugar
Glimmer Spray: Gold, Sugar
Glitter Paste: Blush, Sugar
Dies: Elegant Border, Flourish, Flutter
Stickable Stencils: Cascade

Sunday, May 17, 2015

Wonderful Wood Shapes Mini!


Hello everyone! Ilene here to share a mini album I created using the fun "#Forever Young" collection.

11th Birthday Mini Album by Ilene Tell

Birthday Mini Album by Ilene Tell using BoBunny # Forever Young Collection 1

 My daughter's 11th birthday will be in July, so this collection was perfect for a summery, pre-teen, tropical birthday party. And I was actually scrapping ahead! I decorated the cover with the gorgeous clock from the "Clockwork" wood shapes, and misted it pink. (The little chipboard piece is pointing at 11, of course :)

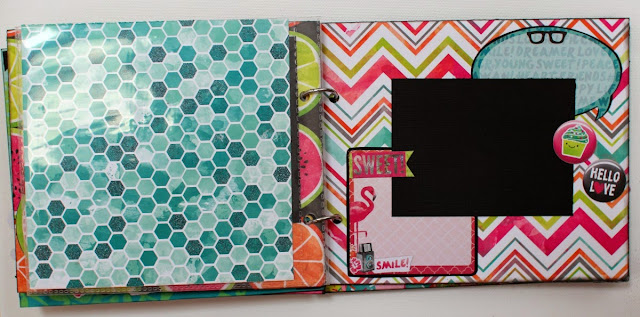
Birthday Mini Album by Ilene Tell using BoBunny # Forever Young Collection 2

To make this album quick and easy, I simply cut out 12x7 pieces from the paper, and then folded them in half to create 7x6 pages - the BoBunny paper is nice and firm, and when folded in half creates very sturdy pages. I then added photo mats slightly larger than 4x3 size to fit the photos, and added embellishments (the photos will slide under the embellies, since I made sure that they were not glued down where the photo goes).

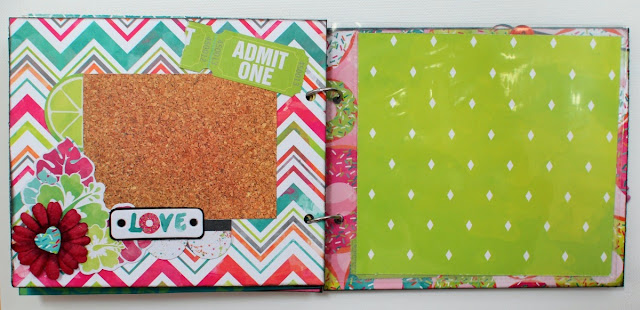
Birthday Mini Album by Ilene Tell using BoBunny # Forever Young Collection 3

I also took three Misc Me 6x8 page protectors and trimmed them down to 6x6 - those will nicely fit 4x6 photos with a 2 inch strip at the bottom for decoration and possibly some journaling.

Birthday Mini Album by Ilene Tell using BoBunny # Forever Young Collection 4

Even though this album was very quick and easy to put together, it will fit six 4x6 photos and 16 3x4 photos - so 20 photos total! Which will be perfect to commemorate such a wonderful occasion. (It doesn't hurt that my daughter really fell in love with this collection - it fits her so well :)

Birthday Mini Album by Ilene Tell using BoBunny # Forever Young Collection 5

I also added one pocket page for memorabilia. I took one of the Kraft Misc Me envelopes and trimmed 2 inches off the bottom to fit the mini. Then, I hand-stitched the bottom closed.

Well, get ready for a bunch more pics... here's the rest of the mini:

Birthday Mini Album by Ilene Tell using BoBunny # Forever Young Collection 6


Birthday Mini Album by Ilene Tell using BoBunny # Forever Young Collection 7


Birthday Mini Album by Ilene Tell using BoBunny # Forever Young Collection 8


Birthday Mini Album by Ilene Tell using BoBunny # Forever Young Collection 9


Birthday Mini Album by Ilene Tell using BoBunny # Forever Young Collection 10


Birthday Mini Album by Ilene Tell using BoBunny # Forever Young Collection 11


Birthday Mini Album by Ilene Tell using BoBunny # Forever Young Collection 12


BoBunny Supplies:
Patterned Paper: #ForeverYoung / #ForeverYoung, Besties, Happy, Heart, Hugs, Laugh, Love, Smile, Sweet, Yum
Wood: Clockwork Wood Shapes
Buttons: #ForeverYoung
Noteworthy: #ForeverYoung
Chipboard: #ForeverYoung Chipboard, #ForeverYoung Layered Chipboard
Blossoms: Blush Daisy, Denim Daisy, Plum Purple Daisy, Wildberry Daisy
Foil Transfers: Filagree Gold
Misc Me Envelopes: Kraft
Misc Me Page Protectors: 6x8
Glimmer Spray: Tutu