Showing posts with label Tips. Show all posts

Wednesday, April 15, 2020

How to Use Leftover Paper with Malin

Hello hello and welcome back!

Today I want to give you 3 tips on how to use up your left over papers. I know we all have them right? At least I do, and a lot too. Making new projects all the time leaves you with so much paper scraps and then you have just piles and piles with so many beautiful small pieces of papers. And I at least DON`T want to throw it away. Because this beautiful paper does cost money, right?

So I will show you today what I usually do with my paperscraps.
I will also have a video for you on youtube where I show you how I make this small projects with my left overs.


First of all I often use the bigger pieces of my papers and create paper backgrounds on cards. I can also use it for layouts or on my project life cards. But most of the time I make cards and when I use this on my cards I have a bunch of ready to go cards to use and the only thing I need to do is to decorate it for the occasion I want to use it for later on. I do sizes as 15x15cm, 10x15cm and 10x10 cm. This is the most common sizes I use.


The second thing I use the paperscraps for are to making flowers! I love making this easy lollipop flowers, and this is something I can easily do in front of the tv if I would like to! Also a perfect little small project to do when looking at you tube.
I think they are so cute and you can make them with or without glitter. A perfect way of also using brads!


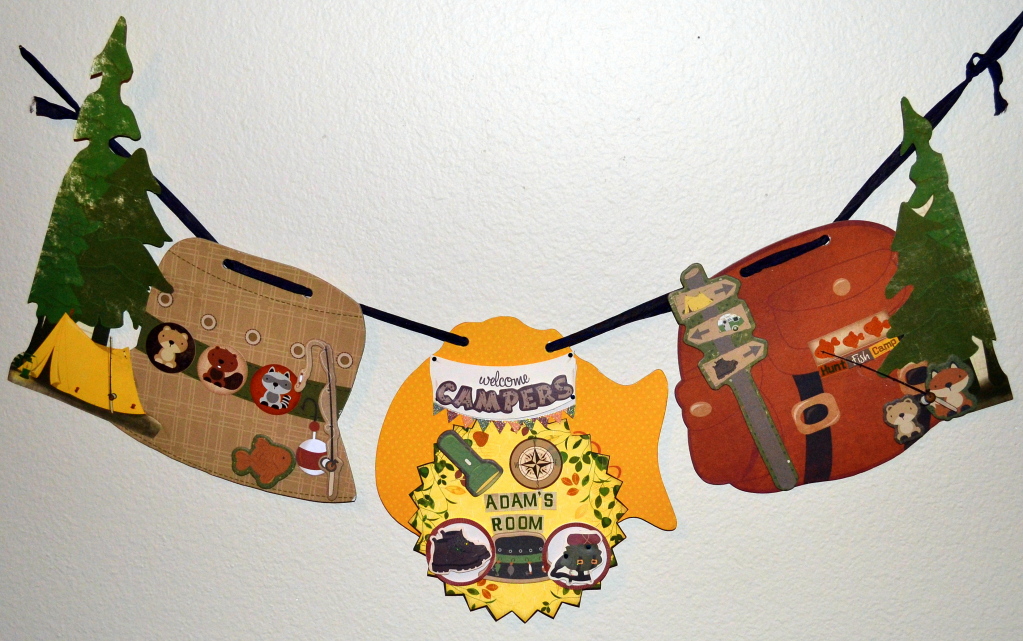
The last thing I use to do is small banners. Small banners that I can use as decorations on both cards and layouts etc. Perfect to use up all small stripes that has been left from my papers that you usually throw away because you can´t use them for so many things.
This - it´s perfect!


I hope you liked this small tips of using paperscraps.
Let us know how YOU use your paperscraps?


Products I Used:
Paperscraps from the collection Family Heirloom and Garden grove.
Different brads from many of the collections.

Have a nice day!

Monday, September 16, 2019

Stamping Tips with Malin

Hello everyone!

Today I will share with you a few scrapbooking tips from me.
I have some small simple tips using stamps today and using stamps to make decorations for your projects. I love using stamps om my projects and I hope you will do to.

The thing is that this is something you can do if you don´t have that much time for scrapbooking but still want to scrap a few minutes or half an hour or so when you can. As for example before christmas time when we have our hands full of preparing christmasgifts, decorate the house, meeting up with family and so on.


Prepare some 10x10 cm cardstock to be used for this, you will get 4 out of one cardstock and that is good! You can have them on your table to be used as you go. Or just the sizes you like!
I have then used the christmas stamps christmas treasures from this collection.

Tip 1. Use some basic monochromatic cardstock, stamp your stamps and then cut it out, and you have a decoration. On this picture I took brown cardstock and stamped some of the cones on. Perfect and I do not need to color them! And i have some decorations for my card!

Tip 2. Stamp on patterned papper. This will give the stamp more "life" in it even if you do not color it. I have on this one used patterned papper pieces from the collection christmas treasures and stamped some of the banners and text, cut it out and I have a decoration. Do this with all kinds of patterned papper that you have and you can do several and save for later projects. This is also fun and easy to do in front of the tv... Or if you cook or something just stamp a few during the time you are waiting and so on.

Tip 3. If you have a litte more time now and then stamp up your stamp and emboss it! You can emboss with all sorts of colors and it also looks nice to have an embossed picturestamp on a monochromatic paper to be used on a cas card and so on. Just play and try around what you like!


Tip 4. Do as usual and stamp up a lot of your small picture stamps and color them. You don´t need to color them all at ones, do some now and then when you have a little time left. Then when they are done start cut them out and you will have a lot of decorations for your projects when you have a little more time to be sitting down and scrapbook! I personaly think this is great to have been making and have them done when it´s time for scrapbook time!


Small tips from me today. Look around your stamps and you probably will have plenty to make decorations of!
So here it is then...
A small christmas card I did using the stamp set. The card is only 10x10 cm but perfect to send out as a christmas card or be put on the christmasgift you just wraped to write on to the person who is giving the gift.


Products I used:
BoBunny Christmas treasures stamp set # 7310902
Christmas treasures paper collection.
White cardstock

Other:
Differnet mediums for coloring and embossing.

Have a nice day!

Saturday, November 24, 2012

Christmas (or winter) Card Sketch

Today we have a fun card sketch for you all to enjoy!
I love how a sketch gives you somewhere to begin,
it's such a great jump start.

Today's sketch was made by Jolanda Meurs

Merry Wishes to you and yours 
by Jolanda Meurs
 Tip: Don't forget about Rubons... they add so much detail to a project.
 Bo Bunny supplies:
Patterned Paper: Mistletoe Greetings/Chevron and Pucker up
Cardstock: Wasabi Dot
Jewel: Mistletoe
Rubons: Mistletoe
Chipboard 12 x 12: Mistletoe
Layered Chipboard: Mistletoe 

Joyful
Lynn Shokoples
Tip: Don't be afraid to let certain objects or pieces go "off the project"

 Bo Bunny Supplies:
Patterned Paper: Snowfall, Jubilee/ Rejoice
Stickers: It's Christmas Time Cardstock Stickers
Noteworthy: Rejoice
Chipboard: Rejoice Layered Chipboard Stickers
Jewels: Rejoice
Blossoms: Wildberry Zinnia
Card: Rejoice Card Kit 

Rejoice
Carin McDonough
Tip: A little dimension adds so much interest to a project,
foam squares, liquid pears, embossing powder etc.

 Bo Bunny Supplies:
Patterned Paper : Adorned, Rejoice The Season/Rejoice
Double Dot : Wine Dot
Stamps : Rejoice; Smoochable
Ribbon : Double Dot Harvest Ribbon 

All Bundled Up
Tara Orr

 Tip: If you run out of brads, a little circle punch and some diamond glaze makes an
awesome substitute!
Bo Bunny Supplies:
Patterned Paper: Sledding, Trees/Snow Day
Dimensional Stickers: Snow Day
Brads: Snow Day
Buttons: Snow Day
Noteworthy: Snow Day
Chipboard: Snow Day
Combo Stickers: Snow Day
Jewels: Snowfall

Thursday, August 16, 2012

Layouts with limited supplies

Today we are making one page layouts with our formula.
In case you've forgotten, it's as follows...

3 sheets of patterned paper
1 sheet of cardstock
1 sheet of stickers
1 package of embellishments of your choice

I think you're going to love what you can do with such a few products!!

Your Smile
Tara Orr
Designer Tip: To lengthen the life of your embellies and stretch their use, don't hesitate to cut them in half, disassemble them, paint them, mist them, stamp on them, etc. Remember, all of your embellishments are alterable. I tore apart most of my flowers and tucked some of them under my papers and kept some as is. I also took off the centers of some of the flowers and used them as embellishments around my photo.
 Bo Bunny Supplies:
Patterned Paper: Journey, Cut-Outs, Dot/Apple Cider
Stickers: We Are Family Cardstock Stickers/Apple Cider
Cardstock: Gingerbread Vintage
Blossoms: Buttercup Daisy
(Stamps: Urban Acrylic, Et Cetera Clear, Midnight Frost Clear) 

 Best Friends
  Agnieszka Piskorz
 Designer tip: My picture is very colorful, so I went bright background. Colored strips of paper pointed out the picture. I try to choose colors that match the pictures.

Bo Bunny Supplies:
Patterned Paper: Around, Postage/Weekend Market ; Mistletoe Chevron;
Cardstock: Chiffon Journal
Rub ons: Detour
Stickers: Combo Stickers Camp a Lot

 Out in the Woods
Sarah Eclavea
 Designer Tips: When using a few supplies cut up patterend paper to make your own. I cut out the trees from the Camp-A-Lot paper to create my tree embellishments and cut my scraps to create a banner. I saved all my scraps to create banners on cards and other projects.

Bo Bunny Supplies:
Patterend Paper: Camp-a-lot, Firewood, Starry Night/ Camp-A-Lot
Stickers: Combo Stickers/ Camp-A-Lot
Chipboard: 12x12 Chipboard/ Camp-A-Lot

Spring Break
Robbie Herring
Designer Tips: Make your stickers go further by using them as embellishments and in the place of title. To give mine more the look of embellishments, I added lots of foam dots.
Also, try keeping to specific shapes to pull your page together. Since I used squares for my paper design, I chose to use round brads for my embellishing. Punched circles and circle stickers compliment the brads and make layering the embellishments easy.
Ideas for more uses: Brads are such an easy embellishment to work with. 
They will fit pretty much anywhere. I keep my left over brads in a drawer so 
I can pull them out for added detailing on my pages.
 Bo Bunny Supplies:
Patterned Paper-Detour Stripe, Cut Outs, Recalculating
Double Dot Cardstock-Cranberry Dot
Stickers-Detour Home Sweet Hotel
Brads-Detour

These girls make me feel like anythings possible!  So if you happen to be
on a budget or you don't have a lot of time... make sure to take note and don't
forget to share your creations with us!
You guys are the best!!! 

Tuesday, July 31, 2012

How to cluster...

Do you ever wonder how to cluster embellies on your layout?
How many are just the right quantity and size and color?

Maybe you are even thinking... "What is clustering?"
Clustering is a design technique where you cluster a set of embellishments together
to draw the eye in to a focal point.

Today the girls will give you some great examples 
and tips on how to make the perfect clusters!

Win
Debbie Sherman
 Debbie said: "One of my favorite techniques is to cluster my embellishments. In this case I cut out 5 stars from the Falling Stars patterned paper and overlapped them on top of one another. I popped them up with foam squares which made clustering them on top of each other much easier."
 TIP: In design, odd #'s are more interesting to the eye than even numbers.  Use 3 and 5 as your go to #'s in design and you'll be surprised at the difference it can make.
 Bo Bunny Supplies:
Patterned Paper: Camp-A-Lot Falling Stars, Camp-A-Lot, Squares, Fireflies
Starry Night, Cut Outs, Dot

Endless Fun In the Sun
Carin McDonough
 TIP : When adding a cluster to your page use foam dots on the some of your items. This makes them easier to cluster together and adds more dimension to your cluster.
 TIP: Stacking and layering are so important when making clusters.
You want to make sure you have a variety of colors, textures & heights.
Bo Bunny Supplies:
Patterned Paper : Hello Sunshine, Busy Bee, Stripe, Sweetness, Daydream, Cut Outs, Little Things, Sweet Pea/Hello Sunshine
6x6 Paper Pad: Hello Sunshine
Chipboard : Hello Sunshine 12x12 Chipboard
Stickers : Lazy Day Cardstock Sticker/Hello Sunshine
Jewels : Hello Sunshine
Carin said: "I also did a diagram to show measurements for how I cut my sun rays, it will even give you two sets of rays! The shaded areas are the ones I used."

Super Star
Jolanda Meurs
 Jolanda says: "I love to cluster my embellishments . I also have made a cluster off my pictures."
 Bo Bunny Supplies:
Patterned Paper: Dot, Falling Star, Squares/Camp-A-Lot
Jewels: Camp-A-Lot
Buttons: Camp-A-Lot
Combo Stickers: Hello Sunshine, Camp-A-Lot

You Are My Son Shine
Tara Orr
 TIP: When making clusters, use repetition.  
If you are using a circular item, use other circular items throughout the layout.
In this layout, Tara has used flowers for her repeating element.


Don't be afraid to try the clustering technique... it might take a few tries,
but once you get it... it's so addicting.  
Make sure to layer, lift, tuck and repeat and you'll be great!!!
Don't forget to show us your version of clustering.
You guys ROCK!!!

Friday, July 20, 2012

We ♥ Banners

We are loving the banner trend around here, so we wanted to share
a few ideas with you for a little inspiration.  Cuz who doesn't need inspiration, right?

Nini´s Class Trip
By Luzma

Tip: I always paint with a marker (brown in this case) all the edges of the papers,stickers and chipboard to add more dimension.Give it a try you will be surprised....


 Bo Bunny Supplies:
Patterned Paper Weekend Market
Brads Weekend Market
Trinkets Weekend Market
Jewels Weekend Market
Buttons Weekend Market
Dimensional Stickers Weekend Market
Noteworthy Weekend Market
Combo Sticker Weekend Market
Chipboard Weekend Market
Cardstock Sticker Camp-a-Lot

Sisters
By Samantha Wright

 Designer tip: Take inspiration from the patterned papers you are using. When tasked with this banner assignment, I knew which paper collection I'd like to use, so it was just a case of brainstorming and "paging through" my paper stack when I noticed the row of little bird cages on the Cut Out sheet and that sparked my banner idea! The large bird cages also hint at the banner idea!


 Bo Bunny Supplies:
Double Dot: Coffee Flourish
Patterned Paper: Maree, Jamayka, Allie, Cut Outs/ Little Miss
Stickers: Sweet Girl Cardstock Sticker
Jewels: Little Miss
Ribbon: Double Dot

My Guys 
By Jolanda Meurs

 Tip: I have used Glossy accents on my stickers to give them extra dimensions.


 Bo Bunny Supplies:
Patterned Paper: Daycream, Little Things, Sweetness/ Hello Sunshine
Stickers: Combo Stickers Hello Sunshine
Jewels: Hello Sunshine
Trinkets: Hello Sunshine
6 x 6 paperpad: Hello Sunshine

Adam's Room Banner
by Julie Wolek-Tucker

Designer Tip: The great thing about making a banner is you have room to add anything you want! At each end of my banner, I had room to add the trees I cut out of the 12x12 Camp-A-Lot sheet


Bo Bunny Supplies:
Camp-A-Lot Mini Album
Camp-A-Lot Combo Stickers
Camp-A-Lot Dimensional Stickers
Camp-A-Lot Chipboard
Camp-A-Lot 
Camp-A-Lot Cutouts
Camp-A-Lot Rub Ons

Alrighty then.... I "BAN" each of you to your scrap room until you
come out with a fabulous banner project.  Make sure you share it with us on facebook.
You guys are the best in the world!