
There really is no question. We say ALTER AWAY!!
Today, our amazing Design Team has altered all kinds of fun projects for you to join in and try...
 Christmas Home Decor
Designer: Agniezska Piskorz
Supplies: Noel iCandy Chipboard, Noel iCandy Brads, Noel Chipboard,
Noel Cheer, Noel Ornaments, Holly Berry Wraps
 I {heart} You Frame
Designer: Sarah Eclavea
Tip: Buy an unfinished frame and paint with acrylic paint to match the colors in your papers.
Supplies: Tutu dot Cardstock, Crazy Love Stripe Paper, Crazy Love Chipboard,
Crazy Love Brads, Crazy Love Dimensional Stickers

Holiday Magic Frame
Today, our amazing Design Team has altered all kinds of fun projects for you to join in and try...
Designer: Agniezska Piskorz
Supplies: Noel iCandy Chipboard, Noel iCandy Brads, Noel Chipboard,
Noel Cheer, Noel Ornaments, Holly Berry Wraps

Designer: Sarah Eclavea
Tip: Buy an unfinished frame and paint with acrylic paint to match the colors in your papers.
Supplies: Tutu dot Cardstock, Crazy Love Stripe Paper, Crazy Love Chipboard,
Crazy Love Brads, Crazy Love Dimensional Stickers
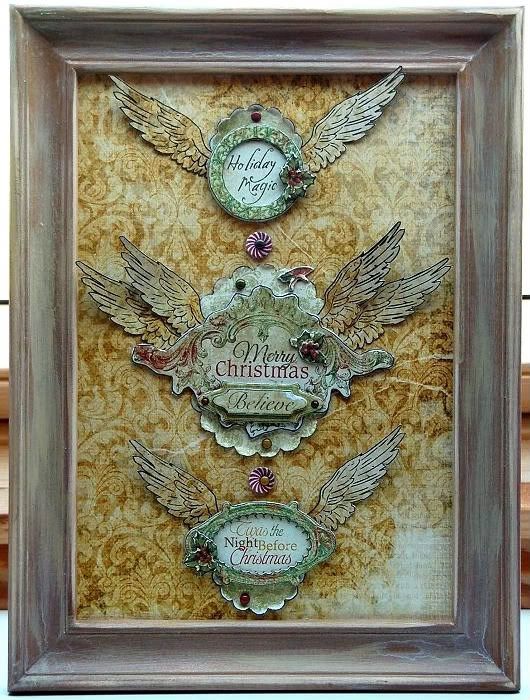
Holiday Magic Frame
Designer: Christiane Muller
Supplies: Noel Memories, Noel Holly, Noel I Candy Brads, Noel I Candy Chipboard Stickers, Noel Chipboard, Cambridge Clearly Stamps
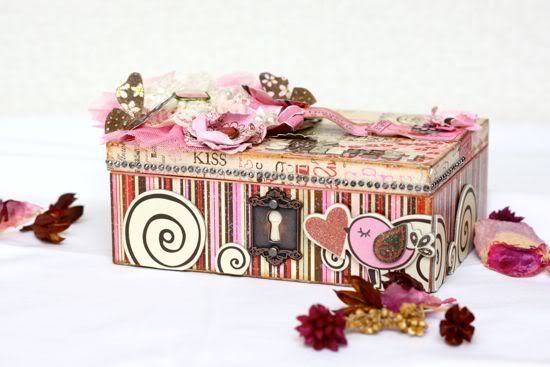


Altered Box & Mini Album
Designer: Tomoko Takahashi
Hint: I stamped the paper flowers with Crazy Love Stamp, crumbled them, and put together with a brad.
Supplies: Crazy Love Conversation, Crazy Love Dot, Crazy Love Happy Together, Crazy Love More Than Words, Crazy Love Story, Crazy Love Stripe, Persuasion Blooms, Crazy Love Cut Outs, Crazy Love Noteworthy, Crazy Love Chipboard, Pink Rose Wraps, Pink Parfait Petals, Crazy Love Rub-on,
Crazy Love Layered Chipboard, Crazy Love Brads, Crazy Love Stamp
Other Supplies: Tim Holtz Keyhole, Prima Flower, Mod Podge (Glitter), Butterfly Stamp, Stickles (Waterfall), Rhinestones, Pin, Pearls, Glossy Accents, Lace, Acrylic Paint (Pink), The Cinch Bindering Tool, Wire Binders (White), Scallop Scissors, Rose Accent, Ink(Black, Brown)


Treat Bag
Designer: Janis Medina
Supplies: Whoo-ligans Stripe, Whoo-ligans Monsters, Whoo-ligans Spiders, Whoo-ligans Batty
Whoo-ligans Boo, Whoo-ligans Combo Sticker, Batty for Candy Cardstock Stickers, Bo Bunny Ribbon
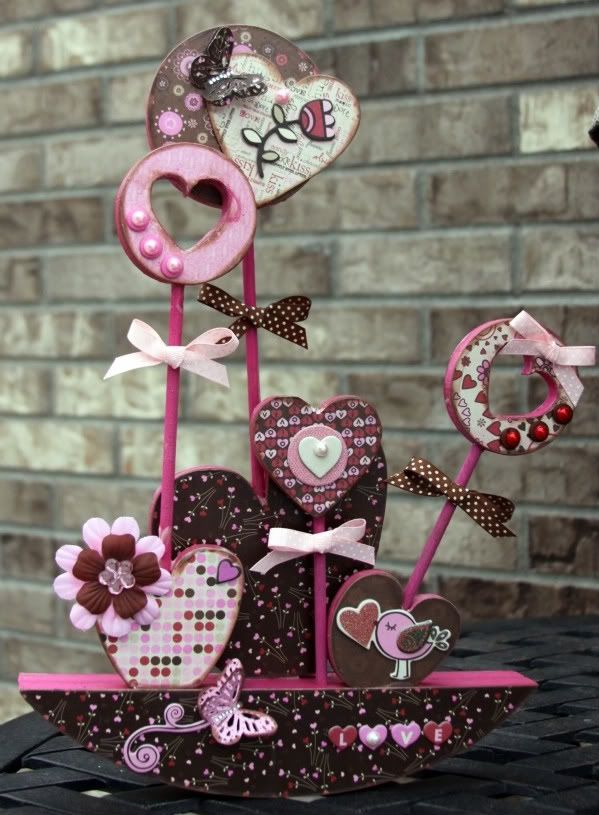
Lollipop Hearts
Designer: Debbie Sherman
Supplies:Bo bunny Crazy Love Collection 6x6 Paper Pad, Kisses, Stripe, Happy, Together, More Than Words, Dot, Conversation, Layered Chipboard, Crazy Love Chipboard
Bo Bunny Tutu Dot and Chocolate Ribbon, Bo Bunny Flowers - Alissa and U Bug Me, Buttons
Additional items
Shelf Decor, Adhesive Pearls, Butterfly Punch, Modge Podge
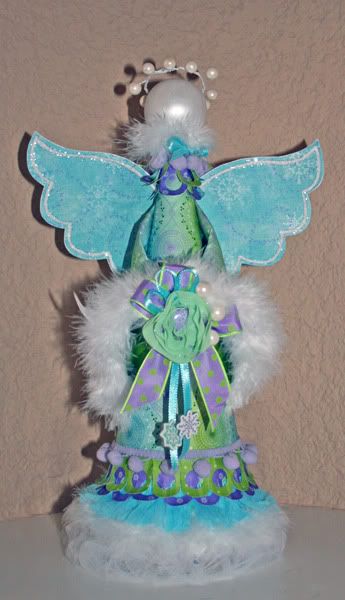
Winter Angel
Designer: Robbie Herring
Designer Tips: This was made with a paper mache tree topper cone.
To make the wooden head stay on well, I cut the top off to give myself more of a base to adhere it to.
The arms are paper that is draped and glued over two pipe cleaners to help hold it's shape. Give your paper a very light spray of water to shape the curve of the arm and then hide the ends behind the wings on the back. Use hot glue to add the boa to the edges of the 'sleeves'.
To make the floral 'arrangement' that the angel is holding, I adhered everything to a circle of paper and then glued it all at once where her hands would be. The chipboard snowflakes are held to the ribbon by using two that are the same size and sticking them together with the ribbon in between.
Supplies Used: Winter Joy Bundled, Winter Joy Brrrr, Winter Joy Magic, Winter Joy Stripe, Winter Joy iCandy Brads, Winter Joy Chipboard, Winter Joy Purple Pom Pom Wrap, Winter Joy Green Scrunch Flowers
Other Supplies Used: Michaels Ribbon, Feather Boa, White Tulle, Tulip Dimensional Paint, Martha Stewart Glitter
The arms are paper that is draped and glued over two pipe cleaners to help hold it's shape. Give your paper a very light spray of water to shape the curve of the arm and then hide the ends behind the wings on the back. Use hot glue to add the boa to the edges of the 'sleeves'.
To make the floral 'arrangement' that the angel is holding, I adhered everything to a circle of paper and then glued it all at once where her hands would be. The chipboard snowflakes are held to the ribbon by using two that are the same size and sticking them together with the ribbon in between.
Supplies Used: Winter Joy Bundled, Winter Joy Brrrr, Winter Joy Magic, Winter Joy Stripe, Winter Joy iCandy Brads, Winter Joy Chipboard, Winter Joy Purple Pom Pom Wrap, Winter Joy Green Scrunch Flowers
Other Supplies Used: Michaels Ribbon, Feather Boa, White Tulle, Tulip Dimensional Paint, Martha Stewart Glitter
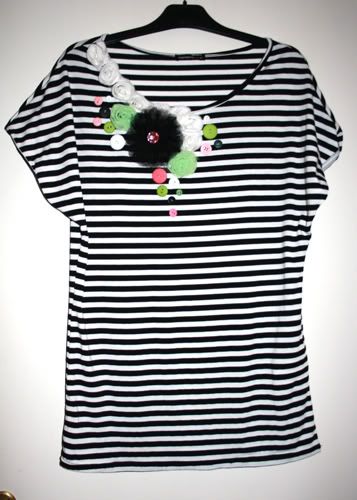
Altered T-shirt
Designer: Mahlin Wiggur
Supplies: Secret crush Petals, White rose trim, Green scrunch, assorted bo bunny buttons
Mahlin said: I went shopping for clothes the other day and I realize that there are alot of scrappy -looking flowersbeing popular in fashion right now.. and I got this bright idea to alter my top by myself using the gorgeous trims and petals. I just sewed them on.. Both the trim and the cute petals are so easy so stitch down.
Thanks for stopping by and make sure you share your altered projects with us! We can't wait to see what you come up with!


