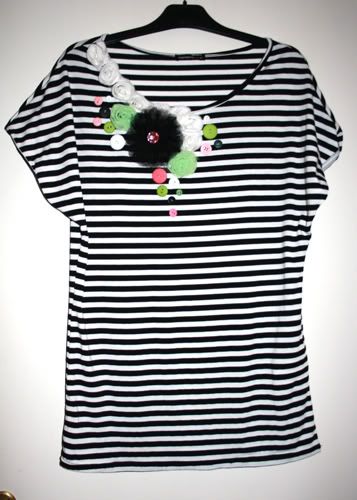
One of the new products we released this CHA was our new and improved petals.
They are so stylish and so fun, and can be used in so many different ways.
Check out what our design team has created with them.
Winter Joy Mini Album
Designer: Tomoko Takahashi
Supplies Used: Winter Joy, Winter Joy Dot, Winter Joy Peace,
Winter Joy Stripe, Winter Joy Snowfall, Winter Joy Snow Angels,
Winter Joy Magic, Noteworthy Winter Joy, Winter joy iCandy Dementional Stickers,
Winter Joy Rub-ons, Winter Joy Combo Sticker, Winter Joy 12" Chipboard,
White Rose Trim, Cream Gardenia Petals
Other Supplies: Distress Ink, Mist, Ribbon, Book Ring, Acrylic Paint, Gliter
Daddy
Designer: Gabrielle Pollacco
Supplies Used:Cambridge iCandy Brads, Noel Wraps, Wine Double Dot,
Cambridge Crown Die Cut, Cambridge Crest, Camgridge Post,
Cambridge Cut Out, Charcoal Knit Petal's
Other Supplies: Chalk Inks, White Gel Pen, Stickles, Crystal Flourish.
Designers Tip: I just love a nice piece of 'journal' paper like the Cambrige 'Post' paper.
I like to use it for all sorts of things. On this page I punched blooms from it and tinted
them with a little ink (I'll be posting a tutorial on making blooms coming up this month)....and
I like to change up a neutral paper like this with a little ink and masking. For my Circle
design on this page, I cut a circular piece of the 'Post' paper. I then cut out a few
floral designs with my die cutter. You can use a flower punch or even hand-cut a simple
flower design for this. The grass I just cut from some plain white paper with scissors.
I attached it to the paper with some removable sticky tape. Then just dabbed on a variety of chalk inks.
Here I used a dark brown & green chalk ink. I then removed the pieces of paper (discarded them)
and I'm left with the floral design. To dress it up a little more I lightly brushed the flower
design with some Wheat color chalk ink and some Rose color ink....and the leaves with a
touch of bright green. Don't worry about being exact, the colours melding into each
other gives the piece a nice water-color effect.
Sugar & Spice
Designer: Mireille Divjak
Supplies Used: Olivia, Olivia Strip, Olivia Nectar, Olivia Cameo Die Cut,
Cream Gardenia Petals, Olivia iCandy Brads, Olivia 12" Chipboard,
Olivia Rub-Ons, A Mothers Love Cardstock Sticker
Other Supplies: Punch, Ink, Stickles, Glossy Accents
Designer Tip: I added some curls for extra dimension under the flower.
These are actually very simple to make. Cut a very small strip of paper and
wrap it around a needle. Gently pull and adhere the last part under the flower.
Tittut
Designer: Mahlin Wiggur
Supplies Used: Olivia 12" Chipboard, Olivia iCandy Brads, Olivia Cream Gardenia,
Olivia Chocolate Ruffle Wrap, Chiffon Double Dot, Buttercup Double Dot,
Learning Curve Cut Out, Whooligans iCandy Chipboard, Whooligans Dot, Whooligans Rahh,
Whooligans Stripe, Whooligans Combo Sticker, Whooligans Chipboard,
Winter Joy Green Scrunch, Winter Joy Bundled, Winter Joy iCandy Stickers
Designer Notes: I just love mixing things up and for this layout I've used products from
no less than 4 of the new collections. That is one of my favorite things with BoBunny,
every single collection is so well co-ordinated but they are also so easy to combine with
each other...Just look for the colors you love.
Tittut translates to Peekaboo and the journaling reads; Playing peakaboo has
been one of your favorite things to play since you were real little you still love doing it.
Moments
Designer: Tomoko Takahashi
Supplies Used: Olivia, Olivia Ambrosia, Olivia Cashmere, Olivia Dot,
Olivia Honeydew, Olivia Moonlight, Olivia Mums, Olivia Nectar,
Olivia Stripe, Olivia Cut Outs, Coral Double Dot, Olivia 12" Chipboard
Cream Gardenia Petals, Olivia iCandy Stickers, Olivia iCandy Chipboard,
Olivia iCandy Brads, Chunky Charms, Assorted Flowers
Other Supplies: Alphabet Stickers, Sewing Needle, Alcohol Ink (Gold),
Little Glass Bottle, Other Flowers and Leaves, Grungeboard,
Pearl, Stickles, Wepia Accents
Puzzle Time
Designer: Samantha Wright
Supplies Used: Learning Curve Stripe, Learning Curve Letters, Learning Curve Dot,
Learning Curve iCandy Dimentional Stickers, School is Cool Cardstock Sticker,
Learning Curve Combo Sticker, Learning Curve 12" Chipboard, Harvest Double Dot,
Double Dot Ribbon, Assorted BoBunny Buttons
Other Supplies Clipboard, Chalk Ink, String
Best Times
Designer: Frances Sylvia
Supplies Used: Olivia Moonlight, Olivia Baby's Breath, Olivia Stripe,
Olivia Ambrosia, Olivia Cut Outs, Olivia Combo Stickers, Olivia 12" Chipboard,
Olivia iCandy Brads, Almond Double Dot, Antique Lace Petal, Chiffon Chunky Chips
"Witching You..." Treat Box
Designer: Patti Milazzo
Supplies Used:Green Scrunch Petal, Whoo-ligans Dot, Whoo-ligans Spiders,
Whoo-ligans Monsers, Whoo-ligans Boo, Whoo-ligans Wrap,
Whoo-ligans iCandy Brads, Whoo-ligans iCandy 3D Stickers,
Whoo-ligans 12" Chipboard, Boo Crew Buttons and Bling
Other: You cand find the shoe template on the "Skip to My Lou" website here
The Bride
Designer: Janis Medina
Supplies Used: Olivia Cameo Die Cut, Olivia Ambrosia, Olivia Mums,
Olivia Baby's Breath, Olivia Nectar, Olivia Stripe, Olivia Stickers,
Olivia 12" Chipboard, Olivia iCandy Brads, Olivia Rub-Ons,
Olivia Wraps, Olivia Cardstock STickers, Cream Gardenai Petals,
Antique Lace Petals, Assorted BoBunny Flwoers
Designer Notes: I placed BoBunny Petals on the center of my Gardenias
for some pop of orange on my flowers. I outlined my Olivia Cameo Die Cut
paper with gold paint. Instead of air drying, I heat gunned it for a more
textured look. I also applied Opal Dust on the edges of my Gardenia Petals and
Mica Flakes on my Swirl Chipboard for added shimmer and texture
Life
Designer: Luzma Bruna
Supplies Used: Chiffon Rose Trim, Olivia iCandy Stickers, Cream Gardenia Petal,
Olivia iCandy Brads, Olivia Dot, Olivia Moonlight, Olivia Ambrosia, Olivia Nectar,
Olivia 12" Chipboard, Chiffon Double Dot
Altered Paperback Book
Designer: Robbie Herring
Supplies Used: Olivia Stripe, Olivia Honey Dew, Olivia Cashmere,
Olivia Dot, Clover Double Dot, Cream Gardenia Petals, Olivia 12" Chipboard
Other Supplies: Florists Foam, Glimmermist,
Tulle-Copper Shimmer, Royal Coat Decoupage Finish
Designer Note: To add an overall antiqued look, simply give
your entire project a few light sprays of Glimmermist
So lets hear it. Whose inspired?!?! I know we are.
Hope you have a great Wednesday and thanks for stopping by!