

After all the requests for simple layouts and the feedback from our idea to show you how to start with simple and take it a few steps further, we're back with Step it Up! this Friday!
The team has shared lots of the little details that give their pages that special 'something'.
Let's take a look!
Flytta/Moving
Mahlin Wiggur
Mahlin Wiggur
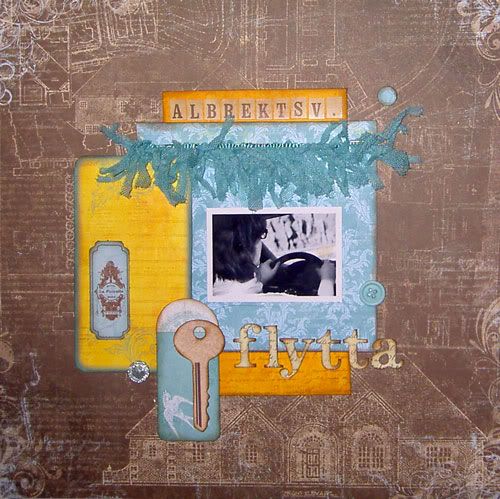
Here is the simple version of Mahlin's layout. Perfectly beautiful but...
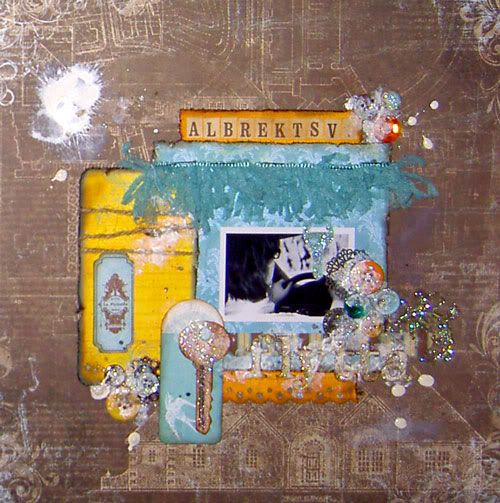
Look what starts to happen as she layers on more embellishments, paint and glitter!!
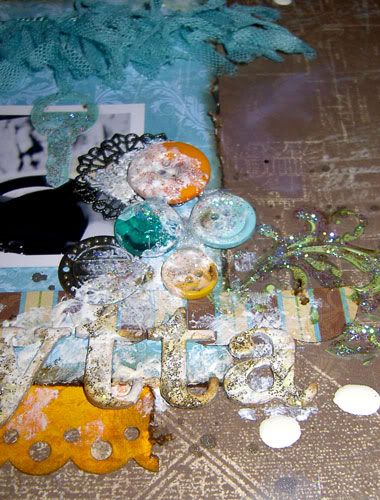
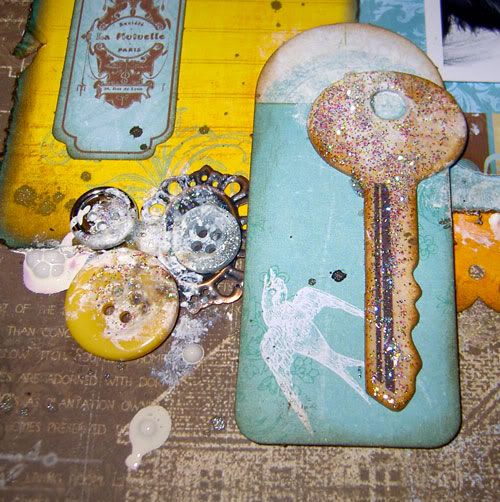
Here a couple of close-ups:
Bo Bunny Supply list :
The simple version:
Patterned Paper: Blaze, Cut outs/ Forever Fall, Front door, Picket Fence /Welcome Home.
Combo Stickers: Welcome Home
Noteworthy: Welcome Home
"12 Chipboard: Et Cetera, Welcome Home
The simple version:
Patterned Paper: Blaze, Cut outs/ Forever Fall, Front door, Picket Fence /Welcome Home.
Combo Stickers: Welcome Home
Noteworthy: Welcome Home
"12 Chipboard: Et Cetera, Welcome Home
What she added:
Rubons: Welcome Home
Buttons: Forever Fall, Welcome Home
Trinkets: Blitzen
Project Kit: Welcome Home
and some paint and glitter...
Buttons: Forever Fall, Welcome Home
Trinkets: Blitzen
Project Kit: Welcome Home
and some paint and glitter...
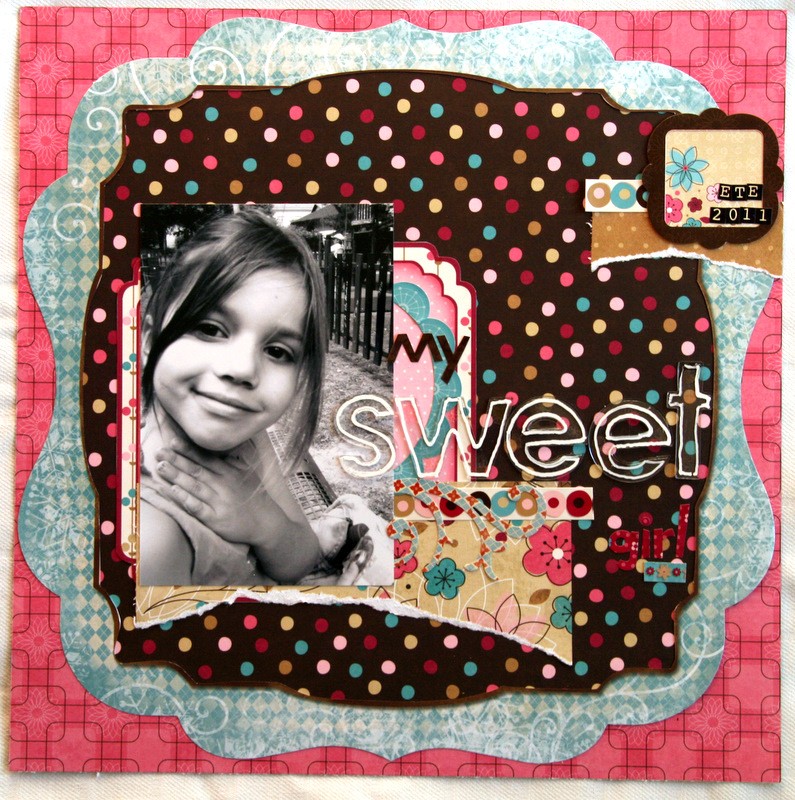
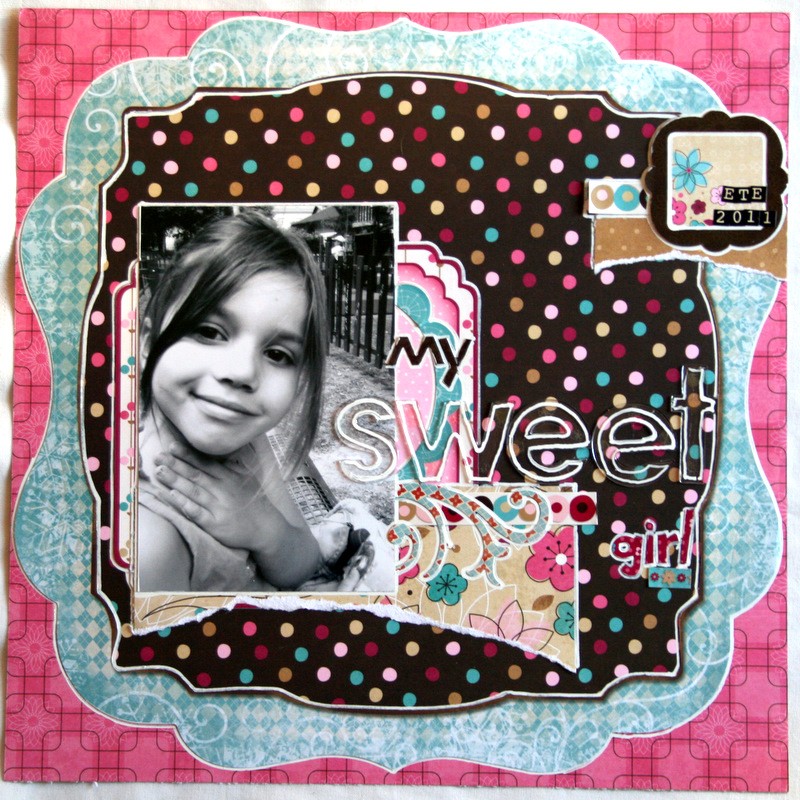
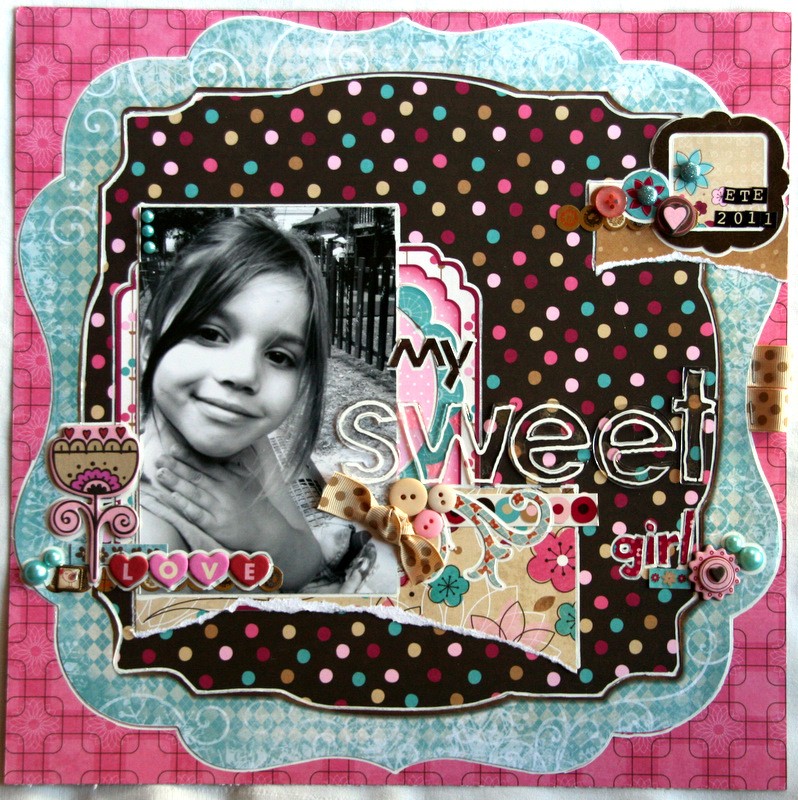
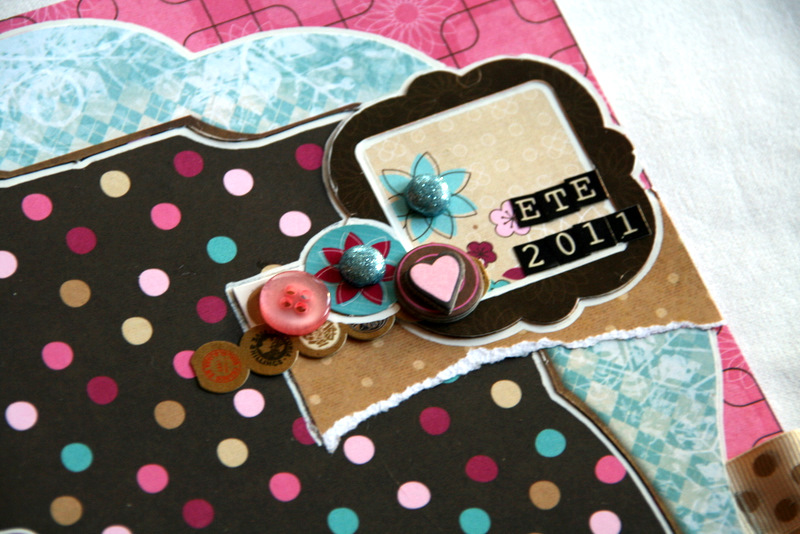
My sweet girl
Michele Beck
Michele Beck
First, this is the simple version, papers, title/journaling/date and photo. Perfectly adorable!
When Michele outlined everything on her layout with a white pen corrector, look how it makes the layout brighter:
And finally, she added some embellishments like ribbon, brads and chipboards.
Here are a few of Michele's close-ups:


Bo Bunny Supplies Used:
Patterned papers: Sweet Tooth Indulge; Sweet Tooth; Sweet Tooth Delish; Blitzen Die Cut
Brads: Sweet Tooth
Chipboards: Crazy Love 12x12
Ribbon: double dot ribbon decaf ribbon spool
Stickers: Sweet Tooth CS stickers; Sweet Tooth Combo sticker; Welcome Home CS sticker; Blitzen CS sticker; Et Cetera combo sticker
Jewels: Ad Lib
Alpha: chunky chips alpha clear
Brads: Sweet Tooth
Chipboards: Crazy Love 12x12
Ribbon: double dot ribbon decaf ribbon spool
Stickers: Sweet Tooth CS stickers; Sweet Tooth Combo sticker; Welcome Home CS sticker; Blitzen CS sticker; Et Cetera combo sticker
Jewels: Ad Lib
Alpha: chunky chips alpha clear
Picks of the Patch
Robbie Herring
I couldn't resist pulling out my Whoo-ligans for this cute pumpkin patch picture.
Quick, simple and prefectly acceptable.

Now add some strands of embroidery floss as extra borders and around the picture.
Next, stitch with purple thread around the Noteworthy.

Really add some impact with big flowers and buttons.
The last little detail is the dots done with slick paint.

Here are a couple of close-ups:


Bo Bunny Supplies:
Patterned Paper: Whoo-ligans Madness, Monsters.
Patterned Paper: Whoo-ligans Madness, Monsters.
Double Dot Cardstock: Citrus Dot
Double Dot Ribbon: Orange Citrus
Double Dot Ribbon: Orange Citrus
Cardstock Stickers: Whoo-ligans Combo and Batty for Candy
Noteworthy: Whoo-ligans
Bo Bunny Buttons
We hope you are inspired to try some of these ideas! Just a few extra steps can add so much to your layouts!
Don't forget there is still time to participate in the ongoing challenges!
Have a great weekend!
Very helpful for those of us that are artisticly challenged.
ReplyDeletewonderful creations girls :)
ReplyDeleteThese are wonderful! I love seeing the transformations from simple to more elaborate!!!
ReplyDeleteOh wow, thank you so much. Layering is one of those things that I struggle with. This is going to be so helpful.
ReplyDeleteSweet projects with your amazing paper and supplies. New follower here on gfc and on fb.
ReplyDeletehttp://blog.neatthings-boutique.com
You've hit the nail right on the head! I love seeing a progression from simple to amazing! Some days, I go for the K.I.S.S.-style. Other days, I want to go all out!
ReplyDeleteThese are perfect examples and I love to see you have a regular Friday feature with this in mind! Thanks for listening to your readers :-)
Ohhhhhhhhhhhh I love love love how everyone stepped it up! These are just GORGEOUS! :):):):):):):):):):):)
ReplyDeleteGreat idea :) These are wonderful!
ReplyDeleteThe button concept is outstanding, but i suggest you to use it in a plane texture next time.
ReplyDeleteprint VIP cards
Printing on Plastic
What a wonderful tips! very creative. I got lots of inspiration.
ReplyDeleteThanks for sharing!