Showing posts with label Welcome Home. Show all posts

Friday, August 2, 2013

Hi friends,
For the next few blog posts, we want you to meet our new Design Team and one of their projects they used for their audition
and get to know them a little better...  so join us with your favorite beverage
and meet your new friends.  Don't you love that scrapping brings us together as women from all over?  It's one of my favorite things.
My name is Agnieszka but in the scrapbooking world I go by Bellaidea. Together with my husband - I'm still dating him - we're taking care of our two treasures - a Girl and a Boy.
I love traveling, taking photos, African bush aroma, Pavlova dessert, old books, doilies, trips with friends to Italy, evenings by the fireplace, reading books to my children (even though they can read by themselves). I enjoy audiobooks during long distance drives, praising people for their talent and creativity.
I scrapbook for many reasons! These are to preserve memories, to make my kids remember I always care about them, to have MY time when I need it, to keep in touch with all my scrap-friends all over the world. My style is eclectic, 
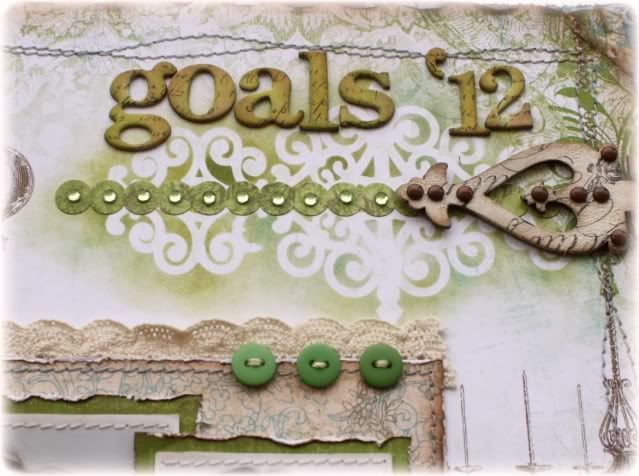
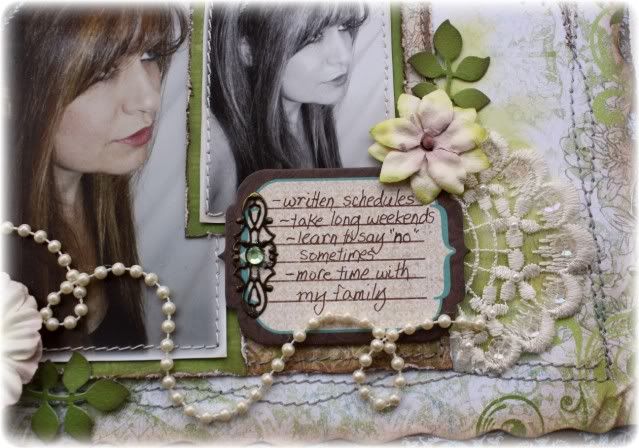
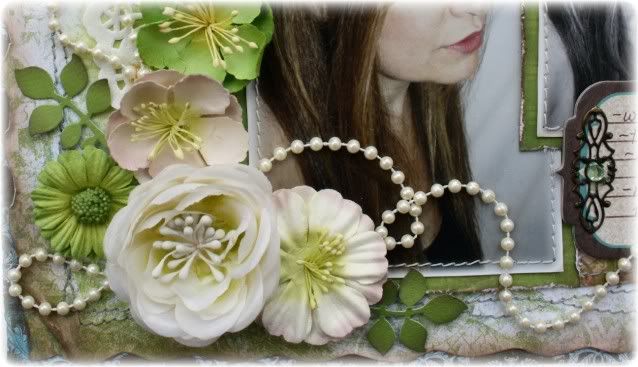
romantic, with a touch of whimsy. My projects are influenced by mixed media. You will find the following on many of my projects: lace, chipboard, doilies, turned corners, fussy cutting, etc... I never forget the most important element of the page which is the photo and a story. Sometimes I hide my journaling when it`s very personal.
Over the last couple of years I have had the pleasure to design for many blog challenges and companies from USA, Austaralia, Scandinavia, Poland, Canada.
I am very proud to design with some "old" and new friends for BO BUNNY now.

I cordially invite you to my blog, Bellaideascrapology where you can find out what I do late at night when the rest of my family is sleeping!


Well hello there my name is Amy Voorthuis I’m 35 of age. I live in The Netherlands with the love of my life Jeroen and our handsome son Kevin (8).
I love to be creative in every way I can, seeing my job as an optician I need to be kind of creative anyways…..fixing all those glasses Emoji
I’ve been scrapbooking for over 9 years now and I love it. I got introduced with scrapbooking by my aunt Ellen who lives in the sunny state Florida…..
I think she did an awesome job because I’m hooked for life. BoBunny is one of the first companies I bought papers from (I used to only scrap on white papers) and I feel very blessed they have chosen me to be on their 2013-2014 Design Team. I can't wait to get creative and I hope you all enjoy my work Emoji


I 
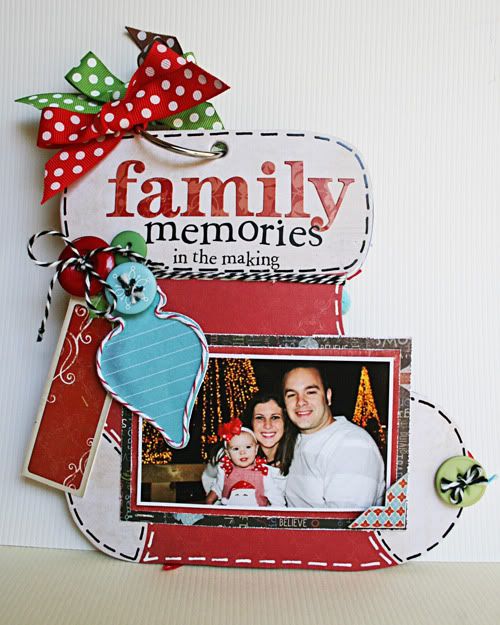
am a 32 year old scrapper from Toowoomba, Queensland, Australia. I am married to a very understanding husband who pushes me all the time to persue what I love. I have been scrapping now for 10 years and my 2 children are my main muses'. I am passionate about scrpbooking and love capturing and recording the everyday and special events. 


I am a happy, loving and devoted mother, a giving wife and very happy scrapper and paper hoarder! Pretty papers are my nemesis!!
I live in sunny Johannesburg, South Africa and paper creating is my absolute passion!

My name is Evgenia Petzer, i am 28 years old, Russian girl who now lives in South Africa and loves it! I love to make cards, layouts and sometimes altered items. My style is more feminine, always detailed and layered. I also love photography and try to capture lots of moments of our everyday life. We have a son (who is almost 5), another baby on its way and a cute yorkie and a ginger cat.
And some random facts about me: i drink about 20 cups of green tea every day, i have a constant huge mess in my scraproom, i am addicted to sunshine, my favourite bo bunny collection of all time is Country Garden and i am in love with shabby chic style.


I know you all are feeling my pain when I tell you 
it was so hard to choose winners, right?
Everyone's work is FABULOUS!  
I'm so excited for them to get the newest lines and
start creating. We all are going to be blown away!
Hope you all have a EXCELLENT day!

Tuesday, July 24, 2012

♪ ♫ I wanna STAMP with somebody.... ♫ ♪

♪ I wanna use the INK with somebody ♫  ♪

It's amazing what you can do with stamps.
I often forget to use my stamps, and then the girls go and do
amazing things with them and I'm all gung-ho to get mine out.

Mother's love lasts a lifetime
by: Tomoko Takahashi


 Gorgeous, right?
 Love all the detail.  A little detail goes a long way!
 Bo Bunny Supply List:

Patterned Paper: Alice, Brenna, Jaquoya, Maree, Cut Outs/ Little Miss

Stickers: Combo Sticker/ Little Miss

Rub-ons: Little Miss

Chipboard: Little Miss
Stamps: Ambrosia, Little Miss

2 handen op 1 buik
Romy Veul

 Bo Bunny Supply List:

Patterned Paper: Dreams, Flourish, Front Door, Porch Swing, Portrait, Stripe/ Welcome Home; Cut Outs, Glimpse/Country Garden

Stamps: Et Cetera, Timepiece

Rub-ons: Country Garden

Noteworthy: Country Garden
Stickers: Welcome Home Combo Sticker

Designer Tip: On this layout I wanted the stamped clocks to be the main embellishments on my layout. To make sure they really catch the eye, I stamped them on a piece of a paper, cut them out and then layered them using foamtape. I added a few circles that I cut out from the Country Garden 'Glimpse' paper, a banner and three fussy cut butterflies to finish off my layout. As you can see, you don't need many pre-made embellishments to achieve an embellished look. A few cut out and stamped images will do too.

This is a great tip from Romy!  Just sayin'... I tried to google translate the title, and it must be a dutch saying cuz the literal translation is " 2 hands on 1 belly."  So Romy, will you tell us what it means and where the saying comes from pretty please???

Card Kit Personified
by Debbie Sherman

 I love how easy it is to add to the card kits.
You can make them as simple or as complicated as you want.
I also love that the stamps coordinate so well with the line.


 It's so awesome what a little embossing powder, charm and fiber does to a card.
Designer Tip: To add a little exta to the Serenity card kit I added stamping with the coordinating stamps from the Serenity line. I embossed them with ultra thick gold powder to give the cards more texture and to make the stamping stand out from the rich colors of the paper.


I hope that song is stuck in your heads like it is mine now... ha ha
Happy Stamping and make sure to share with us!

♪ ♫ With somebody who loves me... ♪ ♫

Friday, December 30, 2011

Goals for 2012

It's another day of great ideas from the Design Team about setting your goals for 2012!

Two of the designers did beautiful pages about their goals.  Both of them are just beautiful with plenty of ideas to inspire us with our scrapbooking but also with great goal inspiration for the new year.


First up today, we have Tara. 
Tara said, "My only goal/resolution for the upcoming year is to try to calm down and relax - let the little things go. "

Relax
Tara Orr

user posted image

user posted image

user posted image

Supplies:
Patterned Paper: Rose, Dots, Enchanted/Enchanted; Sunflower, Bouquet, Cut Outs/Forever Fall
Noteworthy: Forever Fall

Today, we also have Gabrielle.

Goals 2012
 Gabrielle Pollacco

user posted image

user posted image

user posted image

user posted image

Supplies:
Patterned Paper: Welcome Home; Porch Swing, WH Dot, WH Dreams, WH Keys
Cardstock: Double dot Clover
Chipboard: Welcome Home, Et Cetera
Trinkets: Welcome Home
Bloom: Oliva (tinted with green ink in the center)
Stickers: Welcome Home Combo Stickers
Bo Bunny buttons
Butterfly: Gabrielle

We also promised to announce the winner of the Circle Challenge today.  You just have to love seeing all the wonderful pages everyone creates for these challenges!  We know that we do!

The winner is...
Rachelle Sigurdson

Rachelle used the Gabrielle Collection for this gorgeous layout!

Rachelle, please e-mail us with your address so we can get your prized out to you!


So now it's  your turn!! 

 We would love to hear about your goals for the new year! 
As always, we invite you to share your pages with us on Facebook! 


Wednesday, December 7, 2011

Focus On....Buttons!

For me, buttons are one of those things that were really a big embellishment many years ago, then they sort of faded away....but recently I've seen a resurgence of these beautiful embellishments!  More and more I see them used on layouts and off the page projects!  And not just a scattered button here or there but loads of them!  Take for example this beautiful framed decor project done by our very talented design team member Patti!  She created this incredibly cute tree using Bo Bunny Buttons!...

"Framed Button Christmas Tree"
by Patti Milazzo

Supplies:
Patterned Paper: Stockings and Patchwork/ Blitzen
Buttons: Blitzen and assorted Buttons & Bling (previous collections)
Chipboard: Blitzen 12”
 ~~~~~~~~~~~~~~~~~
Luzma used beautiful Bo Bunny buttons scattered among blooms & butterflies for a truly gorgeous border on her heart-warming page of herself and her daughter....

"Living My Happily Ever After"
by Luzma Bruna


Supplies:
Papers Welcome Home collection
Buttons Welcome Home collection
Sticker Welcome Home collection
Jewels Welcome Home collection
Chipboard Welcome Home collection
~~~~~~~~~~~~~~
Aren't these projects beautiful?!  And Bo Bunny has GORGEOUS buttons coordinated for each of their amazing paper collections, so you'll always have the right button embellishment to go with a project!

TIP:  Here is a little tip about using buttons on a project!  Take the time to either stitch it on the project/page or use some twine or string in the button holes.  It goes a long way to adding a beautiful 'finished' look to your project!  Believe me, I've tried both ways and always find I like the look a hundred times better when I take the time to add the twine or thread!

Have you tried using buttons on your projects recently?  Give it a go, you'll find your pages taking on a new and fun look to them! xo

Monday, November 28, 2011

Blitzen Mini Album

Have you checked out the Bo Bunny Mini Albums?  

They are so terrific!  The different shapes of them make them so fun and I LOVE that they are ready to decorate!!  Isn't it great to start with perfectly coordinated minis that are ready to decorate? 

GOTTA LOVE THAT!

I chose to use the Blitzen Album for these precious pictures of a trip to Santa's Wonderland.

Santa's Wonderland
by Robbie Herring

There are a lot of pages in this mini, so I didn't do close-ups.  I'll be sharing some tips after each of the pages though, so just keep scrolling along.

user posted image

Tips: 
To make the scalloped border stickers follow the curve of the tree, I just used powder to get rid of the sticky backing and then gave a little pinch in the center of each scallop.
Attaching ric rac and trim is easy when you use the right glue!  Use Fabri-Tac by Beacon to attach.  It dries clear and it dries fast! 

user posted image

Tip:
You can see from this picture that there are a LOT of things going on with this album.  Sometimes, using a lot of layers, trims, bows and pop dots can make your album a bit difficult to handle and turn correctly.  If that is the case, the fix is simple!  Just get a larger ring to use at the top. 

user posted image

Tip:
To get the nice white outline on this page, I first used a white Souffle Pen and then added a thin line of glitter glue right over the top.

user posted image

Tip: 
Use foam dots to get the layers on the flower.  I cut and extra flower to give myself 3 layers.  The poinsettias are included in the awesome Noteworthy package.
I only put in four holes, one at each corner, for the black floss border.  Just use tape on the back to keep everything flat. 

user posted image

Tip:
Think about layering similar images.  I really liked how adding the chipboard reindeer using foam dots added interest to this page.  Using foam dots also allowed me to layer the twine and flourish chipboard more easily.

user posted image

Tips:
Use Souflee and Glaze pens to draw on stitches.  I also backe the large tag with patterned paper, so it would look nice when you flip to the next page.
Mix up letter stickers with rub-ons to easily tell the story.

user posted image

Tip:
To make the Blitzen letter stickers show better on the striped background, I stuck them to some lightly inked chipboard letter stickers from the Et Cetera collection.  The fonts are the same, but the size is a bit different so it worked perfectly.

user posted image

Tip: 
The die cut is from the Noteworthy.  Because it is the same on both sides, I just folded it in half so that the other side would look nice, too! 
I made a hole through the album page to attach the brad.  You will see on the other side that I cover the hole with a bow.

user posted image

Tip:
You can see the Noteworthy behind the wreath and see how the bow covers up the hole and the prongs on the brad.

user posted image

Tip:
To attach the twine, just pull up on the heart part of the layered chipboard, tie the twine and use a touch of glue to secure the heart back in place.

user posted image

Tip:
Why not use lots of different alphabets to tell part of the story?  I used Blitzen and Welcome Home stickers.  I also used Blitzen Rub-ons and a couple of misc. rub-ons, too.

user posted image

Tip:
Tie on little extras to the bottoms of bows.  Here I used a little Christmas heart and in other places, I used jingle bells.

user posted image

 Tip:
Don't forget to finish it off!  For the backside, I just used a bit more trim and ribbon and added the date. It's a nice way to add the date or any other little details that you might not have put inside.

Bo Bunny Supplies Used:
Patterned Paper:  Blitzen
Double Dot Paper:  Wild Berry Dot, Aquamarine Dot and Avacado Dot
6x6 Paper Pad:  Blitzen
12x12 Chipboard:  Blitzen and Et Cetera
Layered Chipboard:  Blitzen
Combo Stickers:  Blitzen and Welcome Home
Stickers:  Blitzen
Brads:  Blitzen
Buttons:  Blitzen
Noteworthy:  Blitzen
Rub-ons:  Blitzen
Jewels:  Blitzen and Welcome Home
Double Dot Ribbon:  Wild Berry, Chocolate, Aquamarine and Kiwi

Other Supplies:  Baker's Twine, Jingle Bells, Ric Rac, Pom Pom Trim, Misc. Word Rub-ons.

We invite you to share your mini's and other projects
with us on Facebook! 
We always love to she what your are doing with Bo Bunny!

Thanks for dropping by!

Thursday, November 10, 2011

Unique Ways to Say Thank You

For today's post we asked the very talented Debbie Sherman who always makes the most beautiful items to come up with a unique way to say thank you.  Sometimes it is so much fun to think outside the box and let your creative energy free to try different things and although a standard Thank you card is always well received, something special you have thought up and made especially for the person you are saying thank you too will be even more meaningful and lets not forget a whole lot more fun for you to make! 

For her unique way to say Thank You Debbie created this beautiful banner using Welcome Home and Gabrielle! 

Thank You Banner
Designer :  Debbie Sherman


Bo Bunny Supplies Used:
6x6 Paper Pads : Welcome Home; Gabrielle
Chipboard : Gabrielle
Jewels : Gabrielle

All I can say is WOW  how gorgeous is that banner!  The colours are so beautiful together and it is just so elegant I am sure anyone would adore it and be so touched that you had made such a beautiful item to say thank you to them!  

So what unique items have you made to say thank you to people?  Do you have other unique ideas for this topic?  Please share them with us and if you have any items you have made please share them with us on our Facebook page as we would love to see them!

Can I also use this opportunity to say Thank You to all the wonderful Bo Bunny fans you are all amazing and the best fans ever! :)