Hello Gift Bag by Lisa Novogrodski
I love to come up with different ways to use products. How many ways can I use the BoBunny kraft bags? Here I created a gift bag with the plain kraft bags, then I layered two bags on the front. The first bag is adhered to the front and you are able to open it as the flap wraps around the back. You can use this for a gift card or treat. The second bag I layered over the first and left it open as a pocket on the front to slip a card or tag in.
I also used the kraft bags to create a rosette in the center of my bow as well as cutting strips of the bag itself to create my bow.
Hello Tag- Lisa Novogrodski
This little tag fits perfectly in the layered pocket on the front of the gift bag! A simple tag that acts as a card and can be saved by the recipient.
The tag was created by tearing off pieces of the Kraft Dot Bag and mixing it up with stamps, stickers, washi tape and ink!
Here is a close up of the back of the tag. This tag slips right in the pocket to complete your gift set.
BoBunny Supplies:
Pattern Paper: Somewhere In Time, Antiquity, Timeless, Evening Mist, Elegance/ Somewhere In Time
Kraft: Dot Gift Bags, Plain Gift Bags, Wood Shapes Elegant, Wood Keys and Butterflies
Brads: The Avenues
Jewels: Pop Quiz, Mistletoe, Modern Miss
Combo Sticker: Somewhere In Time
Stamps: Captured Stamp, Stitches Stamp, To The Point Stamp
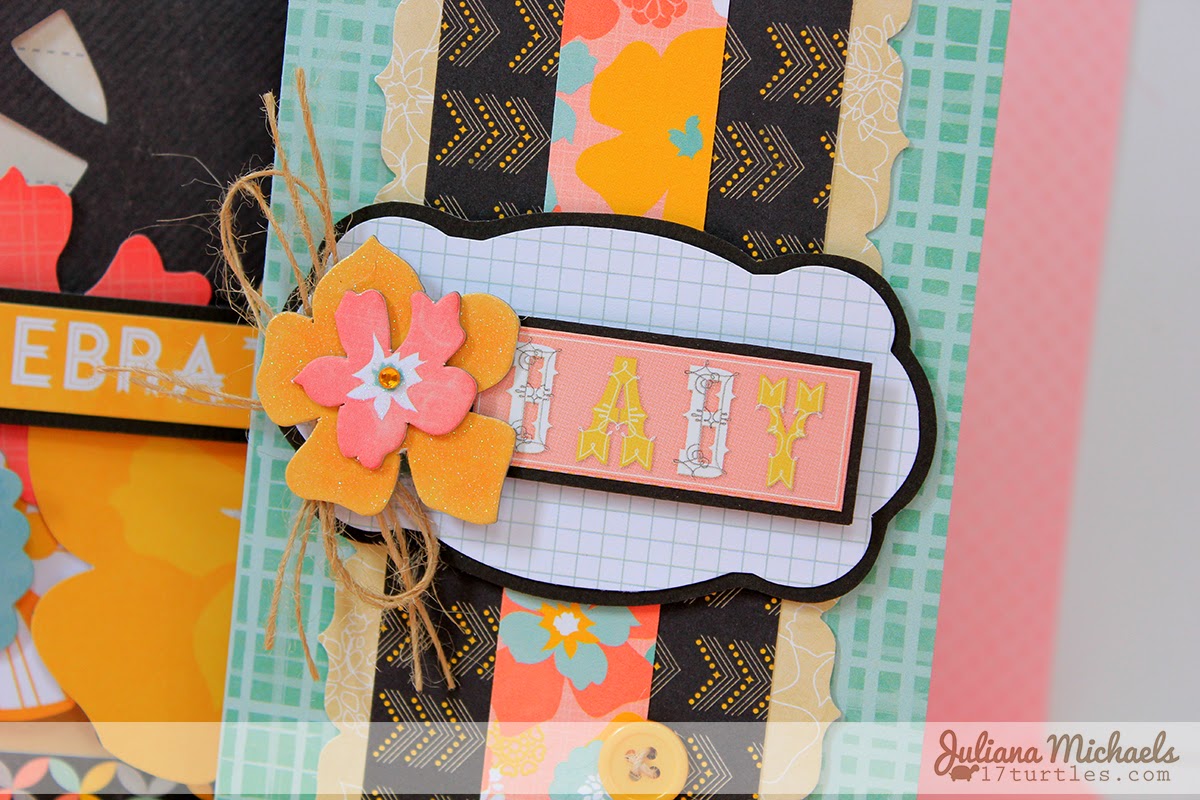
Welcome Baby Card by Juliana Michaels
The BoBunny Kraft Bags come in a wide range of patterns, however, I thought it would be fun to pull out the Plain Kraft Bags and personalize them with some of the new BoBunny stamps. I used one Kraft bag to create an envelope and I used another one to create a gift bag. I choose to create a baby card and envelope along with coordinating gift wrap to give to my next door neighbor who is due with a baby girl in December!
The card was created using paper from the 6x6 Baby Bump Paper Pad. I created the embellishment that I used on the front of the card by layering a Noteworthy shape and the Baby sticker on black cardstock. To create added dimension, I adhered them to my card using double sided foam tape. I then added the floral shaped chipboard, jewel, twine and buttons.
The envelope is a Plain Kraft Bag, that I stamped with one of the small button stamps from the Stitches Stamp Set. I then selected a label from the Baby Bump Noteworthy and layered it with some black cardstock before I attached it to the front of the envelope.
Celebrate Life Baby Gift Wrap by Juliana Michaels
To create my baby gift wrap, I selected the large Plain Kraft Bag. I again used the tiny button stamp to add detail to the bag. Next, I selected a variety of the Baby Bump Noteworthy shapes and layered them to decorate the front of the bag. I used double sided foam tape to give some of the flowers more dimension. The "celebrate life" die cut was layered on black cardstock before I attached it to my bag with double sided foam tape. I then cut a strip from the Bundle paper and attached it to the bottom of the bag.
I also cut a strip from the Oh Baby paper and cut it into a banner shape before attaching it to the top right hand side of the bag. To complete the embellishment of my bag, I added some jewels, twine, a chipboard button and some glitter glue. This was such a fun set to create and I really love how the stamped buttons added to the whole baby theme of my gift wrap.
BoBunny Supplies:
Patterned Paper: Bundle, Oh Baby / Baby Bump
6x6 Paper Pad: Baby Bump
Noteworthy: Baby Bump
Chipboard: Baby Bump Layered Chipboard
Jewels: Baby Bump
Buttons: Baby Bump
Stickers: Baby Bump Combo Sticker
Cardstock: Island Mist Dot
Kraft Gift Bag: Plain
Stamps: Stitches Stamp


Gorgeous projects here!!
ReplyDeleteGorgeous card and gift bag Lisa!
ReplyDeleteGreat projects ladies! I love the details on your gift bag Lisa and the tag is so cute too! Juliana, your stamping on the bag is a great way to alter it. Love your gift set and your neighbor will love it!
ReplyDeleteI see a couple of projects that I need to make
ReplyDelete