Showing posts with label Sun Kissed. Show all posts

Wednesday, August 18, 2010

2 page layout day!!!

Hip Hip Hooray, its another 2pg layout day!!!

Summer Fun
Designer: Carole Janson

Materials used: Sun Kissed Adventure, Sun Kissed, Sun Kissed Afternoon,
Sun Kissed Skies, Sun Kissed Splash, Sun Kissed Cutouts, Sun Kissed Combo Stickers
Sun Kissed Buttons & Blings, Sun Kissed 12x12 Chipboard,
Double Dot Brilliant Blue Cardstock, Pina Colada Popsicle Pattern Paper


Bubble Blower
Designer: Tonya Dirk
Double Dot Paprika

Material used: Block Party, Celebration, Jamboree, Note Worthy Party Notes,
Combo Sticker, 12" Chipboard,iCandy Chipboard,
iCandy Stickers, Buttons & Bling, iCandy Jewels


Designer Tip:
Use transparency to make clear bubbles and stitched them to the page.


If you enjoy getting a lot of photos on your layout, then today's post is for you!
Have a fun Thursday and don't forget to share your 2 page LO's with us!


Friday, July 30, 2010

Noteworthy Summer

Hopefully by now, you have all heard about the new Bo Bunny Noteworthy journaling tags. They are one of the latest, and in my mind greatest, additions to the Bo Bunny family of products! They are perfect for using on your layouts as a place to journal or even as a decorative element on a layout. You can also use them on cards as a place for your sentiment or even as a decorative element. But, have you thought about using them to create a mini album?! Well, that is exactly what I did for today's project! I chose to use the Noteworthy that coordinates with the Sunkissed collection after recently going on vacation to Lake Michigan. Follow along below to learn how you can create your own Noteworthy mini album!
Supplies:
Bo Bunny Noteworthy Fun in the Sun
Bo Bunny Sun Kissed iCandy Dimensionsal
Bo Bunny Sun Kissed Combo Stickers
Bo Bunny 12 x 12 Sun Kissed Chipboard
Bo Bunny iCandy Jewels
Begin by gently spreading apart the metal binding and removing the pages. There are 2 of each design so you will need to separate them and set the second set to the side. Next, take the ones that have the same shape and put them together with the back sides facing each other. Cut a piece of scrap chipboard just slightly smaller than each shape and adhere each same shape design to the front and back of the chipboard. Make sure there is no chipboard present where the holes are because these holes will be used to re-bind the album later. Now decorate each page by adding your photos, journaling and embellishments. I used the transparency page as my album cover and attached the first page of the mini to it by placing adhesive on the backside of the title strips. Once you have completed your album, it is time to re-bind it. This can be tricky, but I am going to share with you how to make this a much easier process. Begin by stacking your pages in the order you want them (I kept mine in the same order as how they appeared in the original Noteworthy with the exception of a couple pages that needed to be flipped over to keep the image right side up). Then take your last page and place it on the top with the back of the album face down on your album cover. Take then entire album and turn it upside down so that the last page is on the bottom and begin threading the metal binding through all of the holes on each page. Then gently squeeze each ring closer together trying to maintain their round shape. Once this is completed, bring the back page into its intended place and you will see how you can easily turn each page.
I hope you enjoyed learning how to create your own mini album using the Noteworthy journaling tags! Please feel free to share your mini albums or how you have used the NOteworthy journagling tags with us by either sharing the link here on our blog or on Facebook! We look forward to seeing your creations!

Friday, July 16, 2010

Layout Challenge Friday


Who doesn't love a good layout challenge?
We've come up with a fun one for you today,
and just wait until you see what the
design team has come up with!

So here's the challenge...
We challenge you, to create a layout using
the title of your favorite movie or TV show!

Let's see what our amazing team has come up with!


"Good Times"

Designer: Rita Shimniok

Products Used:
Sun Kissed Heat Wave Die Cut, Sun Kissed Adventure,
Sun Kissed Chillin', Noteworthy Fun in The Sun, Summer Sun Cardstock Sticker,
12" Sun Kissed Chipboard, Sun Kissed iCandy Brads, Buttons, Bling, Sun Kissed Combo Sticker,
Double Dot Ribbon, Aquamarine Double Dot, Stamp & Store Write On

Designer Tip: Use Cardstock Sticker words for a unique journaling block.

For water themed layouts and projects, use clear
dimentsional glaze on alpha stickers to give them the "wet look".

Add iridescent sparkle dimensional glaze to chipboard colored circles
to give appearance of splashed water droplets, do the same to buttons!

Use Stamp n Store Write On set to create a photo frame/mat - use glitter pens
to trace scrolls and circles for even more color and definition


"The Dirk Bunch"

Designer: Tonya Dirk

Products Used: Petal Pushers Green House
, Petal Pushers Blossom Die Cute
Petal Pushers Notes, Petal pushers Dot, Petal Pushers Stripe, Petal Pushers 12" Chipboard,
Petal Pushers Combo Sticker, Petal pushers iCandy Chipboard,
Petal pushers Lazy Daisy Rub-on, Petal Pushers iCandy Jewels


"While You Were Sleeping"

Designer: Rita Shimniok

Products Used: Peacock Lane Ivy, Peacock Lane Bleu, Peacock Lane Parade,
Peacock Lane plumes, Peacock Lane Tweet, Peacock Lane Cut Outs,
Simply Wonderful Cardstock Stickers, Peacock Lane Combo Sticker,
Peacock Lane Rub-on, Sun Kissed Skies paper, Summer Fun Cardstock Sticker
Peacock Lane Buttons, Peacock Lane Bling, Concord Double Dot Ribbon, Chocolate Double Dot

Designer Tip: Journal between the lines on the tree design found in Peacock Lane Bleu.


On older photos with date stamps, use embellishments to cover the date if desired.

Staple ribbon loops to a think strip of scrap paper, and cover staples with an overlapped boarder.


"America's Next Top Model"

Designer: Robyn Weatherspoon

Products Used: Peacock Lane Stripe, Peacock Lane Bleu, Peacock Lane Combo Sticker
Peacock Lane Cut Outs, Peacock Lane iCandy Brads, Peacock Lane Flowers,
Grape Double Dot, Chiffon Double Dot, Turquoise Double Dot


"Smile Like the Sun"

Designer: Sherry Wright

Products Used: Sun Kissed
Skies, Sun Kissed Adventure, Sun Kissed Dots,
Sun Kissed Die Cut, Sun Kissed Party, Sun Kissed 12" Chipboard,
Sun Kissed Combo Stickers, Sun Kissed iCandy stickers


"Mr. Baseball"

Designer: Patti Milazzo

Products Used: Block Party Jamboree, Block Party Picnic, Block Party Good Times,
Block Party Stripe, Block Party Sparkler, Block Party Celebration, Block Party Shindig,
Block Party 12" Chipboard, Block Party Combo Sticker, All About Family Cardstock Sticker,
It's A Boy Thing Cardstock Sticker, Block Party iCandy Brads, Block Party Buttons & Bling,
Summer Bash Rub-ons, Block Party Clearly Stamps, Decaf Double Dot

Designer Notes: I layered and popped up the alpha sticker title with foam adhesive.
I also applied the small start rub-ons inside and around the stamped stars.


And with every Layout Challenge Friday...

Its time to announce our Layout Challenge winner from our last sketch.

Drum Roll Please.....

Justina, who created this clever layout using Sun Kissed.

We loved how she created the splash elements, and also the fun little details.
Congrats Christine! Email us at thebobunnyblog@gmail.com so we can send you your prize!

Make sure to join us and create a layout using

your favorite movie or TV title

and your favorite Bo Bunny products!

Please email your layout to us at thebobunnyblog@gmail.com

or use the inlinkz to upload.

Layouts will be due August 11th and we'll send the winner some of our

the Mama-razzi collection to enjoy!

Join us for a new Layout Sketch Challenge Due August 13th!


Hope you all have a great weekend!


Thursday, July 8, 2010

It's Hot Out There!

Looks like there are a lot of us experiencing some really warm temperatures these days. The perfect weather for our new Sun Kissed line! Here is a little tutorial on how to make your own summertime garland.


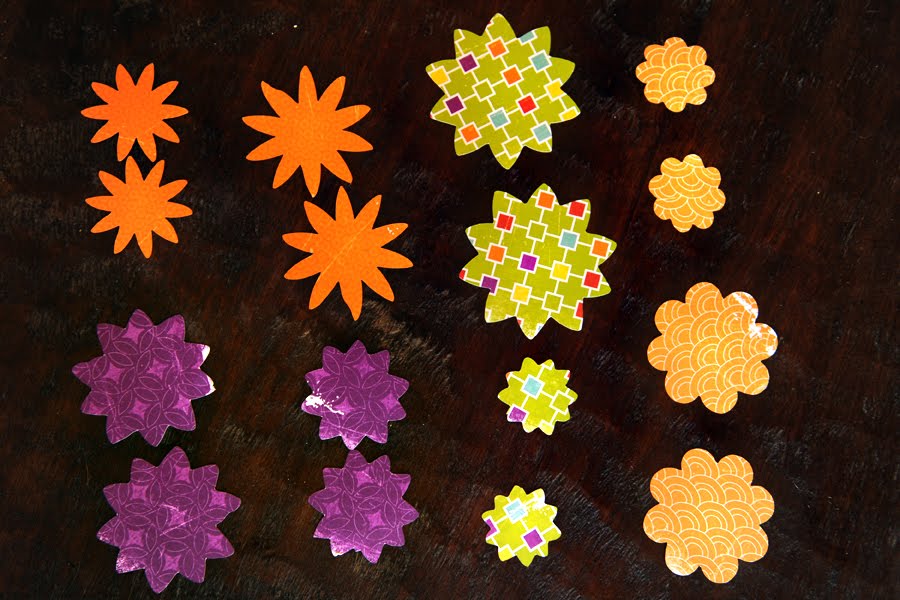
Start by cutting out a bunch of different shapes from various double sided papers. I chose to use flowers and suns to go with the theme. I used my slice and cut out 16 different pieces, I chose 8 different sizes/shapes and cut out two of each of those.


I then stacked the two identical pieces together back to back. I wanted the same side of the paper to show on each piece, however you may want to not stack them together and let the two different sides of the paper show.

Now just start sewing them together using your sewing machine. Make sure to leave some space between the pieces, just keep sewing even though you aren't sewing on anything.


I knew I was going to want to cut the strand in half so I made sure to leave and extra long piece of thread in the middle. I then attached each half to the decorated banner piece.

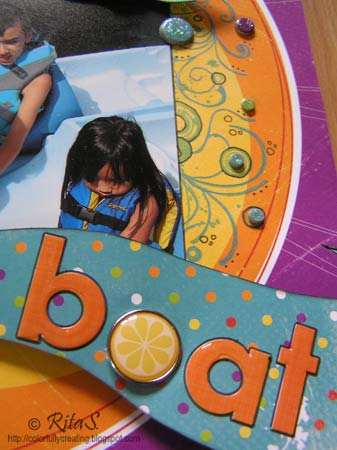
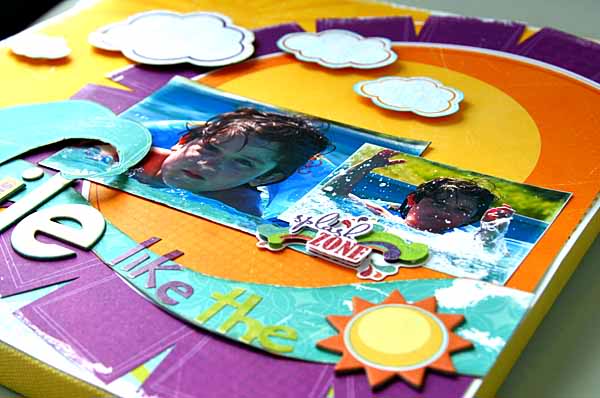
Here are some close ups of the center piece. It was made using the second to last page of the
Edgy Albums.


Super fun and summery!

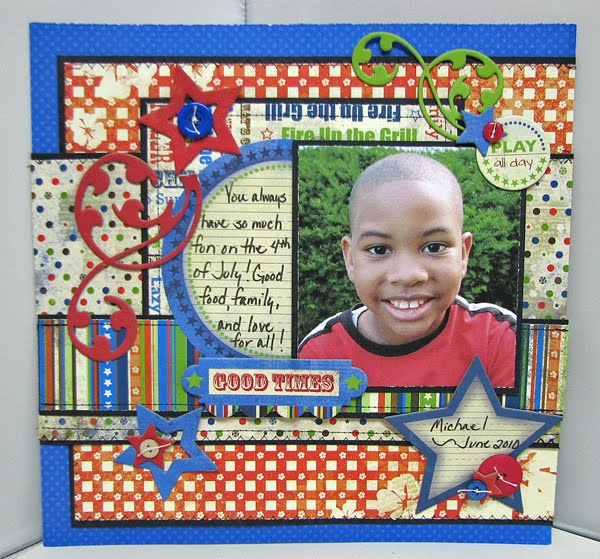
You can also just make the garlands alone. Here is a photo of one that I made for the 4th of July and now it hangs in my sons' room. Used Block Party for it. I also scored all of the stars before sewing so that they would be easy to bend out and make it 3 dimensional.


Products Used:
Sun Kissed
Sun Kissed Party
Sun Kissed Skies
Sun Kissed Stripes
Sun Kissed Summer
Sun Kissed Combo Sticker
Sun Kissed Chipboard and iCandy Chipbpoard
Sun Shiny Day Rub ons
Sun Kissed iCandy brads
Sun Kissed Buttons & Bling
Sun Kissed iCandy Jewels
Sun Kissed
Noteworthy Fun in the Sun

Hope you all enjoyed the tutorial, would love to see what you make!

Tonya Dirk
Bo Bunny DT Member

And of course, leave a comment and
you can win the SUN KISSED COLLECTION!!!


Friday, July 2, 2010

Layout Challenge Friday


It's that time again!!!

LAYOUT CHALLENGE FRIDAY!!!

But before we get started lets announce the winner of our last layout challenge.


DRUM ROLL PLEASE.....


Astrid from the Netherlands!!!!

Here is her beautiful layout using FLOWER CHILD.


We loved this layout for the pops of color,
and the different way she used the Flower Child Die Cut.
CONGRATS Astrid!!! Email us your information to
thebobunnyblog@gmail.com and we will send you your prize!


NOW FOR THE NEW SKETCH!!!


And here is what we came up with....


Backyard Adventure

Designer: Misty Choate (Home Office)

Products Used:
Sun Kissed Adventure, Sun Kissed Splash Zone, Sun Kissed Skies
Sun Kissed Afternoon, Wild Berry Double Dot, Sun Kissed 12" Chipboard


A Summer Evening

Designer: Kristen Swain

Products Used:
Petal Pushers 12" Chipboard, Petal Pushers Combo Sticker,
Petal Pushers Doodles, Petal Pushers Greenhouse, Petal Pushers Dot, Petal Pushers Notes


Waitin'

Designer: Tonya Dirk

Products Used:
Sun Kissed Chillin', Sun Kissed Splash Zone, Sun Kissed Stripe,
Sun Kissed Squeeze Me, Sun Kissed Cut Outs, Sun Kissed 12" Combo Sticker,
Sun Kissed iCandy Brads, Sun Kissed Clearly Stamp, Sun Kissed 12" Chipboard,
Chipboard Alpha Chiffon, Double Dot Kiwi, Double Dot Clover Ribbon

Designer Tip:
Stamp on painted chipboard letters to embellish them.
I stamped with StazOn Ink and then colored in the bird with Copics


Good Times

Designer: Christine Ousley

Products Used:
Block Party Fireworks, Block Party Jamboree,
Block Party Good Times, Block Party iCandy Stickers, Block Party iCandy Chipboard,
Block Party iCandy Brads, Block Party Buttons & Bling


H2O - Summer Fun

Designer: Patti Milazzo

Products Used:
Sun Kissed Splash Zone, Sun Kissed Summer, Sun Kissed Stripe,
Sun Kissed Squeeze Me, Sun Kissed Adventure, Sun Kissed Buttons & Bling,
Sun Kissed Combo Sticker, Chunky Chips Alpha Chiffon, Flower child Combo Sticker


Good Times

Designer: Shannon Anderson (Home Office)

Products Used:
Block Party Celebration, Block Party Chill, Block Party Jamboree,
Block Party Stripe, 12"Block Party Chipboard, Note Worthy Party Notes, Calypso Buttons & Bling


Bliss

Designer: Juliana Michaels

Products Used:
Peacock Lane Bleu, Peacock Lane Feathers, Peacock Lane Plumes, Peacock Lane Ivy,
Peacock Lane, Flowers, Peacock Lane Cut Outs, Peacock Lane Flowers, Peacock Lane Combo Sticker


Good Times

Designer: Robyn Weatherspoon

Products Used:
Block Party Celebration, Block Party Stripe, Block Party Fireworks,
Block Party Good Times, Block Party Chipboard, Block Party Buttons & Bling,
Note Worthy Party Notes, Blue Berry Double Dot


Splash Zone

Designer: Carole Janson

Products Used:
Sun Kissed Adventure, Sun Kissed Chillin', Sun Kissed Dot,
Sun Kissed Skies, Sun Kissed Cut Outs, Sun Kissed Combo Sticker,
Sun Kissed iCandy Stickers, Sun Kissed Buttons & Bling, Sun Kissed iCandy Jewels


So What do you think? Doesn't our design team ROCK!!!

Join us and create a layout using our Sketch

and your favorite Bo Bunny products!

Please email your layout to us at Bobunnyblog@gmail.com

or use the inlinkz to upload.

Layouts will be due in Saturday, July 14th and we'll send the winner some of our

Block Party collection to enjoy!

Join us for a new Layout Sketch Challenge Due July 16th!