Showing posts with label Note Worthy. Show all posts

Tuesday, April 17, 2018

Chabby Chic Card Duo - Featuring Black Tie Affair with Ginny


Hello there, Friends, and a happy day to you all!  I'm here to share two cards that I created with the Black Tie Affair collection. If you're thinking I'm going classic black and white these cards might surprise you.  This collection works for shabby chic inspired projects too!


Shabby Chic Card 1  By Ginny Nemchak for BoBunny using Black Tie Affair and Mini Alphabet Punch Board


I've pulled out the whites and grays for these cards and layered them with sweet soft pink cardstock. This 6 x 6 card has loads of Noteworthy pieces and a large die cut doily.

 Shabby Chic Card 1  By Ginny Nemchak for BoBunny using Black Tie Affair and Mini Alphabet Punch Board

To make the ribbon slide I used the Alphabet Punch Board from We R Memory Keepers and created the tops of two A's but on opposite ends of a long strip. I simply wound the ribbon through then wrapped the tails and secured them on the back.  A few Double Dot Jewels are the perfect finishing touch!

Shabby Chic Card 2  By Ginny Nemchak for BoBunny using Black Tie Affair and Mini Alphabet Punch Board

This card is A2 sized and has more of the cut aparts and a smaller die cut doily. For this ribbon slide I punched the ends like in the previous slide...but left the ends squared off. I also trimmed a bit to make it narrower so as to fit the scale better.


The scrap from the cut apart makes an excellent tag when given a coordinating metal eyelet and twine. Instead of my usual poofy bow I created a smaller ribbon embellishment with the trim  and secured it in the center with a Double Dot Brad.

I'm having loads of fun creating unique embellishments with my Alphabet Punch Board. Of  course it's great for letters too!

Okay that's all for me. Wishing everyone a happy and productive day : ) G

BoBunny Supplies: 


Patterned Paper: Black Tie Affair / Romance, Diamonds, Rendezvous, Elegant, Formal

Sticker : Black Tie Affair

Noteworthy: Black Tie Affair


Double Dot Jewels: Think Pink 

Double Dot Brads: Think Pink


Collection Pack Double Dot Vintage

BoBunny Dies: Mandala, Darling Doily


We R Memory Keepers:

Mini Alphabet Punch Board


American Crafts Supplies:

Sticky Thumb Adhesive


Sticky Thumb Dimensional Adhesive Foam Dots

Thursday, March 23, 2017

Petal Lane and Pentart Antique Paste with Elena O.


Hello BoBunny friends, it's Elena here today.

I've got to share with you a fun canvas I made using the beautiful Petal Lane collection and many fun Pentart mixed media products.

Beautiful Life Canvas by Elena Olinevich using BoBunny Petal Lane Collection

It's exciting to create your own background with the sprays and acrylic paints.

Beautiful Life Canvas by Elena Olinevich using BoBunny Petal Lane Collection

But, actually the glitter pastes and wax pastes are great products to add the shimmer and shine to your project.

Beautiful Life Canvas by Elena Olinevich using BoBunny Petal Lane Collection

The wax paste works great on porous surfaces, such a canvas especially on textured surfaces It has a smooth color and shade, it's best to apply it with your finger tips. Start with just a little then apply more as needed.  It goes pretty far!

Beautiful Life Canvas by Elena Olinevich using BoBunny Petal Lane Collection

You can also combine 2-3 colors to achieve a more gradient look. And the same can be done with the glitter paste- simply add/mix 2 colors while spreading them on the surface through the Stickable Stencil.

Beautiful Life Canvas by Elena Olinevich using BoBunny Petal Lane Collection

To add more colors I used the acrylic paints, they help you to make it look more even.

Beautiful Life Canvas by Elena Olinevich using BoBunny Petal Lane Collection

You can find the process of my creation from start to finish in my video

Beautiful Life Canvas by Elena Olinevich using BoBunny Petal Lane Collection

I also mounted the paper layers on the card board pieces, to give the canvas somegreat dimension.

Beautiful Life Canvas by Elena Olinevich using BoBunny Petal Lane Collection

These are some of the Bo Bunny and Pentart mixed media products I used to create my canvas.  Glitter Pastes not pictured.

Beautiful Life Canvas by Elena Olinevich using BoBunny Petal Lane Collection and Pentart

Hope you have liked my canvas end enjoyed watching the tutorial.

Thank you for stopping by!


BoBunny Supplies: 

12" Petal Lane Love Notes, Hooray, Sunshine.

Petal Lane Noteworthy and Layered Chipboard

Cascade and Love Stickable Stencils

Blush, Gold Glitter Paste

Gold Glimmer Spray, Sugar Glimmer Spray

Gold Pearlscents


Pentart Supplies:

Graphite, Baroque Gold , Rose Acrylic Paint Metallic

Rose Acrylic Paint Semi-Gloss

Wax Paste Chameleon Peach

Metallic Wax paste Copper

Primer paste White

Tuesday, February 21, 2017

Faith and Pentart Lasur Indoor/Outdoor Gel with Katherine

Hello, Katherine here!  It's actually Tesday, but we are going to mix things up a bit today with one layout three ways using the beautiful Faith collection and also Pentart Indoor Lasur Gel too.

Here is the first stage of my page.  I used the 6" paper pad and cut out lots of 3" base by 2" high triangles - I was struggling to choose between all the beautiful papers, so I decided to just pull out some of my favourites from the 6" pad and patchwork them together on the page!

Believe by Katherine Sutton

Believe Scrapbook Page by Katherine Sutton for BoBunny using the Faith collection

I added a few embellishments around the photo, some from the Noteworthy collection and the others cut out from the cut-a-part paper Rejoice.

Believe Scrapbook Page by Katherine Sutton for BoBunny using the Faith collection

For my next version I added lots of machine stitching.  I glued the triangles in the centre, so my machine needle would not get caught up in any stickiness from tapes or glues, and added lines of stitching across the page.  I stitched around the 2 photo mount papers, and added some more of the Noteworthy phrases across the page.  To highlight my photo a little more I used some Pentart White Acrylic Primer, and then on either corner of the paint I added in just a small brush full of the Pentart Yellow Lasur Gel.  As with all the paints I've used from Pentart, the pigment is really good, so you just need a little bit of yellow and it goes a long way.


Believe Scrapbook Page by Katherine Sutton for BoBunny using the Faith collection


For my final version I trimmed 1/2" off 2 sides of my double dot base, then added orange and yellow ink around the edges and mounted the page on the Blessings paper.  I also added in some of the vellum and smaller triangles on foam pads to the centres of the larger triangles.

Believe Scrapbook Page by Katherine Sutton for BoBunny using the Faith collection

You can see some of the Yellow Gel that I added to the page in little drip shapes - the gel is glossy and shiny so it adds a different effect to your page.

Believe Scrapbook Page by Katherine Sutton for BoBunny using the Faith collection


This is a closer look at the Acrylic Primer mixed with a little bit of the Yellow Lasur Gel, as well as the beautiful gold foiled vellum from this collection.

BoBunny Supplies:
Double Dot - French Vanilla
Paper: Faith - Blessings, Rejoice and Heaven Sent.
6 x 6 pad - Faith
Noteworthy - Faith
Vellum - Faith
Jewels - Citrus

Pentart Supplies
Lasur Gel - Yellow
Acyrlic Primer - White


Thursday, January 12, 2017

Winter Wishes and Pentart Glass Paint with Irit


Hello my dear crafty friends and welcome to my new BoBunny project.
This week I was challenged to make a  Mixed Media project with Winter Wishes collection and to add Pentart Glass paint.
So what should you use to combine glass paint and paper?  It sure should be a kind of something clear, even if it's not a real glass. 
So this project was made with  clear acrylic album cover, but I made it into a wall deco project.


This is how this wall deco looks over the sheet of BoBunny patterned cardstock from this most adorable Winter Wishes collection.

I wanted to leave this decoration as clear and translucent as possible. So I didn't use any cardstock, just vellum pieces only and added some layered chipboards, stickers and die cuts here and there.

 I used hand cut vellum pieces as my front part background and added the main Angel image sticker that was hand cut from the sticker rectangle.

The title was made with three different stickers and it says " Perfect Angel Wonderland".


And now let me show you the back side of this piece.
As you can see it was made with two components.
The outside  square of the cover was covered with BoBunny White Crackle paste. 
First I used the Primer and then the Crackle component and you can see those gorgeous crackles around the cover.
Then I used Pentart  solvent based White Glass paint and I left some clear areas as I wanted parts of the piece  to stay translucent.
Finally- not seen here- I covered the  painted back with Pentart solvent based Glossy Varrnish.


Here you can see the layered chipboard clock that was added on the top of the project.
I used BoBunny delicious brads to fix the cord inside the pre-made holes (remember that this was originally an album cover with holes for binding rings).
Some die cuts from Noteworthy pack were added near the chipboard clock.


The silver snowflakes were  made with a new Winter Fun stencil and my favorite BoBunny Silver glitter paste and believe me that shine and sparkle of this paste is even seen in the dark!


The trees were cut out from the gorgeous foiled vellum paper from  the same paper collection and glued with a bit of glaze.

 I added some pink pearls over the trees just to add some color to the whole piece.


And here is another look at the brads that hold the cord.


 I hope that you got some Winter inspiration from this decor piece and will try to make something similar with BoBunny delicious products.

BoBunny Supplies
Winter Wishes Foil Vellum paper
Winter Wishes Noteworthy
Winter Wishes Layered chipboard
Winter Wishes Combo Stickers
Winter Fun Stickable stencil
Think Pink Brads
Think Pink Jewels
Crackle paste (primer and crackle)
Silver Glitter Paste

Pentart Supplies:
Solvent based Glossy Varnish
Solvent based White glass paint


Tuesday, June 19, 2012

SuBWaY aRT

Hey, Howdy & Hello!!!
Today's post is brought to you by "Subway Art"
I searched and searched to find the definition of 
Subway Art and couldn't really come up with much.

So here is my definition
subway art, n. 1. placing and arranging related words, in random fonts to form art.

Our FAB DT has been playing with this topic and I can't wait to show you what they've come up with.

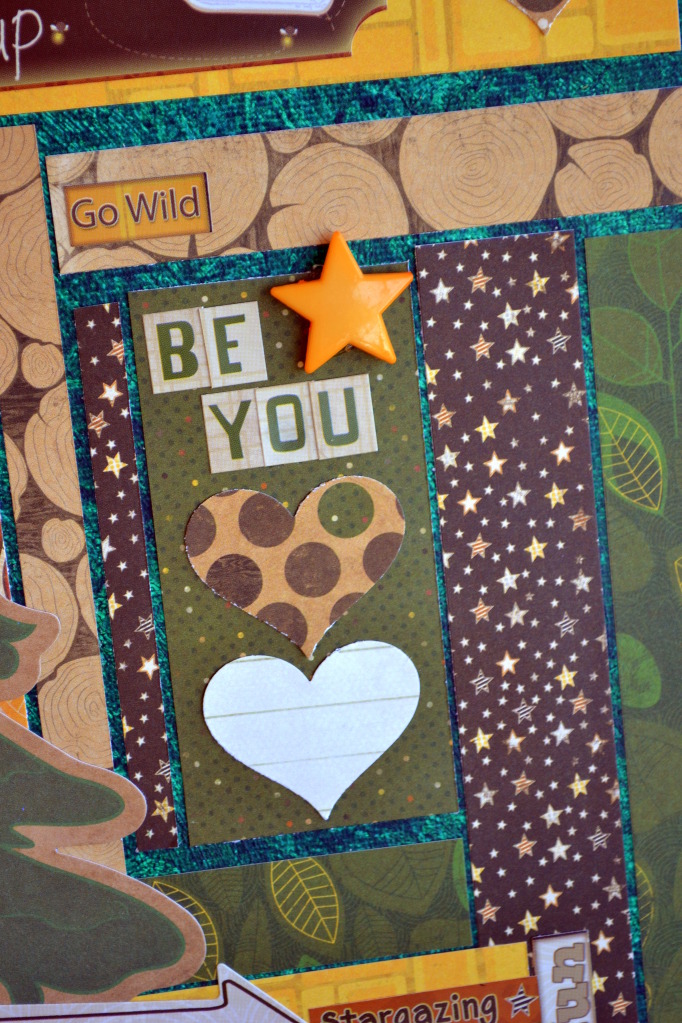
BE YOU
Julie made this adorable  Camp-A-Lot Canvas.  
She says she loves Subway Art and the personal meaning behind it.  
What a fun project to display and brighten up your home this summer!!
Julie also gives us a GREAT TIP and said...
"Don't always grab the unused papers in your scrapbook stash! For my canvas, I mostly made this using scraps I had left-over from a layout and cards I had made using this collection!"

Supplies Used
Pattern Paper: Camp-A-Lot 6x6 paper pad, and
Camp-A-Lot 12" Fireflies,  Sunset, Squares, Starry Night 
Noteworthy: Camp-A-Lot
Stickers: Fireside Fun, 
Nature's Playground, Combo
Buttons: Camp-A-Lot

GIRLS OF SUMMER

Robbie said, "Although this layout has a lot going on, it is really quick and easy to put together."
See below for tips to making this layout quick and easy....

1. To start, I used an electronic cutter to cut out my title. I wasn't really picky about where it ended up, because I planned to just work around it. I did make a point to leave the center of my layout empty.

2. Using lots of stickers makes layouts quick and easy to put together. To add intrest and make layering easy, just use lots of foam dots. You can see this in the close-up pictures.

3. Use the cut outs to add instant shapes. Since they already have such neat shapes printed, 
just choose one and cut along the edges.

4. The yellow banner piece of paper was one that I had cut to small for another layout. I save my large scraps, so I just pulled it out and added it to this layout.

5. Finally, to get the look of stitching or bordering without taking much time, just add holes at the corners and stopping points instead of actually making a lot of stitches.


Supplies Used:
Patterned Paper: Hello Sunshine Little Things, Daydream and Cut Outs
Cardstock: Double Dot Designs Chiffon Dot
Ribbon: Double Dot Designs Burnt Orange
Stickers: Hello Sunshine Combo, Lazy Days and Hot Hot Hot
Petals: Hello Sunshine

I hope you all enjoyed the layouts today as much as I did.  Show these cute girls some love with a comment and be sure to share your SUBWAY ART layouts with us on facebook!!!


Friday, December 17, 2010

Mini Albums

Are you looking for a last minute Christmas gift?  Planning ahead for Valentine's Day?  The design team has come up with some wonderful mini albums that are just the ticket!

Take a look!

Agnieska Piskorz

user posted image

user posted image

user posted image

user posted image

user posted image

user posted image

user posted image

user posted image

user posted image

user posted image

user posted image

user posted image

user posted image

user posted image

Supplies Used:BoBunny Cascading Chipboard album, Crazy Love Layered Chipboard Stickers, Crazy Love Dimensional Stickers, Crazy Love Note Worthy, Crazy Love Brads, Crazy Love Wraps, Crazy Love Chipboard, Crazy Love Story, Crazy Love Cut Outs, Crazy Love Have a Heart, Crazy Love More than Words, Crazy Love Conversation, Crazy Love Happy Together, Crazy Love Crazy Love, Bo Bunny Ribbon Polka Dots

Carin McDonough


user posted image

user posted image

user posted image

user posted image

user posted image

user posted image

user posted image

user posted image

user posted image

user posted image

user posted image

user posted image

user posted image

Supplies Used:  Noel, Noel Cheer,Noel Dot,Noel Holly, Noel Joy, Noel Memories, Noel Ornaments, Noel Postcards, Noel Rejoice, Noel stripe, Noel Traditions, Noel Cut Out, Noel Combo Stickers, Noel 12x12 Chipboard, Traditions CS Sticker, Jolly Old St.Nick CS Sticker, Glitter Noel iCandy Chipboard, Glitter Noel iCandy Stickers, Holly Berry Wrap, Noel Clearly Stamp, Antique Lace Petal, Coordinating Double Dot Almond Dot

We would love to see your mini albums using Bo Bunny!  Be sure to drop by our Facebook Page to share them with us!