Friday, November 5, 2010

A fun tutorial from our Cute Guest Designer Romy!

Do you know those dull, white frames?
You've got the most amazing picture to put in it,
but the frame just isn't worth it to showcase that wonderful picture you have.
user posted image
I got that same feeling when I found this ugly frame in my room. I wanted it to be girly and pretty, so that it would fit in my nieces room perfectly. I had a lot of fun altering this frame and would love to give you a look 'behind the scenes' and share this little tutorial with you about how you altered it.
user posted image
1) I started with covering up the white edges of my frame with the Crush rub-ons. They were the perfect size to fit on my frame.
user posted image
2) I also wanted to use some pretty flowers on my frame and attached this large pink petal to the upper right corner of my frame, using Tacky Glue.
user posted image
3) To create my own handmade flower I took a part of a Bo Bunny wrap.
user posted image
4) I stitched the edges of it together, so that I got this 'circle'. As you can see one side of the flower (the one that the stitches are in) looks pretty ugly...
user posted image
5) But that is no problem at all, as you can see on the picture above. I just placed that ugly side of the flower under the large pink petal. Nobody will get to see it anymore, LOL! As a finishing touch I added a brad to the center of the flower.
user posted image
6) After putting these two flowers on my frame, I took the flower, that comes with one of the Bo Bunny wraps. I cut the tulle backing away and then placed it under the two other flowers.

7) I also took three flowers and four hearts from the Crazy in Love chipboard sheet and attached them to my frame as well.
user posted image
8) I love a bit of glitter on my projects and couldn't resist giving the chipboard shapes a shiny feel using Stickles (glitter) and Liquid Pearls.
user posted image
9) I used Stickles on the edges of this small flower as well.
user posted image
10) And this is what my frame looked like in the end. Pink and girly and a perfect way to showcase this picture of my niece and aunt.

Supplies used: Crush Pink Ruffle Wraps, Crush Rub-On, Crazy Love Pink Rose Wraps, Crazy Love Brads,
Crazy Love Chipboard, Crazy Love Pink Parfait Petals

Romy, thanks for the fun tutorial!

Thursday, November 4, 2010

What's FALL like where you live???

Today, we asked our Design Team to make a project portraying what FALL is like where they live.....


Autumn
Designer: Luzma Bruna

Luzma describes fall in Chili.....

"Here Autumn is not so cold,we have some sunny days and cold ones too.Cold and rain begins in June.We have four seasons and never extreme temps."

Supplies: Olive double dot paper, Chiffon double dot paper, Olivia Mums paper, Olivia Honeydew paper, Olivia Baby`s Breath paper, Chocolate Ruffle wrap, Olivia Chipboard
Other supplies: Vintage photo distress ink, Burlap,
Glimmer Glam, Chalkboard Glimmer mist, felt, MS punches


       Fall Wristlets
         Designer: Christiane Muller

Christiane describes fall in Germany...
"Fall in the northern part of Europe is almost rainy and cold.
I'm a fan of warm clothes and I love knitting.
The wristlets are hand-knitted and felted in the washer.
The BB petals and trims were the perfect icing on the cake!"

Supplies: Bo Bunny Black Tulle Petals, Bo Bunny Purple Rose Trim


                    Don't Worry Be Happy
              Designer: Carole Janson
                   
                     Carole describes Fall in Australia...
                     " it is summer nearly always here in
                      Queensland - Australia"


Gratitude
Designer: Irene Tan

Irene describes Fall in Malaysia
"Fall here is just liked everyday here. Malaysia is not a seasonal country.
We have summer whole year round."

Supplies: Olivia Ambrosia, Olivia Baby's Breath, Olivia Moonlight, Olivia Nectar, Olivia Combo Sticker,
Note Worthy Olivia, Grateful Heart CS Sticker, Olivia Rub-Ons, Olivia iCandy brads, Olive ribbon,
Bo Bunny rub-ons, Bo Bunny blings
Others: glimmer mists, distress ink, thread for stitching, Tombow


Hockey 101
Designer: Samantha Wright

Samantha describes Fall in South Africa
" I had to really think because we have such a mild autumn. This is the time of year though when the mornings are crisp and the sun is warming. It is also time for our hockey season."


How fun are these layouts and projects? 

So, we're interested in knowing....
What's fall like where you live???

Thanks for stopping by!  We love our BB friends!

Wednesday, November 3, 2010

To theme or not to theme???

 We are so excited about today's post.We asked our awesome, incredibly creative Design Team to use paper that had a very specific theme....  and create layouts that have nothing to do with that theme.

Halloween paper is not just for Halloween anymore...
Check it out....

 Adore
Designed by: Tara Orr
Hint: Because the area you are working with is that much larger for a double layout, choose larger embellishments and larger photo(s). This will help to keep your layout 'in scale' and make it easier to 'fill up' the larger space.
Supplies: Whoo-ligans Cut Outs, Whoo-ligans Batty, Whoo-ligans Madness, Whoo-ligans Monsters,
Whoo-ligans Noteworthy Journal Pages, Almond Dot Cardstock, Chiffon Rose Trim, Purple Rose Trim,
Cream Gardenia Petals, Antique Lace Petals, Chunky Charms (swirls & brackets in licorice),
Chunky Chips Alpha Stickers, Bo Bunny Ribbon
Tombo Mono Adhesive Permanent Roller, Permanent or Repositionable Liquid Glue, Mono Aqua, Permanent Liquid Glue
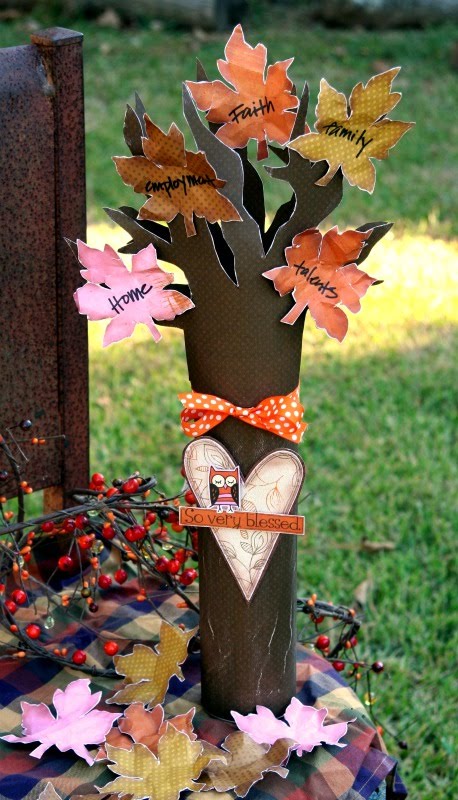

Darling mini album
Designer: Irene Tan
Supplies: Whoo-ligans, Whoo-ligans Spiders, Whoo-ligans Stripe, Whoo-ligans Dot, Whoo-ligans Madness,
Whoo-ligans Boo, Ocean Dot, Licorice Dot, Whoo-ligans Combo Sticker, Whoo-ligans Cut-Outs,
Dark Denim ribbon, Bo Bunny button, flowers, bling,
Others: acrylic album and embellishment, mask, stamps, solvent ink, distress ink, adhesives.
Who would have guessed the projects above were made from Halloween paper???
*With the following 4 projects, you can enjoy Christmas paper all year long.....

Amber at 6
Designer: Mirelle Divjak
note: Every year after amber's birthday I record her favorites. I love to see the changes as she grows up.

Supplylist: Bo Bunny Almond dot, Bo Bunny - Noel collection, dot, joy, noel, traditions, rejoice, memories,
Bo Bunny Olive zipper trim, Antique lace petals, Charcoal knit petals, Chunky charms : Swirls & Brackets Chipboard stickers - chocolate, Combo Stickers: Cambridge


Life
Designer: Janis Medina
Christmas paper with BEACH pictures....
Supplies: Noel Cheer, Noel Joy, Noel Memories, Noel Postcards, Noel Rejoice, Noel Stripe, Noel Cut Out,
Noel 12x12 Sticker, Noel Note Worthy Journaling Cards, Noel Traditions Cardstock Stickers, Noel Wraps,
Noel Epoxy Brads, Noel Stamps, Bo Bunny Curry Coordinating Double Dot, Bo Bunny Dark Denim Coordinationg Double Dot, Bo Bunny Bling, Mama-razzi Flowers

Designer notes: I lightly misted on my Noel Memories paper and stamped on some portions using Noel Clearly stamp for added texture.

Chloe
(Spring photo)
Designer: Gabrielle Pollacco
Bo Bunny Patterned Paper: Noel, Noel Memories, Curry Dot, Chocolate Dot,Noel Chipboard,
iCandy Brads (Olivia collection), & Antique Lace Petals
Other: crystal flourish, laser-cut chipboard, blooms.

Designers Tip: When you are looking to get a non-traditional look to your l/o with themed papers like the Noel collection, choose papers from the collection that are alike in color and go for a monochromatic look. I chose the creamy/gold color papers in the collection to create this page
(leaving out the reds & greens keeps the page from looking like a Christmas page).


Now and Forever Card
Designer: Sandra Rupp
Wedding Card and used the Backside of "Noel Stripe" in Combination with Ocean Dot...

Check out a beach photo,bundled up cozy picture and a picture at the park used
 with our Learning Curve line...
These photos have nothing to do with going to school!

Punta Cana Beach
Designer: Luzma Bruna
Supplies: Learning Curve Recess paper, Learning Curve Stripe paper, Learning Curve dot paper,
Learning Curve paper, Denim wrap, Denim rope trim, Charcoal Knit, Olivia Cream Gardenia,
Learning Curve Cut outs, Learning Curve chipboard, Double dot paper harvest dot, Clover dot,
Chunky chips Alpha clear.    Other: Ek punches, MS punches, Little tag Etsy, Uni ball Signo

 
Cozy
Designer: Tara Orr
Supplies: Learning Curve Noteworthy, Chunky Chips Chipboard Alphabet Stickers, Chiffon,
Bo Bunny Double Dot Ribbon, Chiffon, Learning Curve Crossword, Learning Curve Letters,
Learning Curve Dot, Learning Curve Recess


Swing it?
Designer: Kathleen Glossop
Supplies: Learning Curve Cardstock stickers, Learning Curve iCandy brads, Learning Curve Stripe,
Learning Curve Cutouts, Learning Curve Combo Sticker, Learning Curve Chipboard, Double Dot, Chunky Charms Clear

Janis's daughter has on a sleeveless shirt with a collection called "Winter Joy"
My Girl
Designer: Janis Medina
Supplies: Winter Joy Snowfall, Winter Joy Peace, Winter Joy Frosty, Winter Joy Bundled, Winter Joy Dot 
Here is our Paradise line used with pictures taken in Feb. of Carin's son blowing bubbles.


Simple Joys
Designer: Carin McDonough
Supplies : Paradise Boardwalk, Paradise Batik, Paradise Surf, Paradise iCandy Epoxy Brads,
Chunky Chips Alpha Clear, Double Dot 5/8" Buttercup Ribbon,
Others : Alphabet Stickers, White Gel Pen, Embroidery floss, Acrylic paint

Fun idea: My bubbles are actually the centres from the clear Chunky Chips Alpha!
 
 
We think with these ideas you can pretty much use any photo with any themed paper.
Let your imagination be your guide.  We'd love to see what you come up with using themed paper for something other than it's theme.
Thanks for stopping by!!

Tuesday, November 2, 2010

We would like you to meet....

 Romy Veul
I'm sure a lot of you will recognize her, as she plays along in all
of our challenges and her work is amazing and worth looking at again and again.
She is 17 years old and from Holland and will be our Guest Designer
for the next few months.

I'd like to say that I want to be like her when I grow up, but I'm old enough
to be her mom.  LOL  I was going to try to introduce her to you all, but didn't think
I would do her justice... so I had her tell you all about herself.
I'm sure you are going to love her as much as we do!!

I've added some of her work for your viewing pleasure while reading.
It's like a picture book!  hee, hee

Hi! My name is Romy Veul. I'm 17 years old and live in the north of Holland with my parents, my brothers (they are twins) and our cats and guinea pigs. I'm in my last year of high school and will hopefully go to University after my graduation. Besides spending time at school and homework, I love to play badminton, do fun things with friends or family, take pictures and - of course - make cards or layouts.

 
 Scrapbooking is definitely my favourite way to spend my time. I love to let my worries go and just spend time searching through my papers and embellishments and making something new with them. It's also such a wonderful way to capture special moments and memories for the rest of your life. My family loves to take a look in my scrap albums and it's always good for some 'ooohs' and 'aaahs' like 'Oh, I know that moment, it was so funny'. That's what is making me smile.
 I find it pretty difficult to describe my style of scrapbooking. I love to use a lot of layering and embellishments on my layouts and I think you could best say that my layouts are pretty 'full'. I can't keep any corner of a layout or card 'unused'...LOL! Also I'm a huge fan of glitter, pink and all kinds of bling and also seem to grab my scissors for every project...if I can cut out something, I will cut it out:) I'm a real girly girl and love to show that in my pages. Besides those things, I think you can call me a very slow scrapbooker. A layout usually takes me 4-5 hours, though I seem to get a bit faster lately. When I don't have the time or inspiration to make a layout, I'll work on a card. Thanks to all the great embellishments and cut-out sheets, that manufacturers like Bo Bunny offer, it's pretty easy to make a beautiful card in no time at all. 
 Since I don't have children yet -which is probably not so rare for someone at age of 17, LOL!- I mostly scrap about my nieces (I feel blessed to have 8 nieces, who are 0 to 11 years old), our family, our pets or vacations. I just let the picture do the work for me and then start to search for papers and embellishments in my stash to compliment it. I love all the great things this hobby brought me. I got to learn some amazing girls - some of them even became real friends - , who aren't only very supportive, but also really sweet when it comes to other things than scrapbooking. 
How about some fun facts about myself?

-Did you know I mostly spend more time on chattering about scrapbooking than on scrapbooking itself? There are just so many great blogs and online galleries...I just have to take a look at them every day:D
-Did you know that I'm a little bit afraid of fish? When I see that there's a fish in a lake, I will refuse to swim in it. Oops!
-Did you know that I've got a little something with surnames? I already thought of what names I'd like to give my own children in the future.


-Did you know that I love romcoms in all kinds and sorts? I just looove feel-good-movies with a 'happily everafter'-end.
-Did you know that I've been stalking the Bo Bunny blog since it's very first start and that there haven't been any Bo Bunny collection yet that I didn't like? I feel so honoured to be a guest designer for this amazing manufacturer and to get to work with so many talented girls. Thanks so much for this amazing opportunity!
And in case you'd like to see more of my creations, please feel free to take a look at my blog: www.scrapstuffandmore.blogspot.com 

 Romy...  Thank you so much for being our Guest Designer, 
we are so excited to see what you come up with and we hope you have fun 
playing with our product and our AWESOME Design Team!!

Monday, November 1, 2010

Thanksgiving Table Decor & Winner, Winner Chicken Dinner

Can you believe it's November already? Where did October go? As I was thinking about what I could create and share for this week's Mad Scrapper post, it just seemed crazy that I'm already thinking "Turkey Day!" Here's what I came up with....

I thought it would be awesome to create an "interractive centerpiece" if you will. In our family, it's tradition before we eat our Thanksgiving meal to take turns going around the table and expressing what we're grateful for. That's how the idea for this "Blessings Tree" came. All I did was covered a tall, empty Pringles can with Chocolate Double Dot cardstock. Then I drew out the tree-top (I've provided the pattern below) and glued it to the top of the tree trunk. You can't see the seams of the paper because it's hidden behind the orange Double Dot ribbon I used to wrap around the tree and tie a bow. I also created a heart that says "So very blessed" to add to the front of it. The leaves are a ton of fun to make. (I've provided the pattern for this and the heart below also) I cut them out of several different colored fall papers then inked and sanded the edges before crinkling them to make them look realistic. You can create many of these to lay out as part of your Thanksgiving table decor. Then, as each person takes a turn saying what they are grateful for.... they can write it on a leaf then attach it to the tree. FUN!!!


Supplies used: Chocolate Dot, Gingerbread Dot, Orange Citrus Double Dot ribbon, Delilah Cut-outs, Delilah Pretty, Delilah You & Me, Delilah Promise

Then I also created a fun place card using Bo Bunny's Falling 4 U stamp. Just Stamp the image on some double dot cardstock then using a craft knife, cut around the top of the tree so it pops up off the cards when you cut them out and fold them. Easy peasy!

Supplies: Falling 4 U stamp and Chiffon Double Dot cardstock

Okay..... I'm sorry it's taken so long to announce the winners of a few of my previous Monday posts! But here they are!!!!!

Double Dot Cardstock giveaway.....
Denise said...
It looks fantastic!!! I'm constantly reaching for beige. It just goes so well with all the colors.

Noel Card Kit giveaway....
Ronnie said...
I love to mix it up, but traditional just does something to me that is all about the meaning of christmas.

Okay Ladies.... Congrats! Shoot me an email at shannavineyard@comcast.net to give me your mailing addresses and I will get your prizes shipped!