Showing posts with label Romy. Show all posts

Saturday, July 2, 2016

July Blog Sketch Challenge!


I was the lucky one who got to make an example for this month's sketch challenge and I decided to make a lay-out with the wonderful Take a Hike collection.

Here is the sketch:


I took this photo of a squirrel in Central Park last month and I figured that the Take a Hike collection was simply perfect for scrapping it.


I replaced the two square photos in the sketch by two Misc Me cards from the Take a Hike collection, which I added on the right side of my photo. I wrote my journaling on these two cards.


I stamped with the Wall To Wall Textures stamps in the corners of my lay-out for a vintage touch. I also created a cluster of chipboard embellishments in the right lower corner of my photo.


You can better see my title on this lay-out. I made it with the Alphabet Gold Foil Transfers. The title is in Dutch and means "sweet" in English.


BoBunny Supply List:
Patterned Papers: Take a Hike, Campfire, Destination, Trekkin'/ Take a Hike
Dot Cardstock: Chevron Chiffon
Chipboard: Take a Hike Layered Chipboard, Take a Hike Chipboard
Noteworthy: Take a Hike
Stamps: Wall To Wall Textures 
Misc Me Journal Cards: Take a Hike
Foil Transfers: Alphabet Gold

Now it's challenge time! Here's how it works in case you are new to this fun! Each month we will share a new sketch and what one of our designers was inspired to create with it. To play along all you have to do is create a project inspired by the sketch using BoBunny products and then share it with us using the InLinkz widget below. When you enter, you will have the chance to be randomly selected to win this gorgeous prize package full of BoBunny product featuring the party ready Firecracker collection!


Enter Here:  


And now it's time to announce the winner for the June Blog Sketch Challenge! Congratulations to #2 Sandi Pressley our winner! Please email us at bopress@bobunny.com with your contact information so we can send you your prize! Thank you everyone for playing! We can't wait to see what you create this month!!


Thursday, December 24, 2015

Mixed Media Layout!


Hi BoBunny fans!

Today I would like to show you a lay-out featuring lots of beautiful BoBunny products: Double Dot Chevron card stock, Whiteout papers, embellishments and some mixed media products. As winter has officially begun now, I decided to make a lay-out with a very wintry feel to it.


The basis of my lay-out was made with two sheets of Double Dot Chevron cardstock. I used one sheet in its entirety and cut alongside the chevron edges of the other paper, so that I could use this sheet as a border in the middle of my lay-out. 


In order to add some extra interest to my layout, I used the beautiful Cascade Stickable Stencils in combination with Double Dot ink and glitter paste to add some stars along the edges of my layout.


I also incorporated several glitter tickets, which I cut out from one of the Whiteout papers, in my design, as well as two small doilies. I further embellished my lay-out with a few chipboard embellishments from the Layered Chipboard package.  


BoBunny Supply List:
Double Dot Cardstock: Powder Blue Chevron, Sugar Chevron
Patterned Paper: Adventurous, Bundled Up, Cross Country, Exhilarating, Glistening/ Whiteout 
Chipboard: Without Layered Chipboard 
Double Dot Jewels: Blue Hues
Stickable Stencils: Cascade
Glitter Paste: Silver 
Doilies: 4in Small Doilies 
Ink Pad: Licorice

Friday, July 13, 2012

Layout Challenge - White Space

White space really can be your friend...
I don't know if any of you are like me, but I want to fill up every
single space on my layout.  I love STUFF.

Tomoko and Agniezska have put together layouts using white space and
they are challenging you all (and me) to do the same.

Make a layout embracing white space and share it with us to
WIN a bag of BoBunny happiness!!!

Romy
By: Tomoko Takahashi

 How cute that Tomoko scrapped Romy!
Romy... you're adorable!!


 Check out the detail.  I love, love, love Tomoko's attention to detail!


Supplies:
Patterned Paper: Ambrosia, Flowers, Marigold, Pansies, Roses, Stripe, Trellis, Cut Outs/ Ambrosia
Jewels: Little Miss


My dream
by: Agnieszka Piskorz 
Photo: from Pinterest


 I shouldn't admit this out loud, (that's not right) I shouldn't type it out loud, (that's not right either)
 I shouldn't put this in writing... (that works)
BUT... I chose Agniezska to play on the white space day 
cause the girl ROCKS white space like no other! 
My mind = blown every single time.


I can't even tell you how stoked I am that Agniezska used a picture from pinterest!
(What did we do before pinterest??  seriously?)
Did you all know BoBunny has a pinterest...? Come follow us and repin!

Supplies:
Patterned paper: Country Garden Morning -Sunrise
Stickers: Combo Stickers: Country Garden, Et Cetera, Barefoot&Bliss, 
Welcome Home, Dimensional stickers Country Garden
Jewels: Alora
Rub ons: Et Cetera, Enchanted
Chipboard: 12"Welcome Home

I'm soooo lovin' today's layouts.  I think I might join the challenge... 
(but not to worry, I can't win, but I can play)

Come play along and add your layout to the inlinkz thingy below
and then pin your layout also!!


Friday, June 22, 2012

FIELD TRIP FRIDAY

Time for another Field Trip Friday where our DT steps
outside their comfort zone and amazing things happen!!

Get ready to be WOWED! 
Gabi has stepped into the world of mixed media and made an adorable canvas
that makes you feel empowered and artistic!  She also made a fun video tutorial
and gave us all the pattern for her adorable lil miss.

Mixed Media Canvas
by: Gabrielle Pollacco

 check out the detail.... 
 seriously so much fun!

Supplies:
11 x 14 inch canvas
Patterned Paper; Little Miss Brenna, Little Miss Maree, Little Miss Jaquoya, Little Miss Cut Outs, Gabrielle: Cameo, Dot
6x6 Paper Pad: Little Miss
Stamps: Midnight Frost
Rub-on's: Country Garden

I've seriously got that UTZ in my tummy that says I have to go home and try this.

Next up... ROMY
Here's what she had to say...
"Since each Bo Bunny collection comes with many gorgeous papers and beautiful coordinating embellishments, it is pretty tempting to stick to one collection on a layout. I sometimes mix up two collections that look a lot alike, but I have never combined two very different ranges of paper on one layout. 
But the Ambrosia collection inspired me to use a mixture of vintage and colourful on my layout. The muted, vintage tones in the background will make the beautiful colours stand out even more. I used one sheet of the Welcome Home and one sheet of Et Cetera for my background. I also incorporated a sheet of music note paper from an old book. On top of those vintage layers I added papers and embellishments from the Ambrosia collection to create a colourful 'frame' for my photo. 
I had a blast mixing up these collections that I normally wouldn't use together and I hope you will give it a try too."
The little things are not so little after all
Romy Veul

Bo Bunny Supplies:
Patterned Paper: Flowers, Marigold, Primrose, Roses, Stripe, Cut Outs/Ambrosia; Extra/Et Cetera; Stripe/Welcome Home
Chipboard: Ambrosia 12 x 12
Stickers: Ambrosia Cardstock Sticker, Ambrosia Dimensional Stickers
Jewels: Ambrosia
Rub-ons: Ambrosia

Every single time I read that the girls mix up lines, I think I want to try it...
however, I have yet to do it, but Romy made it seem so easy!

And last but certainly not least....  
Juliana says,
"I knew immediately that using rub ons would be stepping outside my comfort zone. I hate to admit this, but I rarely use them. I also hate to admit this...I am afraid of them! I am not a stick it down and move on kind of scrapper. I like to move things around before I commit to their final placement. And as you all know, rub ons can't be moved around at all. Recently one our very own designers, Tara Orr, shared a tip about putting them on cardstock and then cutting around them. Why had I never thought of that?! This is the technique I used and I combined them with stickers from the 12 x 12 Combo Stickers to embellish my layout. If you are interested in more step by step details on how I used them on my layout, please feel free to stop by my blog: 17turtles."

Make A Wish
Juliana Michaels


What a fun idea and new way to play with all those rubons you've been storing up!


Emma makes me wanna get down and make sand angels!

Today you've gotten lots of fun inspiration and ideas that will last you all weekend!
Make sure you leave us a comment and post your layouts and projects on facebook.
We love to see what you all come up with!!!

Friday, April 20, 2012

Step It Up

We have really enjoyed creating and showing how to Step It up here at Bo Bunny!
In fact, we liked it so much with layouts, we decided to do it with cards! 

Some of the design team has made some great cards and then taken them to
the next level by Stepping It Up!

First up, we have Romy.

Oh Happy Day
Romy Veul

Romy has gone all out with her card and not only Stepped It Up, she's showing you step by step how to do it! 

user posted image

1) Use one of the cards from the card kit as a base for your card.
2) Cut several pieces of paper in different sizes from the papers in the mini paper pad. Ink the edges and position them on your card in the desired way.
3) Glue down two of the Noteworthy embellishments in the middle of your card.
4) Embellish your card with a few chipboard stickers, rub-ons and fussy cut clouds and planes. Rub the sentiment rub-on onto a strip of white paper and adhere them to your card using foamtape.


5) Finish off your card with a few jewels, glitter glue and liquid pearls.
user posted image

Bo Bunny supplies:
6x6 Paper Pad: On The Go
Card Kit: On The Go
Chipboard: On The Go Layered Chipboard
Stickers: On The Go Dimensional Stickers
Noteworthy: On The Go
Jewels: On The Go

Next up, we have Sarah.

Thanks For Being You
Sarah Eclavea

Sarah has taken an already adorable card and Stepped It Up to make it over the top!

user posted image

Step one: Create a 5 x 5 card base out of white cardstock.
Step two: Trim two pieces of paper from the 6x6 paper pad and adhere to front of card.
Step three: Adhere rubon and chipboard flowers from the Alora card kit.

user posted image

To step up your card-
Step four: Tie double ribbon into a bow and adhere
Step five: Add faux stitching with white pen
Step six: Adhere a chipboard flower from the 12x12 chipboard sheet over the large chipboard flower piece
Step seven: Add jewels to the chipboard flowers.

Bo Bunny Supplies Supplies:
Patterned Paper: 6x6 paper pad/ Alora
Chipboard: 12x12 chipboard/ Alora
Jewels: Alora
Other: Double Dot ribbon, Alora Card Kit

Be sure to check out the ongoing challenges!
Remember, they are running for one month now!  Be sure to link your submissions for the challenge to the challenge post for a chance to win a prize! 

Have a wonderful weekend!

Friday, April 13, 2012

Stamps & a Giveaway!

Today, the design team has done some projects to show you how to use your stamps.  Bo Bunny has some TERRIFIC stamps available!  Each collection has matching stamps to perfectly coordinate with it. 
Stamps are such a perfect accent because you can use them over and over again! 

A Dream Come True
Romy Veul

Romy used the Ambrosia Collection with the coordinated Ambrosia Stamps for this beautiful layout.

user posted image

user posted image

user posted image

Bo Bunny supplies:
Patterned paper: Bouquet, Flowers, Lily, Primrose, Roses, Trellis/ Ambrosia
6x6 Paper Pad: Ambrosia
Chipboard: Ambrosia 12x12 Chipboard, Ambrosia 12x12 Layered Chipboard
Stickers: Ambrosia Combo Sticker, Ambrosia Dimensional Stickers
Stamps: Ambrosia
Card Kit: Ambrosia

Next up, we have Debbie.

Best Friends
Debbie Sherman

Debbie shows us how the same collection and stamps can be the perfect combination for cards, too!

user posted image
user posted image

Supplies Used:
Bo Bunny Ambrosia Collection
Bo Bunny Ambrosia Patterned paper Primrose
Bo Bunny Ambrosia 6x6 Paper Pad
Bo Bunny Ambrosia Stamps
Bo Bunny Ambrosia Jewels
Bo Bunny Ambrosia Rub Ons

Just For You
Carin McDonough

Carin and Debbie were on the same wavelength for this post.  It is great that they both used the same collection to make a card and showed us how different they can look. 
user posted image

Supplies Used :
Cardstock : Passion Fruit, Island Mist, Orange Citrus/Vintage Double Dot.
Stamps: Ambrosia; Country Garden; Enchanted
Ribbon : Aquamarine Double Dot


PSA Stamp Giveaway!


We also want to tell you about our friends at PSA Essentials. PSA Essentials manufactures personalized stamps with interchangeable designs! Stamp the back of your cards, layouts or project creations with personalized stamps like "hand crafted by", "made especially for you by" - the sky is the limit.  See all of their crafty personalized stamps here  


Be sure to check out the PSA Stamp Camp blog today to see FABULOUS BoBunny projects!
AND, we're giving away FOUR PSA Personalized Stamps! Click here to follow their blog for a chance to win!


Also check out their website and facebook too!


We would love to see what you are doing with Bo Bunny Stamps! 
 Please share your creations with us on Facebook.  We love seeing what you are up to!

Have a fantastic Friday!

Friday, September 23, 2011

Layout Challenge Friday


It's time for another Layout Challenge! 

For this challenge, we invite you to

Take Note

We want to see how you use Bo Bunny's Noteworthy!  We also want to see some journaling on your page. Couldn't be easier, right?  You have until October 4th to share your pages with us. 

Let's take a look at what some of the design team did.

Delish
By Jolanda Meurs

Jolanda chose to use a combination of stickers for her journaling.  The sticker sheets from the collections are a great way to tell your story.

user posted image

Bo Bunny supply list:
Paper: Sweet Tooth; Sweet Tooth
Chipboard: Sweet Tooth
Stickers: Sweet Tooth Stickers and Combo Stickers
Noteworthy: Sweet Tooth
Jewels: Sweet Tooth
I have used extra glitter.

Next  Up...

All That Glitters
Romy Veul

Romy used handwritten journaling added to the cute shaped Noteworthy card on her layout.

user posted image

Bo Bunny Supply List:
Patterned Paper: Patchwork, Reindeer Games, Sentiment, Die Cut/Blitzen
Stickers: Blitzen Combo Sticker, Blitzen Dimensional Stickers
Chipboard: Blitzen 12x12, Blitzen Layered Chipboard
Trinkets: Blitzen
Jewels: Blitzen
Stamps: Et Cetera
Rub-ons: Blitzen
Noteworthy: Blitzen

Designer Note: you can add some extra interest and dimension to your page by using mixed media, such as Diamond Dust, glitter glue and glitter snow.

Papa's Girls
Robbie Herring

Robbie used handwriting for her journaling, too.  She also added some of the stickers to tell more about the story.
 

 Bo Bunny Supplies List:
Patterned Paper:  Welcome Home Collection Flourish, Key and Front Door
Stickers:  Welcome Home Combo and Home Grown
Trinkets: Welcome Home
Jewels: Welcome Home and Et Cetera
Buttons: Welcome Home
Noteworthy: Welcome Home and Et Cetera
Ribbon: Chocolate Double Dot

Design Tip:  Use the large Noteworthy for design elements on your page.  Mix in some of your spiral Noteworthy for more detail.

Now, it's YOUR turn!

We want to see your pages using Noteworthy and also adding journaling!
Link your pages here by October 4th.  We'll choose a winner to win a Bo Bunny Prize!

Have a great weekend!

Monday, August 22, 2011

Get To Know...Romy Veul

Hi, Bo Bunny fans! Today it's time for my spotlight on the Bo Bunny blog and I have to say I'm pretty thrilled to see a post about me and my creations appearing on the blog of such an amazing manufacturer! I joined the Bo Bunny team about 10 months ago and have loved every minute of my term with them so far.

First I'll tell you a little bit about me. My name is Romy, I'm 18 years old and I'm one of the three Dutch girls on the Bo Bunny team. At the moment you're reading this post, I am about to start a completely new phase in my life. I graduated high school before summer vacation and today is my very first day at University! I live in a small village close to Amsterdam, which I'm fairly happy with since it means that my University is only 30 minutes away from my home. So today is the very first day I can call myself a psychology student. I have to admit I'm quite a bit nervous about this big change in my life, but I'm also looking forward to majoring in the beautiful science that is called psychology!

A little over five years ago my school introduced me to scrapbooking. My school celebrated its 45th anniversary and thus organized a few creative workshops for its pupils, including a workshop scrapbooking. I have been creative since I was in kindergarten and always loved painting, making my own jewelry or being creative with flowers and home deco. But always after a while I wanted something different and started to look for another hobby. That was until I attended my first scrapbook class...I immediately fell in love with this hobby and haven't looked back ever since. I love the fact that you can record your memories and photos in a creative way by scrapbooking and being creative is also a great way for me to forget about my busy daily life as a student and webshop owner at the end of the day.

As you might have noticed the past few months I love doing both cards and layouts. If you'd ask me whether I consider myself a scrapbooker or a cardmaker, I really couldn't give you an answer to that question. I love it to create both cards and layouts. Usually I do cards when I don't have enough time for a layout or when I'm in the 'cardmaking mood' and feel like spending my entire evening whipping up a few cards;) I usually send my cards when they're finished to (online) friends and family. I have also filled quite a couple of albums with my scrapbook pages so far. I love doing them a lot and my love for scrapbooking has also introduced me to the wonderful hobby that photography is. I bought a new camera and now try to capture every remarkable moment with my camera, even though not all my family members love being photographed at E-VE-RY single moment of the day, LOL!  

I think you could best describe my style as shabby chic, layered and detailed. The final phase (adding the details) is always my favourite part of the process. I can often hardly stop adding details, so usually every corner of my pages is filled with a little something. I also use my edge distresser a lot and love fussy cutting all those pretty images from the Bo Bunny papers with a little help of my favourite Tim Holtz scissors.

This hobby has brought me so much the past few years, including the many wonderful girls I've met through this hobby and the online world behind it. Some of them I even met in real and became 'real life friends'. I still wish I would be able to make a journey around the world one day, so I can meet all those sweet international girls that I haven't got to speak to in real yet!

I joined the Bo Bunny team about 10 months ago. And I can hear you asking: "The DT announcement was over a year ago, how can it be that you joined the design team later?". Well it's quite a story and one with a very nice ending;) A few weeks after the announcement of this team of amazingly talented ladies I noticed a call on this blog for Bo Bunny lovers who would love to have their work being featured on the blog. I thought I'd just give it a go and e-mailed some of my work to the office. Only one day later I received an e-mail that made me so super happy: I was asked to become a guest designer for Bo Bunny for a few months. I think I reread that question a hundred times that evening, because I couldn't believe one of my dreams all of a sudden appeared to come true:) Two months later I received an e-mail that made me even happier: Kris asked me as a permanent designer on this team. I still feel so honoured for the opportunity that is given me to design with the gorgeous Bo Bunny products and to work together with so many talented (and also very sweet) ladies. Being part of the Bo Bunny family is such an amazing opportunity, so I just wanted to say thank you once again to the Bo Bunny team for having me as a designer and to the other designers for being so sweet and encouraging. You are the best!

I'd also like to share a bit about my family. I share my home with my four family members and four sweet, crazy and furry friends: our cats and guinea pigs.

This is my sweet mom, who I'm loving to pieces. Everytime I go shopping, visit family or friends or just walk around with her, people tell us how much we look alike. But just so you know: my mom has died her hair red, while to me red is my original hair colour LOL! We recently made a mother/daughter trip to Stockholm and both had an amazing time. It was wonderful to spend some time together.

My dad is a hardworking accountant for a Dutch bank, but he's also a real family man and besides that he loves to spend time on his bicycle: the vehicle that Holland is kind of famous for!

My 16-yo brothers, Joeri and Ivan, are twins, but as you can see on the photo above they are like chalk and cheese. They are so different from each other, both inside and out. Joeri spends many hours on his favourite bicycle, his BMX, each day and in fact he's pretty good at it too. Ivan prefers playing inside: he plays League of Legends at his laptop almost all day long. They both love goofin' around especially when I have my camera in front of me;)

Our tomcat Paco is as crazy as can be. He has quite a few quirks. His favourite thing to do is hiding inbetween the green plants, so he can scare us as soon as we enter the backyard. Apparently he didn't give it a moment's thought that the green plants don't really cover his white fur.

Beertje (pronounced as [Bear-tja]) is our 9-yo diva: she walks like a diva and she also has her very own divalicious way to express that she wants you to not walk away, as she's sitting on your lap at that moment;) I sometimes wish I could spend my days in the way Beertje and Paco spend them...I'd love spending my days relaxing, sleeping and eating without having to worry about anything at all...


Our littlest family members are called Babetje (pronounced as [Bu-bat-ja]) and Trudie and they're two cute guinea pig girls.

My favourite scrap subjects are my family, our vacation trips and my friends. I have a few very adorable nieces and nephews. Most of them don't live in my neighbourhood unfortunately, so I don't see them as often as I'd like to. But my two nieces Naomi, who is five years old, and Elise, who just turned one, live almost in the same street, so I usually get to see them at least once a week and for some reason these two cutie pies end up on most of my layouts. Can you tell why? ;)


As you can see Naomi is just like my brothers, she only wants me to take a photo of her if she's doing nice 'tricks' or if she's goofin' around...


Well, I think you know enough about me by now, so it's time for the scrapping part of this post...
A few weeks ago I received a huge box of new Bo Bunny yumminess and needless to say I enjoyed every minute of playing with these wonderful collections so far. I managed to create something with each one of the new releases. As you can see I did both cards and layouts this time around;)

Et Cetera:
Artis

Bo Bunny supply list:
Patterned Paper: Extra, Geography, Symphony, Cutouts and Filigree Diecut/Et Cetera
Cardstock: Double Dot in Chiffon Journal
Stickers: Et Cetera Combo Sticker
Jewels: Et Cetera
Rub-ons: Et Cetera
Chipboard: Et Cetera 12 x 12, Et Cetera Layered Chipboard
Flower: Et Cetera Petals
Buttons: Et Cetera
Stamps: Et Cetera, Gabrielle
Wrap and charm: Et Cetera

Tip: On this layout I cut the petals of the Et Cetera flower apart and used them as little flowers, for example in the upper left corner of my page.

Sweet Tooth:
Birthday Wishes

Bo Bunny supply list:
Patterned Paper: Temptations/Sweet Tooth
6" Paper Pad: Sweet Tooth
Stickers: Sweet Tooth Combo Sticker
Rub-ons: Sweet Tooth
Noteworthy: Sweet Tooth
Buttons: Sweet Tooth
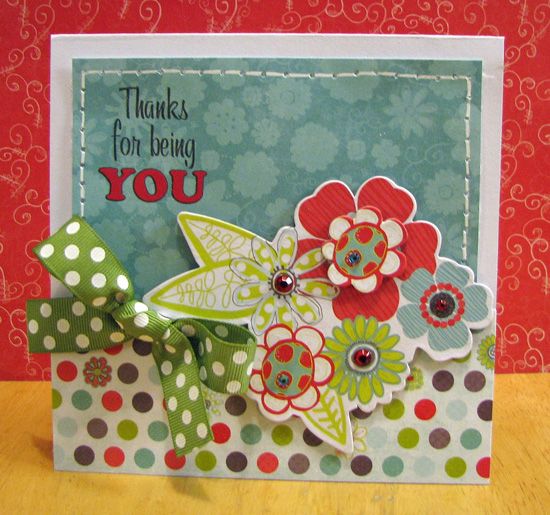
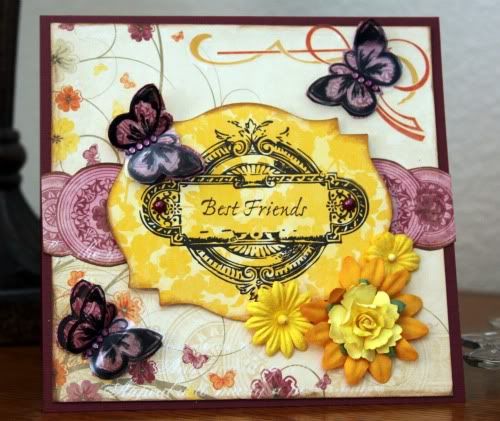
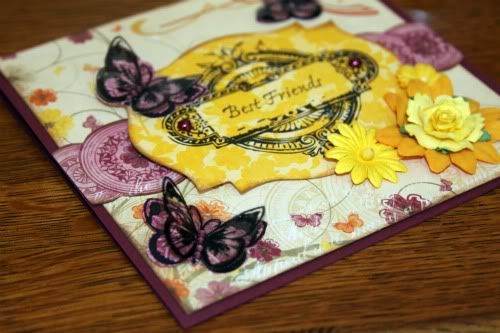
Garden Girl:
 Thanks so much

Bo Bunny supply list:
Patterned Paper: Garden Girl/Garden Girl
6" Paper Pad: Garden Girl
Stickers: Garden Girl Layered Stickers
Noteworthy: Garden Girl
Rub-ons: Garden Girl
Jewels: Garden Girl

Welcome Home:
 Miss You

Bo Bunny supply list:
6" Paper Pad: Welcome Home
Stickers: Welcome Home Home Grown CS Sticker, Welcome Home Dimensional Stickers
Noteworthy: Welcome Home
Rub-ons: Et Cetera
Jewels: Welcome Home
Charm: Et Cetera Buttons

Father Christmas: 
 Seasons Greetings

Bo Bunny supply list:
6" Paper Pad: Father Christmas
Stickers: Father Christmas Combo Sticker, Father Christmas Card Kit, Father Christmas Dimensional Stickers
Chipboard: Father Christmas 12 x 12, Father Christmas Layered Chipboard
Noteworthy: Father Christmas
Jewels: Father Christmas
Charm: Et Cetera Buttons

Blitzen:
 Merry Christmas

Bo Bunny supply list:
6" Paper Pad: Blitzen, Et Cetera
Stickers: Blitzen Dimensional Stickers, Blitzen Card Kit
Noteworthy: Blitzen
Chipboard: Blitzen Layered Chipboard
Rub-ons: Blitzen
Buttons: Father Christmas

Forever Fall:
Peek

Bo Bunny supply list:
Patterned Paper: Forever Fall, Blaze, Dot, Nature/Forever Fall
6" Paper Pad: Forever Fall
Cardstock: Double Dot in Chocolate Journal
Stickers: Forever Fall Dimensional Stickers
Chipboard: Forever Fall 12", Et Cetera 12", Forever Fall Layered Chipboard
Trinkets: Forever Fall
Jewels: Forever Fall
Buttons: Forever Fall
Noteworthy: Forever Fall
Brads: Forever Fall
Rub-ons: Forever Fall

I'd also like it to share some of my older Bo Bunny favourites with you. I picked one layout for each of the previous releases that I've got to play with. Don't you agree that Bo Bunny has some truly amazing products? I simply [heart] everything they come up with:)

Super cute, super pretty and richly and deeply coloured
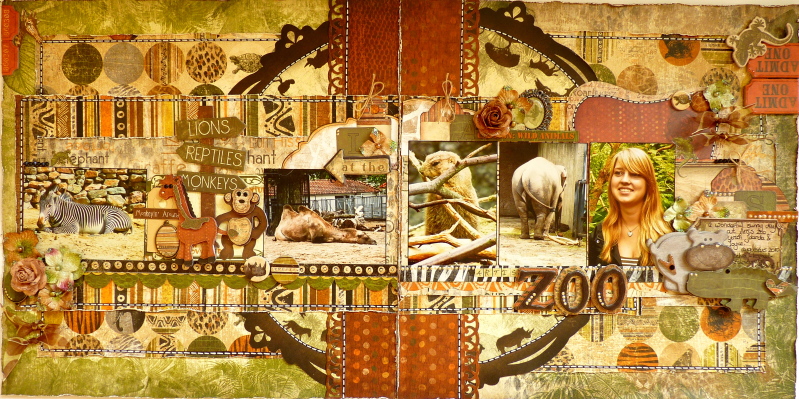
 Zoology:


Fresh, bright and summery Barefoot & Bliss:


Patriotical, masculine and totally awesome Liberty:


Spring-y, colourful and girly Vicki B:


Feminine, elegant and shabby chic Gabrielle:


Timeless, vintage and whimsical Timepiece:


Happy, playful and fun Ad Lib:


Boyish, adorable and trendy


Romantic, lovable and elegant Crush:


Sweet, detailed and pretty Crazy Love:


Wintery, frosty and delicate Midnight Frost:


If you leave a comment on this post you're also eligble for a fabulous Bo Bunny prize. The winner will be drawn at the end of the month. To thank each and every one of the Bo Bunny blog readers I'm also going to give away a little Bo Bunny package on my own blog: Scrapstuff and More. Just leave me a comment there and I'll randomly draw a winner next Wednesday.

Thank you so much for making it through this long, long post and for all the sweet and encouraging words that you've left our entire team throughout this past year. You are the best:)

XOXO, Romy