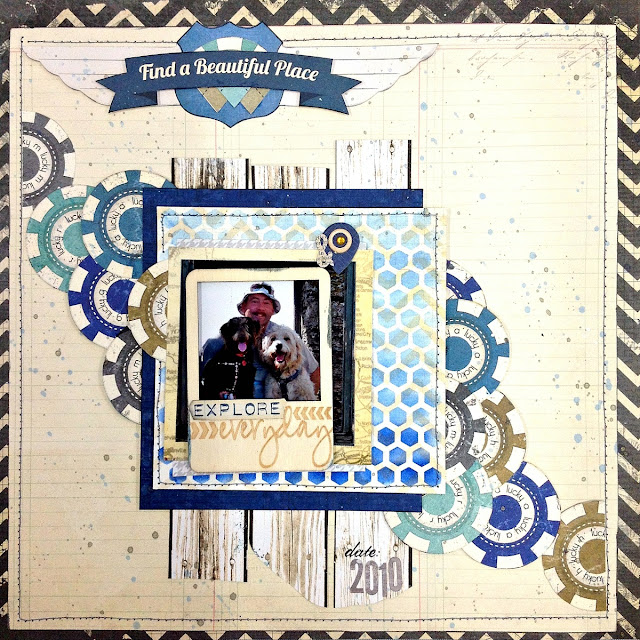
Explore Everyday by Tracee Provis
First we need to start by gathering up our supplies
I stuck my stencil to a piece of cardstock that was slightly larger so that I could trim down the edges afterwards. I gathered my ink pads, a piece of cut and dry foam and a water spritzer bottle.
Taking the white inkpad I pressed down onto my craftmat a couple of times to get some ink onto it I then repeated the same with the Blueberry ink pad. A small tip, always take care to put your ink apart slightly on the mat as this will stop any cross contamination of the ink colours on your pads.
Spritz a little water onto both colours and then mix together, I used my finger but you can do this with a paintbrush. This will then give you your palest colour which using the sponge you then sponge onto the bottom part of your cardstock through the stencil.
Gradually adding more Blueberry ink and water continue sponging small sections of the stencil until you reach the top. When you peel back the stencil you will see a beautiful ombre effect, that is simple to achieve. You can then cut to size and use on your layout.
Bo Bunny Supplies:
Patterned Paper:Billiards, Cash Out/Wildcard; Journey/Souvenir; Passage/Somewhere In Time
6 x 6 Paper Pad:Rose Garden
Double Dot:Charcoal, Chiffon/Chevron
Noteworthy:Wildcard
Misc Me:Souvenir
Stickers:Combo Sticker Souvenir, Altitude
Chipboard:Souvenir
Wood Shapes; That's Life
Ink; Blueberry:White
Stencils:Brocade
Glimmer Spray: Bronze
Stamps: You're Invited


Thank you for the ombre tips - going to try this today!
ReplyDelete