Showing posts with label tracee provis. Show all posts

Wednesday, July 6, 2016

1 Layout 3 Ways with Firecracker!


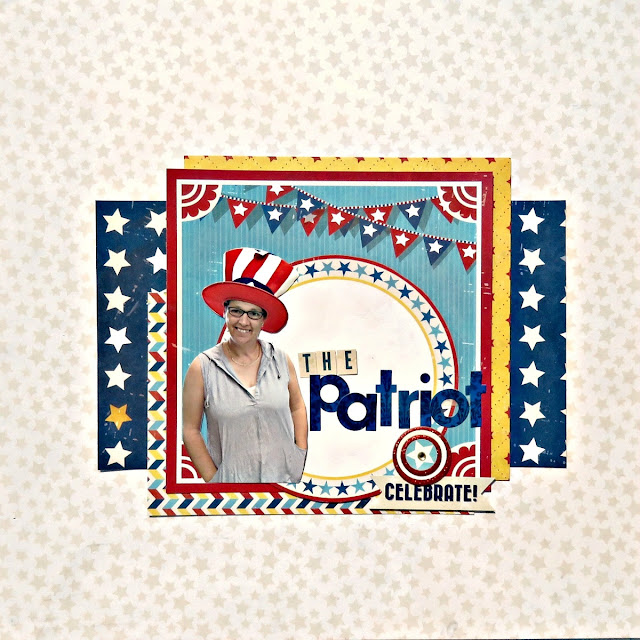
The Patriot - 1 Layout 3 ways by Tracee Provis

The Patriot scrapbook page Tracee Provis for Bo Bunny 1 layout 3 ways collage

Hi BoBunny fans today I am going to share 1 layout 3 ways using the Firecracker Collection

The Patriot scrapbook page Tracee Provis for Bo Bunny 1 layout 3 ways 01

For my first stage I simply layered up some of the papers in the collection. At first I had my photo as a rectangle, but then I decided to fussy cut the image out. I love doing this as it brings lots of "life" to the page. I used some letter stickers from the Genevieve and the Juliet Collection to make up my title.

The Patriot scrapbook page Tracee Provis for Bo Bunny 1 layout 3 ways 02

My second stage I cut the blue sections from the Honor sheet, I then layered this over the Firecracker background sheet. When I create my pages I generally make the main cluster separately and just keep laying on top of my background until I achieve the look I am after, this way I was able to then lay my cluster back on top. I used the Picture This die to tuck some film reels into my page.

The Patriot scrapbook page Tracee Provis for Bo Bunny 1 layout 3 ways 03

Stage 3 I really went all out, adding lots of Double Dot Jewels and Chipboard Stickers. Let's take a look at some close ups. I love all the different colour ways that the Double Dot jewels come in, there are pearls and gems in the packs and this gives a big diversity in the projects they can be used on


For the circle behind my photograph I used a Bo Bunny Palette Knife to spread some Transparent Gel through a stencil, when dry this gives a watermark type effect to the paper.


I snipped in half one of the border stickers on the Combo Sticker Sheet and added pearls to the centres. The layered chipboard stickers have some glitter on and this gives a great sparkle to your projects, fun embellishments and so easy to use.


I stitched all around the outside of the page and then also along the red lines of the starburst shape. I added some detail to my film reels by outlining them with a journaling pen, as you can see I was a little wobbly in some places but it all adds to the funkiness of the layout.


The Jewels also come in these swirl shapes and I cut the largest one in half and tucked it into the corners of my main cluster. I outlined the edges of the Celebrate Sticker and this time was a little steadier! I really enjoyed my time in the USA for the July 4th holiday and I hope to do it all again next year!

Thanks for stopping by the BoBunny blog today hope to see you again soon!

BoBunny Supplies:
Patterned Paper; Firecracker, Honor, Freedom, Picnic, Parade/Firecracker
6 x 6 Paper Pads; Firecracker
Double Dot Cardstock; Chiffon Chevron
Stickers; Chipboard Stickers/Firecracker: Layered Chipboard Stickers/Firecracker: Combo Sticker; Firecracker, Genevieve, Juliet.
Double Dot Jewels; Glaze, Blue Hues, Citrus
Brads; Firecracker
Dies; Picture This

Saturday, June 25, 2016

Snazzy Firecracker Cards!


Firecracker Cards by Tracee Provis

Firecracker cards by Tracee Provis Bo Bunny 01

Hi BoBunny fans, today I have some cards to share that I created using the adorable Firecracker Collection. The Firecracker Collection is a wonderful line that incorporates July 4th and much much more.

Firecracker cards by Tracee Provis Bo Bunny 02

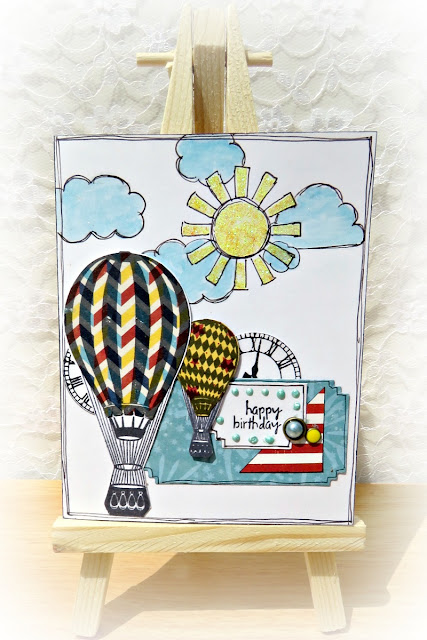
For my first card I started with a white base, then stenciled some clouds and a sun using Glitter Paste and Pearlescents.


I stamped the hot air balloons and the clock with stamps from the Dreamer set. I stamped the hot air balloons a second time onto patterned paper from the Firecracker 6 x 6 paper pad, I then fussy cut just the balloon part and layered it over the original shape.

Firecracker cards by Tracee Provis Bo Bunny 03

You can use the BoBunny Pearlescents in a number of different ways, this time I used the Brilliant Blue Pearlescents and painted my cloud shapes. They have a real shimmer and you can water them down to create different shades. After they were dry I used a mixture of Lemonade and Gold Glitter Paste and the Summertime Stickable Stencil set to make my sun in the clouds.


I wish we celebrated July 4th here in England it looks like so much fun! I always make a card for my friend over in the USA and I love the little children that feature in the Firecracker collection so I decided to make him the focus of my card.

Firecracker cards by Tracee Provis Bo Bunny 06

I layered up some papers from the collection and placed my fussy cut image in the centre, I used the On This Day stamp set to create my sentiment. BoBunny produces a set of Stamp Blocks, they are really great as they have a grid etched on for you to stamp your stamps exactly where you want them.


Firecracker cards by Tracee Provis Bo Bunny 07

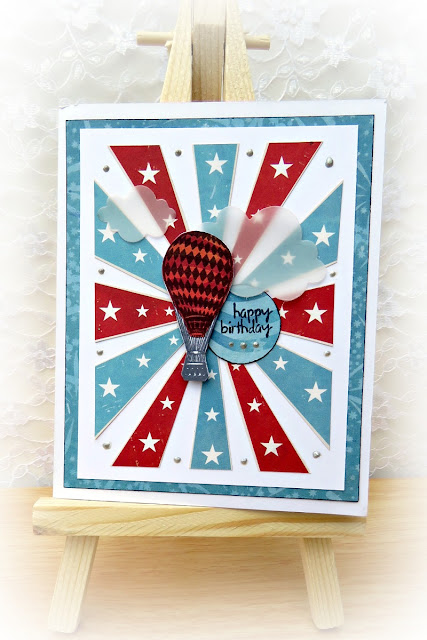
For my final card I chose one of the 3 x 4 sections of the paper and carefully cut away the white parts, this left me with a red and blue starburst that I mounted onto a slightly larger white piece. In the white parts I added a small dot of Silver Pearlescents.

Firecracker cards by Tracee Provis Bo Bunny 08

I used the same technique with the balloons as I did on the first card. I cut out a small circle and added my sentiment to it, with a few more of the Silver Pearlescents to make a simple greeting. I wanted to keep this card simple but I felt it needed a little something more, so I cut some clouds from vellum using the Fly Away die. I turn to this die time after time as I love cloud shapes. Thank you for spending time with me today, see you soon!

Bo Bunny Supplies Used:
Patterned Paper; Anthem, Picnic/Firecracker, 6 x 6 Paper Pad/Firecracker
Pearlescents; Brilliant Blue, Silver, Island Mist
Brads; Firecracker 
Glitter Paste; Lemonade, Gold
Stamps; Dreamer, Icons, On This Day
Stencils; Summertime
Dies; Fly Away, Picture This

Sunday, June 5, 2016

Tea For Two!


Hi there BoBunny fans Summer is almost upon us, time for a Tea Party for Two outside in the garden. The gorgeous Butterfly Kisses is the perfect collection to create the scene.

Tea For Two by Tracee Provis


I wanted to use my Grandmother's tea service, so I used the blue/green tones that are found in the collection. To create a flowery feel I added some Bo Bunny Blossoms and Petals along with the papers.


I created a vase of flowers using a mixture of the Bo Bunny Blossoms and Petals. I also created a couple of my own flowers, and for cute touch I added some fussy cut butterflies. I attached all these to wires and arranged them in an old jar, that I covered with lace and a chipboard sticker.


No tea party is complete without cupcakes, I die cut some cupcake wrappers using the Gentle sheet. I used a Silver Foil Transfer to add to the middle of a Bo Bunny Doily, I added it to my cake stand by piercing a small hole in the middle.


I wanted to add a little sign to my table and I added a teapot shape to my layered up papers. Once again I used Silver Foil Transfers to add some shine to my piece.


As a final touch I created these faux t-bag strings, I added some Silver Foil shapes and wrote the names on the other side. A tea party fit for a queen! 


BoBunny Supplies:
Patterned Paper; Gentle, Delight, Butterfly Kisses, Flutter, Sunlit, Springtime/Butterfly Kisses
6 x 6 Paper Pads; Butterfly Kisses
Stickers; Chipboard/Butterfly Kisses
Brads; Butterfly Kisses
Buttons; Soiree, Beautiful Dreamer
Blossoms; Denim Blue Pansy; Neutral Petals
Foil Transfers; Silver Foil Filagree, Silver Foil Accents

Monday, May 23, 2016

Take A Hike With Misc Me!


Hi BoBunny fans! Today I will be sharing some 12 x 12 Misc Me pages with you using the fabulous Take A Hike Collection, so lets get started.

The Great Outdoors by Tracee Provis

Ever year we hire a little cottage by the sea, there are lots of trails and coastal paths to explore so I thought I would create an album of our adventures.


The Take A Hike collection is perfect for documenting outdoor walks, and I cut out 3 x 4 journaling cards on the Trails sheet. I cut just the paw on the bear card then I slipped my picture of the nature trail sign in behind and it looks like he is holding on to it for me.


I layered up some papers along with a Misc Me Pocket Square (that I cut the edges off) and then added some journaling. As you can see by the date I am starting with some older photo's in this album.


I cut the compass from another of the Pocket Squares, there are usually more than one of each of the cards, so I still have another to use in its entirety. I then layered over a title that I cut on my silhouette.


I used the 4 pocket page protector for my next page and in each one I created like a mini scrapbook page. 


I cut out the frame that is on the fishing sheet and I wanted it to fill my pocket but it wasnt quite big enough so I attached it to a 6 x 6 piece of vellum and popped it in. I sneaked in a butterfly that I cut from the Butterfly Kisses Collection. Once again I cut the Wild and Free title on my silhouette.


You can also use your mixed media products in your pockets, here I took the Summertime Stencil and added some crackle paste clouds to my papers after it was totally dry I then added it to my page protector.


I hope you have enjoyed your visit with me today, I will be back soon to share more of the pages in this album.

BoBunny Supplies:
Patterned Paper; Fishing, Destination, Happy Trails, Nature, Trails, Trekkin, Getaway/Take A Hike; Sunlit/Butterfly Kisses
6 x 6 Paper Pads; Take A Hike
Stickers; Combo Sticker/Take A Hike
Misc Me; Pocket Square Cards/Take A Hike, 12 x 12 Page Protector Variety Pack
Crackle Paste Primer, White Crackle Paste 
Stencils; Summertime

Thursday, May 5, 2016

Scribble Technique with the Believe Collection!


Hi BoBunny fans today I am here to share some cards I created using a simple scribble technique. I will show you how you can create your own cards or in fact any project with this technique.

Happy Day Card by Tracee Provis


Using the Scribble technique I created both the flowers and my sentiment, I also cannot stop using the gorgeous Believe collection. All you need to create your own flowers or sentiments are patterned paper, a fine marker pen or pencil, some scissors to fussy cut with.


Start by drawing a rough outline of your flower, it doesn't have to be really neat. Keep drawing over the outlines until they become thicker, if you have gaps you can add some pen strokes until you are happy they are filled in. Take your scissors and cut around the outline.


Once you have cut them out you can add jewels or pearls to the centers. These Double Dot Citrus Jewels coordinate perfectly with the oranges and yellows in the Believe Collection.


Cut flowers from different colours and patterns in the collection. Of course with this technique you aren't just limited to flowers. here I also used the scribble style to form my sentiment, simply scribble your lines so that each letter is almost overlapping, then cut around.

Love Card by Tracee Provis


For this card I chose to scribble and cut heart shapes, I used the Love die from the Love Squared Set and gave it a border using my fine pen. I stamped the script writing just a little wider than my die cut frame to add a little interest, yet keeping it simple. Some torn paper finished off my card.


New Beginning Card by Tracee Provis


Changing collections for this card I used the Secret Garden Collection. I took these stems from the Doodle Blooms set and masked off the areas I didn't want on my card, I used my colouring pencils to fill in the leaves and I added a line down the stem too. I wanted my flowers to be growing out of the ground and I used the Grass Die that comes from the Bike Ride Set. 


I used lots of layers behind my flower panel and I drew an outline around the edge of each one to create a sort of a busy illusion. Some white Double Dot Pearls were added to the centers of the     flowers. I hope you like this simple easy way to create flowers hearts and in fact anything you wish. Thank you for joining me today. 
                                                                Til next time....


Wednesday, April 27, 2016

Layout Inspiration With Secret Garden!

Today we have a little layout inspiration for you! The Secret Garden collection is perfect for any occasion!


Just a few bits of paper, embellishments and a dash of mixed media and viola! You have a wonderful layout!

Monday, April 25, 2016

Marvelous Mixed Media Layout!

Hi BoBunny fans today I am here with a simple layout using the bright and beautiful Believe Collection, I teamed this with a few of BoBunny's newest mixed media products with great results.

Live in the moment scrapbook page tracee provis bo bunny believe 01

I started by applying a thin layer of Crackle Paste Primer to my page, after allowing it to dry I then applied the Crackle Paste and watched the magic as the crackles appeared. once it was all dry I flicked a little Frost Glimmer Spray around.

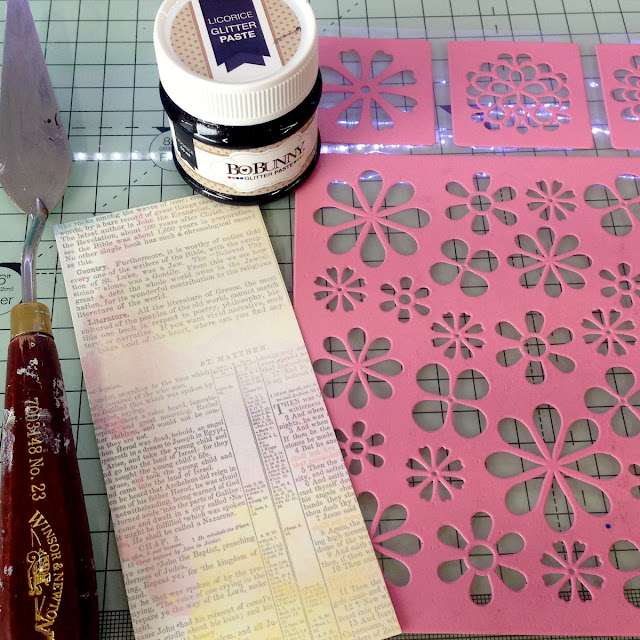
I also created a glitter textured layer using some Licorice Glitter Paste, here is a small tutorial below of how I did it.

Live in the moment scrapbook page tracee provis bo bunny believe 02

Take your chosen stencil, I used the Flower Power stencil. A palette knife, or something to smooth your Glitter Paste on with and of course your pot of Glitter Paste.

Because the piece of patterned paper I was using was smaller than the stencil, I chose to use a glass cutting board to work on. This way the excess paste can be easily wiped up.

Live in the moment scrapbook page tracee provis bo bunny believe 03

Spread the Glitter Paste over the stencil, then immediately remove the stencil and clean. Simple, you then have a glittery piece to use as a layer behind your photo.

Live in the moment scrapbook page tracee provis bo bunny believe 04

I fussy cut some clouds from the Faith sheet, I used one of them to write some simple journaling on. I stamped a few random stars using a small star stamp from the Amen Stamp Set.

Live in the moment scrapbook page tracee provis bo bunny believe 05

I fussy cut these flowers from another of the patterned sheets then blinged them up by adding a Double Dot gem or rhinestone in the centre. My title "Live In The Moment", is a ticket that I cut from the Divine sheet. The colours in this collection are so vibrant and happy they give every project you create a feel good factor.

BoBunny Supplies: 
Patterned Paper; Radiance, Faith, Glory, Divine, Worship, Joyous/Believe
Glitter Paste; Licorice
Crackle Paste Primer
White Crackle Paste
Glimmer Spray; Frost
Double Dot; Citrus jewels

Monday, March 21, 2016

Dreamy Misc Me!


Dream - Misc Me by Tracee Provis

Today I will be sharing with you some Misc Me pages that I created for my Granddaughter's album. I always let her fill her own journaling in as it makes it much more personal for her. I used the Beautiful Dreamer Collection, which certainly lives up to it's name....it's gorgeous!


This collection doesn't cry out beach theme but it's easily adapted for any occasion you want. I fussy cut a little bird from one of the papers and placed him on top of the plastic pocket for a 3D look without adding too much dimension.


I used one of the large pieces from the Journal Contents Pack, and created a mini scrapbook page. I added a little torn Gold Foil Washi Tape and a coordinating sticker from the new Clear Sticker range.
I left a space for Star to write her journaling in, along with her 6 reasons why she loves the beach.


I adore the birds that are printed throughout this collection and I couldn't resist adding them to both of my pages. The tiny one on the left is another Clear Sticker from the pack along with the letters that spell out strawberry picking. I added some die cut viewfinders that I cut from the 6 x 6 Beautiful Dreamer paper pad.


As I said I do like to add some of my elements to the top of the plastic pocket. Here I fussy cut the gold frame and adhered it on top, underneath on the polka dot card is a secret message (you could also add another photo here if you wished). I am loving the way this album is turning out and I'm sure I will be back to share some more pages in the future.

BoBunny Supplies Used:
Patterned Paper; Daydream, Journal, Illusion, live life, Beautiful Dreamer/Beautiful Dreamer
6 x 6 Paper pads Beautiful Dreamer
Stickers; Beautiful Dreams Clear Stickers, Beautiful Dreamer Combo Stickers, Tuxedo Double Dot Alpha Stickers, Beautiful Dreamer Chipboard Stickers
Misc Me Journal Contents; Beautiful Dreamer
Misc Me Pocket Squares; Beautiful Dreamer
Misc Me White & Kraft 8 x 9 Binder
Dies; Love Squared, Picture this
Stamps; Icons
Stickable Stencils; Serenity
Glimmer Spray; Bronze