Showing posts with label Background stamps. Show all posts

Friday, July 6, 2018

Best Day Layout with Irit

Hello my dear crafty friends!
Irit here today with a lovely and sunny baby girl layout made with the new Sunshine Bliss collection.

This collection is so versatile. You can do baby girl pages or projects and you can also use it for bright summer crafts and there are darker green cardstock designs in this collection that are great fit even for some mixed media projects.


This is my adorable grand daughter Netta who was here just 16 months old. She is almost 5 years old now, but these photos are so great to scrap again and again.
I decided to make a baby girl layout just because the photos I used were a great fit for the colors.
I made this layout with cut out photo as the background was out of the color range and made double matting for the cut out photo part with stamps.
The layout is pretty dimensional, but not mixed media kind.

Also I stamped over the background, but it was for more interest, not for making it messy.
I made a double title using this collection's thickers and one single layered chipboard.
I added some journaling with the combo stickers.

I used Vicki Boutin mixed media inks to color the bare chipboards "as is"- just grab the ink over the pieces and let them dry as these inks are pigmented. You can also heat dry the inks or add some clear embossing powder over the ink.

The Noteworthy die cut flowers were embellished with green pearls and more  jewels were added over the layout.


Here you can see all layers of this page, but it's still a flat scrapbooking page that can be kept in a clear pocket.


Thanks for being here with me today and I hope that you like my baby layout as much as I love it.
See you soon again!

BoBunny product list:
Sunshine Bliss cardstock collection 12*12'': Tranquillity, Joy, Euphoria, Sunshine Bliss, Charm
Sunshine Bliss Combo Stickers
Sunshine Bliss Layered Chipboards
Sunshine Bliss Noteworthy die cuts
Sunshine Bliss Thickers
Fanciful Flourishes Stamp
Take Note Stamps
Wall to Wall Textures Stamp
Leaves Laser cut chipboards
Double Dot Citrus Jewels
Double Dot Emerald Jewels
Double Dot Citrus Flourish Jewels
Beautiful Dreamer Buttons
Color Weel Mixed Media inks Vicki Boutin by American Crafts


Monday, August 19, 2013

There are soooo many ways to use Zip-A-Dee-Doodle!

I'm so excited...  our new DT has started getting their boxes
and playing with the new product, so today, we're going to show 
off what they've done with Zip-A-Dee-Doodle.

It's A Wonderful Life 
by Keri Babbitt
Designer Tip: I love the bold, freestyle look of the new Zip-A-Dee-Doodle collection from BoBunny. The color scheme is fresh & versatile, and the blues in the collection are perfect for outdoor/blue-sky photos, like this silly family-selfie we took at the lake last weekend! I used the new coordinating Countdown stamps to create a graphic element for my page - using only the numbers 0-4, to represent our family of four.

 BoBunny Supplies:

Patterned Paper: Collage, Meow/Zip-A-Dee-Doodle 
Cardstock: Coffee Vintage
Stickers: Zip-A-Dee-Doodle Combo, Dimensional Stickers
Noteworthy: Zip-A-Dee-Doodle
Jewels: Zip-A-Dee-Doodle
Chipboard: Zip-A-Dee-Doodle 12 x 12
Stamps: Countdown
Misc Me Stickers: Zip-A-Dee-Doodle


Birthday Wishes 
by Juliana Michaels
Designer Tip: I enjoyed using the fun and whimsical Zip-A-Dee-Doodle collection to scrap these photos of my Mother as she was opening her birthday gifts from me. They were perfect to capture the excitement of the moment! You can visit my blog 17turtles if you would like to see more tips on working with this collection!


Happy Day
Ilene Tell


BoBunny Supplies:
Patterned Paper: Zip-A-Dee-Doodle, Abstract, Collage, Crackle, 
Creative, Journal, Zig Zag

Cardstock:Licorice Stripe
Stickers:Zip-A-Dee-Doodle Misc Me Sticker
Brads: Zip-A-Dee-Doodle
Jewels: Zip-A-Dee-Doodle
Chipboard: Zip-A-Dee-Doodle 12 x 12; Zip-A-Dee-Doodle Layered Chipboard

Don't you just love it???
For more fun, check out what Bernii has done with
this collection on her blog.  She's included a photo tutorial.
You're going to love it.

We can't wait to see what you all come up with using this
line.  Make sure you share your creations with us on facebook.

Monday, July 8, 2013

KRAFT! DOUBLE DOT! STAMPS!

Ok guys, it's our final new product day, and we are so excited to show you our new line of KRAFT goodies! There are all sorts of kraft items to mix and match with all your crafting! Plus we have new Double Dots and stamps!


New Pleated Lace in Burlap and Canvas- 1meter in length

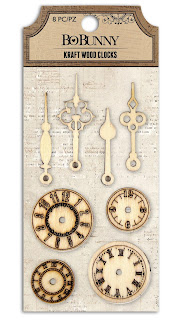
Wood embellishments to add to all your projects


Wood Alphabet Stamps in upper and lowercase


Decorative paper roll to wrap, mod podge, or tear any way you'd like! 


And finally some Kraft Gift Bags that come in 2 sizes plus a sheet of stickers to use as closures. 
3 of each size bag in each package


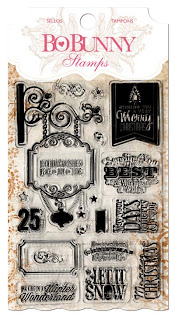
New Large Stamps!


And finally...NEW DOUBLE DOT! I know you've been anxiously awaiting new colors! We have 3 new colors and 3 new VINTAGE dots!

 Charcoal
Jade 
Maize
 Brilliant Blue Vintage

Maize Vintage
Shadow Vintage

I can't even tell you how much I love the new double dots!! And the Kraft! Love it all! What are your thoughts? Leave us a comment for a chance to win! We'll announce all winners tomorrow! Good Luck!


Tuesday, April 9, 2013

Technique Tuesday with Gabi

Today's tute is awesome!!!
First of all it features Mammarazzi²
and then the new texture background stamps.
It can't get much better than that.

Oh wait! It can... this is brought to you by the letter G.
G for Gabi

CLICK
Gabrielle Pollacco
 Hi, it's me Gabrielle here with you today to share with you a little step by step on how I layer the new background stamps to create a unique and fun page design. I love the new background stamp designs and for the above page I combined a number of my favorite new stamps. In a few easy steps you can create a page that is different from any out there.
 I began with a piece of BoBunny Cardstock, here I used the ledger design paper in the Chiffon color. I trimmed off about a quarter inch from the outside edges so that when I later mount the paper on a patterned paper you'll have a nice peek of the paper behind, framing the design. Lightly ink the edges with some chalk ink (I used a brown and a grey chalk ink).
 The next step is to begin creating a soft frame around the edges using the chicken wire stamp from the Distressed Textures stamp collection. Try stamping the design a little heavier in the corners, lighter along the edges. I also used one of crest stamps from the Prairie Chic collection in the top left corner.
 Next I marked in pencil the placement of my photo and inked all around the edges of it in a random pattern. I used Versa Magic 'Sea Breeze' and 'Aloe Vera' chalk inks.
Here's the fun part! I started stamping around the edges of the frame of my photo, over-top of the inked area's with a variety of background stamps. I used the Geometric Patterns stamps, On This Day stamp collection and the Stained Textures stamp (I love the water ring stamps!). As you can see I had a little mishap when I stamped the checker design on the right side of my page (I accidently dropped the stamp lol...but no worries, you can always work around it with some strategic placement of your embellishments).

Finish up by adding your photo and embellishing with the beautiful coordinating stickers, blooms, chipboard, buttons and trinkets that go with the Mama-razzi² collection. Mount your stamp designed paper on a coordinating piece of patterned paper and you have yourself a special page that is your own unique design!


BoBunny Supplies:
Patterned Paper - Mama-razzi2 (Focus)
Stamps - Background Stamps (Distressed Textures, Geometric Patterns, On This Day, Stained Textures), Prairie Chic Stamp.
Rub-on's - Mama-razzi2
Dimensional Stickers - Mama-razzi2
Combo Stickers - Mama-razzi2
Chipboard - Mama-razzi2
Trinkets - Mama-razzi2
Buttons - Mama-razzi2
Lace - Clover
Flower - Natural Earth Daisy
Other Supplies: Burlap, Tim Holtz Washi Tape

Enjoy and scrap happy!!!