Showing posts with label Winter Wishes. Show all posts

Friday, January 26, 2018

Winter Fun-A Mini Waterfall Album featuring Winter Playground with Solange


Hello Everyone!

It's Solange Marques here! Today I'll share with you another lovely project using the BoBunny Winter Playground range. Seriously, this is the MOST beautiful winter collection that I've seen!

I've created a winter mini album for you to enjoy today.


I've applied Glitter paste on wood shapes and I've added jewels:


Here I've used vellum from a past BoBunny line called Winter Wishes collection to make a pocket.  It still looks goregoues here and coordinates very well.


More pages:


I've used BoBunny dies to the frames, tags and snow flakes:


Here I've applied glitter paste using a stencil on the transparency:


Thanks for dropping by for some winter inspiration! 


BoBunny Supplies:

Patterned Papers:Winter Playground, Children, Frolic, Frosty, Fun, Icicles, Nippy, Noteworthy, Picturesque/ Winter Playground

Cardstocks: Dark Denim Vintage Doble Dot, Taupe Dot

Vellum: Winter Wishes

Stickers: Winter Wishes Combo Stickers

Wood Shapes: Snowflakes

Laser cut Chipboard: Lace Tags

Jewels: Tuxedo , Blue Hues/Double Dot

Jewels Flourishes: Glaze Jewels

Brads: Blue Hues Double Dot

Blossoms: Denim Blue Daisy, Clover Bouquet Buttercup

Dies:Squared, Nested Terrifc Tag, Merry Christmas

Stencil: Winter Fun Stickable, Winter Delight

Glitter Paste: Silver

Gesso: White


Thursday, August 31, 2017

Christmas Comes Early! Fun Pre-Holiday Ideas with Irit!


Hello My Dear Crafty Friends, 

 Welcome to my second August BoBunny blog post.
As my new BoBunny collections are still on the way to me (thanks to our fantastic post service it takes ages to get a package ) I decided to share a few projects made with older collections, with a holiday twist.
All four projects were made with Christmas/Winter collections and with both seasons coming this is just a perfect time to share with I have done with all of my holiday craftiness.
All four projects are almost 100% BoBunny and all are easy and fast crafts. I added step by step written instruction to all of four projects to make them easier to complete.
The first project is an altered planner cover and I didn't add the real planner inside as I am still waiting for the new 2018 one.


As you can see I made this "wooden door" that I love, and have used on my BoBunny projects.  this one is embellished it with Merry and Bright collection pieces.

How to make this project:
1. Cover the simple planner with fabric. Paint with white Pentart black gesso and let it dry.
2. Make the door shape with white painted chipboard piece as a base.  Cut chipboard painted strips to cover the basic chipboard and paint them with white gesso. Use dry brush to make the wooden texture over the wet gesso and let it dry.
3. Arrange the painted strips as shown and secure with brass brads. Add the metal handle and the hinges and paint them all with a bit of white gesso.  Paint the arranged door with Pentart pink and gold acrylic diluted with water.  Glue the "door" to the fabric cover of the notebook.
4. Arrange the embellishment cluster using BoBunny patterned cardstock, chipboards, layered chipboard and Noteworthy pieces.


Products used:
BoBunny products:
Merry and Bright collection: Festive 12'' cardstock
Chipboards
Layered chipboards
Noteworthy
Gold Simmer spray
Pentart products:
White and black gesso
Creamy Acrylic Rose
Creamy Acrylic Metallic Baroque Gold


The second project is an altered notebook and I just used the simple school notebook that was covered as a small Christmas gift.  This time I used the Tis the Season paper collection.


How to make this project:
1. Cover the simple office notebook with Tis the Season Ornament cardstock  (backside0.
Add the black cardstock spine, another patterned paper strip and the sequin ribbon over the cover.
2. Die cut all 5 rectangles for the cover: 3 from silver glitter cardstock and two from BoBunny patterned cardstock. Arrange them as shown over the cover.
3. Add a strip of the cover cardstock vertically on the top. Glue the chipboards as shown over the top and add the chipboard sentiment.

4. Glue a few random sequins over the cover. Paint over the chipboard parts with gold Pentart liner paint.

Products used to make this project:
BoBunny
Tis the Season collection:
Ornaments, Garland, Greetings 12'' cardstock
Chipboards
Noteworthy
Pentart products:
Gold Liner

My next project is the gift card holder made with BoBunny Winter Wishes collection.
This is how it looks when closed:


And this is the upper flap when opened:


This is how it looks when it's totally opened:


And now for some close- ups:


How to make this project:

1. Fold the 12 x 5 1/2'' Flamingo Double dot cardstock to 4 3/4, 4 3/4 and 2 1/2'' piece.

Glue the small magnets inside the front folds for the closure and cover with Powder Blue Double Dot Cardstock inside.

2. Add  Powder Blue and Winter Wishes Snowfall cardstock over the front cover folds. Die cut the sentiment and glue it over the upper fold. Add all die cuts and chipboards to the cover parts. Glue the key hole chipboard on the bottom.

3.Embellish the inside as shown. Add pink photo corners to fit the gift card size in the middle part of the holder.

Product list:
BoBunny products:
Flamingo Doubledot cardstock
Powder Blue Doubledot cardstock
Winter Wishes Foil vellun paper
Winter Wishes Noteworthy
Winter Wishes chipboards
Winter Wishes Layered chipboards
Winter Wishes Combo Stickers

My last project are a set of altered metal bottle caps.
It's a cute, easy to make project that can be a great small gift and it was made as a larger cap and three smaller ones.


How to make this project:
1. Paint the large and small metal bottle caps with Pentart Liquid Metal Copper paint.
2. Cut the patterned cardstock large circle and glue it inside the large cap. Glue December 25 sticker        over the cardstock inside the cap.
3. Glue two more chipboards one over another as shown.
4. Embellish the cap with paper flowers and ribbons.
5. Die cut the Santa sticker to circle that fit the smaller caps from inside. Glue them inside the caps.
5. Cover the stickers with Glossy Accents and let them dry. Add magnets on the back of each cap.

Product list:
BoBunny products:
Tis the Season Combo stickers
Tis the Season chipboards
Tis the Season  12'' cardstock
Pentart products:
Liquid Metal Copper paint


Thanks for being with me today and see you soon!  Irit


Sunday, January 15, 2017

Designers Choice with Ombretta


Hello and welcome to the BoBunny Blog!

Today I propose you paper lanterns for your party! These are super simple to make and as you can see have a beautiful visual impact.

Party Lanterns by Ombretta Fusco using BoBunny Winter Wishes Collection

Paper lanterns for party? Why not? A simple and striking way to decorate the table and rooms of your home! As you can see below, these may look like metal, but they are simply strips of paper!

Party Lanterns by Ombretta Fusco using BoBunny Winter Wishes Collection


Party Lanterns by Ombretta Fusco using BoBunny Winter Wishes Collection

You will only need a few materials to create them, but can you make them beautiful only if you use BoBunny supplies! ^__^

Paper in lovely coordinating colors, adhesive or tape.  I have made so many cuts with different patterns and colors and here you can see the finished project, the beautiful latnerns and they are all different!  teh best part is they are nice home decor during the day and transform into mood lights in the evening.  All you need is a tealight or a flameless candle and you have the perfect craft!

Party Lanterns by Ombretta Fusco using BoBunny Winter Wishes Collection


Party Lanterns by Ombretta Fusco using BoBunny Winter Wishes Collection

Do you like my lanterns? I hope so and I hope I've given you an original idea to make special your parties!

See you next time! A big kiss everyone!

Ombretta!


BoBunny Supplies:
Winter Wishes Wonderland
Winter Wishes Chill
Winter Wishes Magic
BoBunny Doubledot Graphite
BoBunny Doubledot Silver

Pentart Media Ink Brown
Pentart Creamy Acrylic Gray


Saturday, January 14, 2017

Winter Wishes and Pentart Glass Paint with Amy


Hello there My Bo Bunny Friends,

Today I wanted to show you some sweet cards I created using the Winter Wishes collection. The beautifully vintage style is perfect for layering your layouts and cards.


 This pop up card is layered with Noteworthy, layered chipboard and foil vellum pieces creating a beautiful vintage cluster.


This card has a layover of a thin acetate like material great for use with Stickable Stencils and Pentart Glass Paint.  You can see the subtlety of the design on the clear where I applied in pink.  These shades can be mixed a bit too to give you varied effects.


Pentart Glass Paint is transparent and super easy to use!  You can be assured that and will stay put nicely on your projects.

Handmade cards are always so nice to send to special friends and so well appreciated.   Sending a physical card is almost a "lost art" and means so much more!

Thank you for stopping by

BoBunny Supplies:
-Winter Wishes 12" Paper
-Winter Wishes Whimsy 12" Paper
-Winter Wishes Glistening 12" Paper
-Winter Wishes Foil Vellum Paper
-Winter Wishes Combo Stickers
-Winter Wishes Noteworthy
-Winter Wishes Layered Chipboard
-Glaze Jewels
-Winter Fun Stickable Stencil

Pentart Supplies: 
-BoBunny Pentart Glass Paint Magenta and White

Friday, January 13, 2017

Winter Wishes and Pentart Glass Paint with Emilia


Hello BoBunny fans!

Emmy here today with a brand new layout to share. Today's assignment was to combine the lovely Winter Wishes collection from BoBunny with  Pentart Glass Paint. And here is what I came up with:


I used Icicles pattern paper for my background. To create the silver dimensional layer I used a Stickable Stencil and Silver Glitter Paste. I always adore the effects of the paste and it works seamlessly with these stencils. 


I die cut different winter images from a sheet of acetate and used Pentart Glass Paint to colour them. I added first a layer of Blue paint and when it was dry I added a second layer of Carmin paint on top.  That is how it looks somewhat marbled and multicolored.  I really like this technique with the glass paint.  It allows me to add color and interest to the page while not adding busy-ness


Then I decorated my layout using die cut and fussy cut images from Noteworthy and other Winter Wishes pattern papers. 


BoBunny Supplies:
Pattern Paper: Beautiful, Frosted, Icicles, Snowfall, Wonderland / Winter Wishes
6x6 Paper Pad: Winter Wishes
Combo Sticker: Winter Wishes
Noteworthy: Winter Wishes
Glitter Paste: Silver
Stickable Stencil: Winter Fun
Double Dot Jewels: Think Pink
Tools: Palette Knife Assortment Pack

Pentart Supplies:
Glass Paint - Blue, Carmin
Alcohol based Solvent  

I hope you enjoyed today's post!

Have fun creating!

Emmy


Thursday, January 12, 2017

Winter Wishes and Pentart Glass Paint with Irit


Hello my dear crafty friends and welcome to my new BoBunny project.
This week I was challenged to make a  Mixed Media project with Winter Wishes collection and to add Pentart Glass paint.
So what should you use to combine glass paint and paper?  It sure should be a kind of something clear, even if it's not a real glass. 
So this project was made with  clear acrylic album cover, but I made it into a wall deco project.


This is how this wall deco looks over the sheet of BoBunny patterned cardstock from this most adorable Winter Wishes collection.

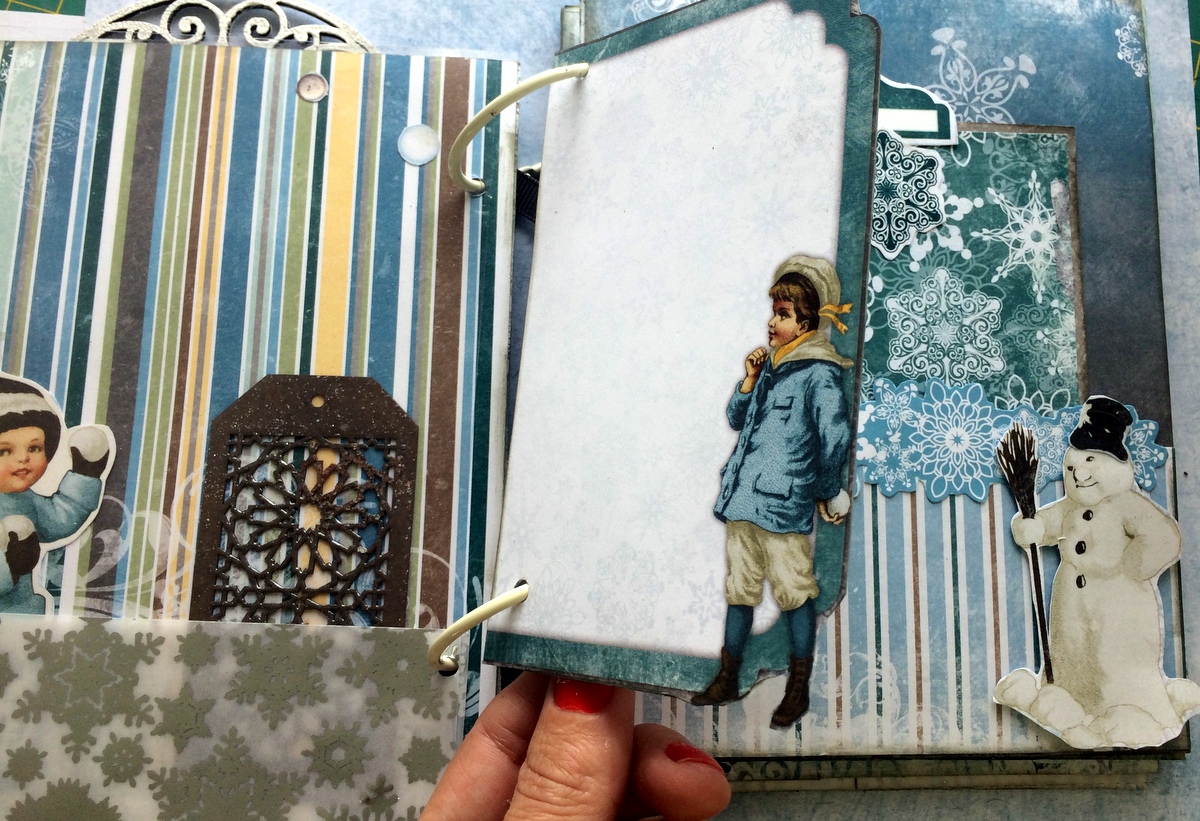
I wanted to leave this decoration as clear and translucent as possible. So I didn't use any cardstock, just vellum pieces only and added some layered chipboards, stickers and die cuts here and there.

 I used hand cut vellum pieces as my front part background and added the main Angel image sticker that was hand cut from the sticker rectangle.

The title was made with three different stickers and it says " Perfect Angel Wonderland".


And now let me show you the back side of this piece.
As you can see it was made with two components.
The outside  square of the cover was covered with BoBunny White Crackle paste. 
First I used the Primer and then the Crackle component and you can see those gorgeous crackles around the cover.
Then I used Pentart  solvent based White Glass paint and I left some clear areas as I wanted parts of the piece  to stay translucent.
Finally- not seen here- I covered the  painted back with Pentart solvent based Glossy Varrnish.


Here you can see the layered chipboard clock that was added on the top of the project.
I used BoBunny delicious brads to fix the cord inside the pre-made holes (remember that this was originally an album cover with holes for binding rings).
Some die cuts from Noteworthy pack were added near the chipboard clock.


The silver snowflakes were  made with a new Winter Fun stencil and my favorite BoBunny Silver glitter paste and believe me that shine and sparkle of this paste is even seen in the dark!


The trees were cut out from the gorgeous foiled vellum paper from  the same paper collection and glued with a bit of glaze.

 I added some pink pearls over the trees just to add some color to the whole piece.


And here is another look at the brads that hold the cord.


 I hope that you got some Winter inspiration from this decor piece and will try to make something similar with BoBunny delicious products.

BoBunny Supplies
Winter Wishes Foil Vellum paper
Winter Wishes Noteworthy
Winter Wishes Layered chipboard
Winter Wishes Combo Stickers
Winter Fun Stickable stencil
Think Pink Brads
Think Pink Jewels
Crackle paste (primer and crackle)
Silver Glitter Paste

Pentart Supplies:
Solvent based Glossy Varnish
Solvent based White glass paint