Showing posts with label Candy Cane Lane. Show all posts

Monday, December 15, 2014

Fantastic Pearlescents Tutorial

Hi everyone! Today, I wanted to share some fun ideas of different things you could do with the new Pearlescents. They are absolutely amazing - a thick, shimmery paint that keeps its shape and comes out of a tube. I LOVE them, which is why I'm always pulling them out and playing around with them. So you're in for a lot of pictures today and several cards I created using Pearlescents in various ways. If you want to see two more New Year's Cards I created using Pearlescents for accents, you can check out my blog HERE.

Fun with Pearlescents by Ilene Tell

1. Stencil
Pearlescents tutorial by Ilene Tell using BoBunny stencils

 Use a snippet of a makeup sponge. Add Pearlescents directly to sponge and dab on top of stencil. The result will be a shimmery image.

2. Dots Around Edges
Pearlescents tutorial by Ilene Tell using BoBunny stencils
Adding dots around the edge helps give the paper interest and the edges more definition. I love to use this technique on my cards and layouts! Simply express a tiny dot onto the page. In the image above, you can also see how the stenciled image came out - it reflects the light beautifully.

3. Cover Naked Chipboard
Merry Christmas card by Ilene Tell using Bo Bunny Christmas Collage with Pearlescents and Stencils

Here is the card using the stenciled doily and the dots around the edges. I used a Leaky Shed Studio laser-cut chipboard Christmas Tree and covered it with Pealescents in gold, and the stump in brown. Pearlscents is absolutely perfect for covering laser-cut chipboard and Bo Bunny wooden embellishments. It's very easy and since the paint is so thick, it stays put and creates a raised effect, giving the embellishment shine and even more dimension.

Merry Christmas card by Ilene Tell using Bo Bunny Christmas Collage with Pearlescents and Stencils

4. Painting

Since the Pearlescents are so thick, you could easily dilute them with water or your BoBunny Glimmer Sprays and paint using a paintbrush. Another option is to "paint" right from the tube, using the thickness to work for you. Here, I started by covering the Leaky Shed chipboard with the Pearlscents.

Jolly Holiday card by Ilene Tell using Bo Bunny Candy Cane Lane with Pearlescents

After letting the chipboard dry, I filled in the empty spaces with the Pearlescents.

Jolly Holiday card by Ilene Tell using Bo Bunny Candy Cane Lane with Pearlescents

As you can see in the detail image below, when used as paint and applied in a thick layer, you can see swirls of shimmer inside, which creates a stunning effect.

Jolly Holiday card by Ilene Tell using Bo Bunny Candy Cane Lane with Pearlescents

5. Stamping

Stamping and Pearlescents tutorial by Ilene Tell using BoBunny Altitude

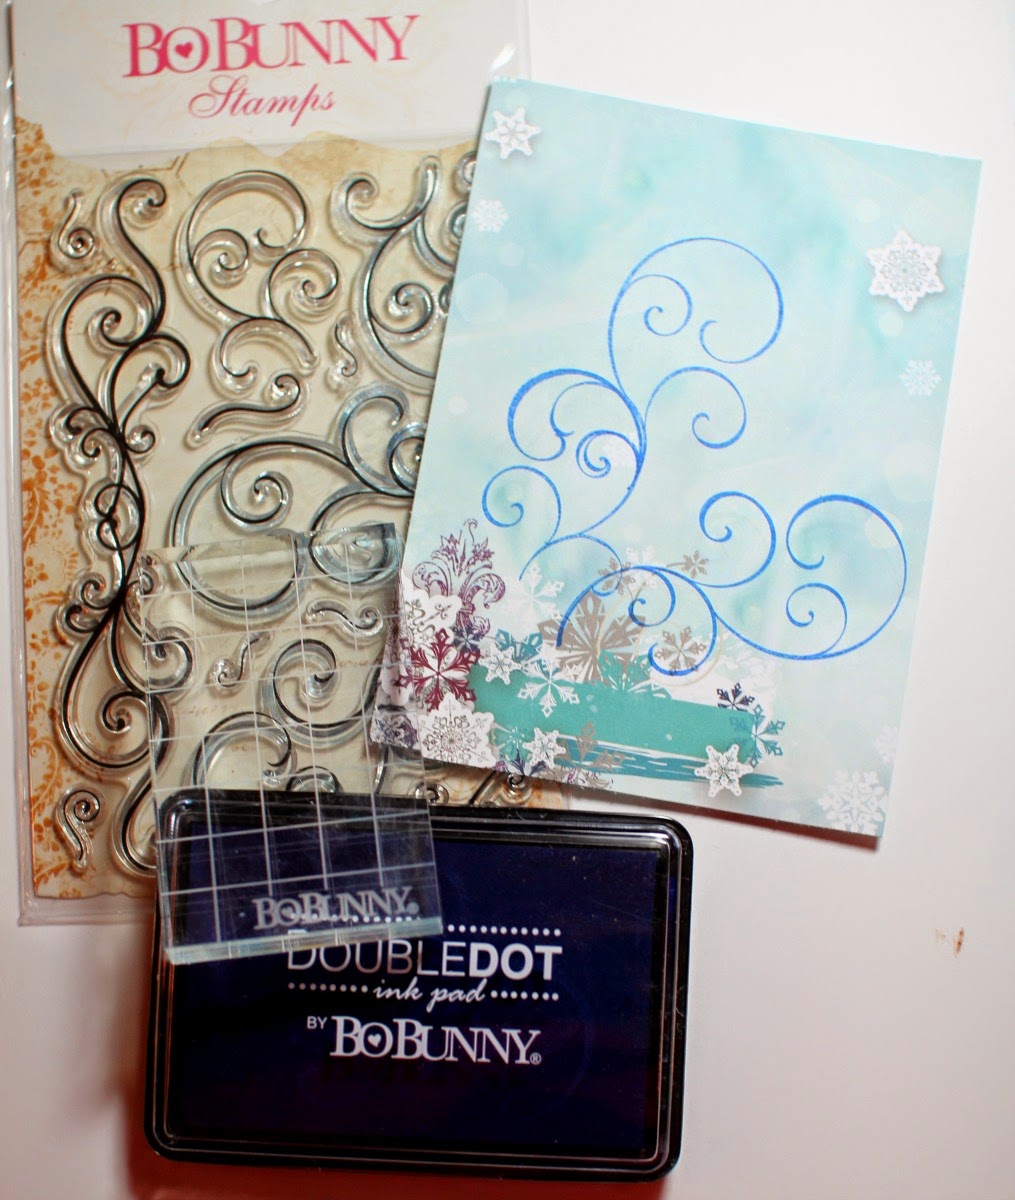
For this technique, stamp your image first. I stamped a swirl design using Bo Bunny stamps and ink. Then, simply trace the design with the Pearlescents. You can see the example of the result below.

6. Icicles
Pearlescents are wonderful for creating a very realistic and beautiful icicle border. Simply add in a line, and create icicles by applying the Pearlescents downward at random intervals, making sure it's thicker at the top and thins out as it stretches down. Super easy!
Here is the completed card with icicles and the painted swirl from above.

Let It Snow card by Ilene Tell using BoBunny Altitude and Pearlescents

Let It Snow card by Ilene Tell using BoBunny Altitude and Pearlescents

7. Pearlescent Molding Paste

Molding Paste tutorial by Ilene Tell using BoBunny Pearlescents

Use the Pearlescents to color Molding Paste. This is a thick substance that is sold in arts and crafts stores, and comes in white. Keep adding and mixing in the Pealescents until you get the color you want. Then you can apply it to your project - it's easy to apply with a pallet knife or an old credit card, and can be applied directly to the page or over a stencil. Below is an example of using the Pearlescents mixed with molding paste, and applied over a Bo Bunny circles stencil. You can see the gorgeous, light blue, transparent effect that was created.

Tip: For mixing the paint, use discarded packaging.

Warmest Wishes card by Ilene Tell using BoBunny Altitude

Tip: Have a box of baby wipes handy where you scrapbook. When done with your stencil, simply wipe off the excess paint.

Warmest Wishes card by Ilene Tell using BoBunny Altitude

8. Paint Embellishments
In order to paint embellishments, first cover them completely with gesso (white primer found in arts and crafts store). Then color it with Pealescents using a paint brush. Easy!

Winter's Best card by Ilene Tell using BoBunny Altitude

Here, I painted the Bo Bunny flower with gesso, and then painted over it with Pealescents. You can see the shimmery result that you get - so perfect for this wintry card! I also used the Pearlescent molding paste technique on this card, combined with a BoBunny script stencil. Because the Pearlescents are so thick, I was able to add the faux pearl to the center and let the Pearlescents act as glue to hold it in place.

Winter's Best card by Ilene Tell using BoBunny Altitude

Well, I hope you liked some of the ideas I shared today on how to make the most out of your Pearlescents. These ideas are all very easy to execute and a lot of fun to try. Thanks for stopping by! Be sure to share any Pearlescents ideas you have in the comments :)

BoBunny Supplies:
Patterned Paper: Altitude / Bundled, Flurry, Cozy, Candy Cane Lane / Jack Frost, Snowflake, Christmas Collage / Caroling, Glad Tidings
6 x 6 Paper Pad: Altitude
Pearlescents: Blush, Brilliant Blue, Island Mist, Butterscotch, Chocolate
Stamps: Curly Q, Holiday Wishes
Tools: New Stamp Block Set
Ink Pad: Blueberry
Double Dot Jewels: Mocha, Tuxedo, Blue Hues
Buttons: Candy Cane Lane
Jewel Flourishes: Glaze
Stickable Stencils: Bliss, Brocade
Blossoms: Blush Daisy
Other Supplies:
Leaky Shed Studio laser-cut chipboard, molding paste, pallet knife

Remember! It's Prize time! BoBunny & Leaky Shed Studio are having a product  swap on the blog, December 7th-31st! Here's the fun part! Stop by our Facebook page every day because the winner of this fabulous prize below will be chosen from a comment left on the post with the most likes during the Leaky Shed swap. So, be sure to 'like' your favorite post AND leave a comment on our Facebook page whenever you see the Leaky Shed/BoBunny logo below to enter! 


Saturday, November 22, 2014

Marvelous Mixed Up Misc Me!

 Good Morning! Have you all enjoyed our Mix & Match week? Who would have thought that you could mix and match so many of the different BoBunny collections? Today I'm sharing my Misc. Me pages that I did featuring the Candy Cane Lane and Madeleine collections.

It's A Onesie Kind of Christmas by Lynn Shokoples


What do those have in common? Colors for one thing... the light greens and the soft pinks. Our daughter bought everyone "onesies" for Christmas last year, so we had some fun photos that I just had to scrap! Of course I couldn't forget our furbabies so they all had antlers for the holidays! To start I took some of the Madeleine Journal contents cards and mixed them with cards I made from the Candy Cane Lane 6x6 Paper Pad.


The Candy Cane Lane "Countdown" patterned paper had the cutest little cards on them, so I cut some out and layered them on the bigger cards. The 6x12 Chipboard has the cutest little sayings on them, so I tucked them here and there. That's the fun part of Misc. Me, playing with all the fun embellies!


The Candy Cane Lane "Holiday" patterned paper was full of fun bingo cards, so I jazzed them up with some of the Gold Glitter Paste and the buttons from the collection. The glitter paste was so much fun to play with I couldn't stop there. I took the Circle Stencil from the Brocade Stickable Stencil pack and added some fun glittery circles all over the cards. I thought it added some fun holiday glitter to the pages.


BoBunny Supplies:
Patterned Paper: Candy Cane Lane/ Countdown, Snowflake, Jack Frost, Candy Cane Lane
6x6 Paper Pad: Madeleine
Journal Contents: Madeleine
Noteworthy: Candy Cane Lane
Buttons: Candy Cane Lane
Chipboard: Candy Cane Lane 6x12
Stickable Stencils: Brocade
Stamps: Stitches
Ink Pad: Emerald
Glitter Paste: Gold
Page Protectors: Misc. Me Life Journal

Thursday, November 6, 2014

Lovely Layout with Jewels!

This beautiful layout highlights wonderful ways to embellish with BoBunny jewels. It's also a great example of mixing different paper lines.

Memories of You by Megan Gourlay

Memories of You by Megan Gourlay using Somewhere in Time & Candy Cane Lane

When I was little I can remember my Nana getting all dressed up for dinners and dances with a group of ladies that were all part of a charity called The Townswomans Guild.  I don't when this photo was taken and she's no longer here for me to ask but I still remember how beautiful she looked on those nights.

I wanted to invoke a bit of history with this layout so I chose the lovely vintage range, Somewhere in Time and matched it with the gorgeous yellows from Candy Cane Lane.  Yellow is not a color I'm drawn to usually but these papers kept calling me!

Memories of You by Megan Gourlay using Somewhere in Time & Candy Cane Lane

I've used a mixture of BoBunny blossoms, chipboard and jewel flourishes to embellish my layout.  To make the jewels and the flowers go further I have split them apart.  The jewels are perfect for doing that  - Ive separated the large black flourish into two pieces, and I have done the same with the smaller charcoal flourish.

Memories of You by Megan Gourlay using Somewhere in Time & Candy Cane Lane

The jewels come packaged with three flourishes and a bling flower, by separating them I still have some left over for another project!

BoBunny Supplies:
Patterned Paper: Chrononaut, Elegance / Somewhere in Time : / North Pole, Snowflake / Candy Cane Lane
Jewels: Licorice
Chipboard: Somewhere in Time
Stamps: Distressed Textures
Blossoms: Buttercup Daisy, Natural Earth Pansy

Thursday, October 9, 2014

Beautiful Layout using Pearlescents & Glitter Paste

 I am love, love LOVING all our mixed media! It is so fun and easy to use! Not to mention the extra little touch of fabulousness it adds to anything you create! I think you'll agree when you see what Kaori has created below.


Hello BoBonny Fans! I'm here to share with you my layout that I created using Pearlescents and Glitter Paste.

I used some Glitter Paste over the BoBunny's Stencil.
I used silver glitter paste over the stencil of dots in part of the snowy mountains.


I also used Pearlescents over the stencil.


BoBunny Supplies:
Patterned Paper: Candy Cane Lane, December,  Jack Frost, Snowflake/ Candy Cane Lane
Stickers: Combo Stickers/ Candy Cane Lane
Chipboard: Candy Cane Lane
Layered Chipboard: Candy Cane Lane
Brads: Candy Cane Lane
Buttons: Candy Cane Lane
Noteworthy: Candy Cane Lane
Petals: Candy Cane Lane
Jewels: Frosting Jewels
Stencils: Bliss Stickable, Brocade Stickable
Pearlescents: Blush Pearlescents/ Double Dot
Glitter Paste: Gold, Silver/ Double Dot
Wood: Iron Works Wood Shapes

Thursday, September 4, 2014

Mix and Match 12 x 12 Misc Me

A little of this, a little of that, put it together and what do you get? A fabulous 12 x 12 Misc Me project!

Keri gives some fabulous tips about working with multiple collections, and how to bring them all together for a complete project.

Where We Live by Keri Babbitt

For this month's Misc Me project, my challenge was Mix & Match...I love to do that!

So, when I sat down to create this project, I challenged myself to use at least two items from EVERY collection in BoBunny's new release.  To refresh your memory, this new release includes two holiday lines: Candy Cane Lane & Christmas Collage.  An elegant/botanical line called Madeleine. A travel line, Souvenir.  And a masculine/games collection, called Wild Card.  So, how did I combine all these together?  Take a look:

Where We Live Misc Me by Keri Babbitt using BoBunny Mix and Match Collection

 For inspiration, I chose nature snapshots that my husband took of the yard of our new country home.  What a treat to see his love of nature captured through the camera lens!  To lay the foundation for this Mix & Match challenge, I began with color palette.  My collection of nature photos feature a palette of magenta, lavender, blue, and green, so I took this as my starting point.

Where We Live Misc Me by Keri Babbitt using BoBunny Mix and Match Collection

Choosing products based on color palette is a great way to use leftovers and themed collections.  Start by searching for colors and images that might work in a nontraditional way.  Here, I chose the elk/deer sticker from the Christmas Collage collection.  It is generic enough to not scream "Christmas", and is perfect for my country/outdoorsy theme.  Behind it, I chose a woodgrain paper from the Wild Card collection.  The green/magenta palette of Madeleine came right into play next, along with carefully selected green/magenta stickers from Candy Cane Lane.

Where We Live Misc Me by Keri Babbitt using BoBunny Mix and Match Collection

That's four collections down, and one to go.  The Souvenir collection, with its map paper and camera/film motifs, fit right in.  Since this page is about our little "place on the map", I used the map paper for the 2nd page background.  And the retro camera/film diecut complemented the idea that all these photos are a rare peek into seeing our yard through the lens of my husband's camera.

Where We Live Misc Me by Keri Babbitt using BoBunny Mix and Match Collection

For my final touch of embellishing, I added wood accents, misted with the amazing new gold Glimmer Spray.  The gold-star flower is a great neutral from Candy Cane Lane, as is the "lucky" button from the Wild Card collection.  I topped it off with a pop of color - brads from Souvenir.

Where We Live Misc Me by Keri Babbitt using BoBunny Mix and Match Collection

So there you have it!  I hope this project gives you some inspiration and motivation to use up some leftovers, and mix collections in a way you might not have thought of before. 

BoBunny Supplies Used:
Patterned Paper: Sightseeing/Souvenir; Billiards/Wild Card
Stickers: Candy Cane Lane Combo Sticker, Christmas Collage Combo Sticker, Madeleine Combo Sticker
Noteworthy: Souvenir
Buttons: Wild Card
Brads: Souvenir, Wild Card
Chipboard: Candy Cane Lane, Christmas Collage Layered Chipboard, Madeleine Layered Chipboard
6x6 Paper Pad: Madeleine
Petals: Candy Cane Lane
Misc Me Binder: Black 12x12
Misc Me Page Protectors: Variety Pack
Wood: Iron Works
Glimmer Spray: Gold

Monday, July 28, 2014

WINNERS!!

We have been so impressed and flattered by your comments! What amazing friends we have!! We are so glad you all like the new release. We worked really hard to make new exciting products for you all. It's  wonderful to get the feedback!

Now on to the big reveal...

 The winner for  some Madeleine goodies is...


 The winner of Souvenir is...

The Wild Card winner is...


The Candy Cane Lane winner is...
 Winner of Christmas Collage is...

The lucky winner of some new double dot products is...


And last but not least, the winner of some fabulous BoBunny essentials is...


Thank you all for your comments, seriously! Hearing your feedback is one of the most rewarding parts of our job here. The other most rewarding thing is seeing what you did with our products and your imagination! So keep posting your projects on facebook. We love to see them!!

And congrats to the lucky WINNERS! Send your name, address, and phone number to bopress@bobunny.com so we can get your prizes sent out!

Thursday, July 24, 2014

Candy Cane Lane

It's Christmas in July again! Celebrate with us and Candy Cane Lane!


This ALMOST makes me want to have snow again...but not quite ;) What do you think of this fun new Christmas line? Leave a comment to win some goodness!