Showing posts with label Jewel Flourish. Show all posts

Wednesday, December 14, 2016

Bo Bunny & 3L Blog Hop with Irene and Irit


 3L is joining us for our Blog Hop this week with more fabulous adhesives and darling projects! https://www.scrapbook-adhesives.com/blog/2016/12/14/2016-blog-hop-with-bo-bunny-day-3/

GIVEAWAY!! Be sure to leave a comment on this post for a chance to win one of three $25 prizes. Winners announced the week of December 19-23, 2016.  Good Luck!

Hi everyone! It's Irene here and today is my turn to share my project for this Blog Hop with 3L. I've created a layout using BoBunny's Felicity collection with 3L adhesives.

You Are The Best Layout by Irene Tan

You Are The Best Layout by Irene Tan using BoBunny Felicity collection

To create this layout, I used several products from 3L adhesives. First, I've used some EZ Runner Ultra to attach all the pieces in this layout. I've also used some 3L crafty foam tape to create dimensions in the layers of the pattern papers and photograph.

I've decorated the layout with tons of die cut flowers from the Noteworthy pack. I used 3L Dodz medium and some 3D foam squares to attach them to this layout. This will create more depth and dimensions here as well Besides that, I also used two 3L keepsake envelopes to create shaker packs and layer them on the layout.
  
Below are some close-ups:

You Are The Best Layout by Irene Tan using BoBunny Felicity collection

You Are The Best Layout by Irene Tan using BoBunny Felicity collection

You Are The Best Layout by Irene Tan using BoBunny Felicity collection

Thanks for dropping by!


BoBunny Supplies:
Patterned Paper: Cherished, Dreamer, Romance, Lattice, Always/Felicity
Noteworthy: Felicity
Stamps: Flutter
Jewel Flourishes: Chocolate
Dot Jewels: Aqua
Dot Brads: Aqua
Pearlescent: Sugar
Glimmer Spray: Bronze
Stickable Stencils: Lace
Foil Transfers: Accents Gold

3L Adhesive Supplies:
Keepsake Envelopes Mix
3D Foam Squares Mix Black
Crafty Foam Tape White
E-Z Runner Ultra
Dodz Medium


Let It Snow layout with Irit

Hello my dear crafty friends and welcome to my new BoBunny layout post. This week BoBunny DT girls are working with Scrapbook Adhesives by 3L and creating with one of our new Fall release collections. Today is our layouts day and this is my  fancyWinter layout here for your inspiration.
I picked this most wonderful and just released Winter Wishes collection and scrapped the photos from our Italian sky trip a couple of years ago.
Actually, living in Israel means that you don't see any Winter at all (with weather kind of like Florida). So when we travel and there is some snow around I took all possible photos  to remember and to scrap later.
I used Winter Wishes Chill cardstock as my basic cardstock and added two more smaller layers with Snowfall (back side) and Whimsy (back side) cardstocks.
Each layer was painted around with Pentart Metallic Pink paint. I used 3L Crafty Foam tape to arrange the layers in this kind of 3D arrangement.
The folded curtain was made with Icicles cardstock and arranged with the very same 3Lfoam tape . It was so easy to glue all die cuts from Noteworthy pack over the folded 3D " curtain" with the very same glue tape.


The small die cut dots were glued with 3L DODZ (those clear 3/8'' round glue dots that were perfect for small round die cuts from the pack).

Each dot was painted with Silver Glitter paste over them.

The smaller photos were inserted into the hand cut slots and I added Pentart Pink Acrylic paint with new Winter Fun Stickable Stencil over the photos. It makes those monochromatic photos more interesting and adds a lot of dimension to those kind of flat images.


I made a kind of a keepsake piece with a hand cut paper clock and some chunky glitter using the most perfect 3L keepsake envelope.

So easy to use and so effective on the page!


One single layered chipboard was added to connect all three photos as shown:


And another look over those painted snowflakes:


I really hope that you like my take on Winter and enjoy our week long blog hop with Scrapbook Adhesives with 3L!

Huge thanks for visiting our blog !


 BoBunnySupplies:
Winter Wishes collection:
Chill 12'' cardstock
Icicles 12'' cardstock
Snowfall 12'' cardstock
Whimsy 12'' cardstock
Winter Wishes Combo stickers
Winter Wishes Layered chipboards
Winter Wishes Noteworthy
Glitter paste Silver
Winter Fun stickable stencil
Double Dots Jewels Tuxedo

Pentart Supplies:
Creamy Acrylic Paint-Rose
Creamy Acrylic Metallic Rose

3L Supplies:
E-Z Runner Ultra
Crafty foam tape
DODZ medium
Keepsake envelopes

Connect with Bo Bunny Press:
Facebook – www.facebook.com/BoBunny
Website – www.bobunny.com
Blog – www.bobunny.blogspot.com
Instagram – https://www.instagram.com/mybobunny/
Pinterest – www.pinterest.com/bobunny
Twitter – https://twitter.com/BoBunnyPress
YouTube – http://www.youtube.com/BoBunnyFun
Email – bopress@bobunny.com


Thursday, November 3, 2016

Winter Wishes Mixed Media Delight!


Hello BoBunny fans!

Emmy here today with a brand new Mixed Media project to share with you. This time I decided to create my own texture paste with a tailor-made colour using the wonderful Pentart products from BoBunny!


To create the texture paste I used two Acrylic Semi-Gloss Paints, Gesso and 3D Powder. There is no set recipe, which you have to follow - just mix all the ingredients together until you are satisfied with the colour and the texture. The home-made texture paste dries really quick once applied to your project and gives an amazing 3D effect. 


To decorate my picture I used flowers, die cut swirls from cardstock and pattern paper and glaze flourish jewels, which I cut in two part to fit my design better.


I also used different fussy cut elements from the pattern paper and die cut pictures from the Noteworthy pack.


As a final touch I added a few drops of Pearlescents Graphite.


BoBunny supplies:
Pattern Paper: Frosted, Snowfall, Whimsy / Winter Wishes
Paper Pad: Winter Wishes
Combo Stickers: Winter Wishes
Noteworthy: Winter Wishes
Stickable Stencils: Winter Fun
Jewel Flourishes: Glaze Jewels
Pearlescents: Graphite 
Dies: Fanciful, Love Squared 
Double Dot Cardstock: French Vanilla Dot, Sugar Chevron
Blossoms: Natural Earth Zinnia
Pentart Creamy Acrylic Semi-Gloss Paint: Pink, Light Gray
Pentart 3D Powder: Fine
Pentart Primer Paste: White Gesso

I hope you enjoyed today's project!
Come back tomorrow for more inspiration from our design team!

Emmy

Wednesday, February 4, 2015

An Oh So Wise Off The Page Wednesday!


Hello, hello! It's Off the Page Wednesday and boy do we have a fabulous project for you today!

Wise Old Owl by Tracee Provis

tracee_provis_off_the_page_project_bo_bunny_double_dot_neutrals_01

Owls are an absolute favourite of mine and the colours that come in the Neutrals packs just reminded of a Wise Old Owl, using a balloon and a leaf shape... Hey Presto my wise owl is born. Of course he needs a perch and I sat him on a bottle that can be filled with wise quotes to inspire your day.

tracee_provis_off_the_page_project_bo_bunny_double_dot_neutrals_02

To start I blew up a balloon to the size I wanted my owl to be, after a coat of newspaper and gesso it was ready for me to cover.
 I chose the soft grey Shadow Dot for the main colour of my owl and I added some Khaki Dot for the patch on his tummy, my feathers were created by cutting a simple leaf shape on my cameo and then glueing and layering them all over the balloon form. After this was done I popped the balloon and pulled it back out from the inside.
A wise owl wouldn't be complete without a book for which I used a couple of small pieces of the Dreamers paper from the Rose Café collection, donning his monocle completes the look.

tracee_provis_off_the_page_project_bo_bunny_double_dot_neutrals_03

I used this small jar as a perch, the stickable stencils are perfect for surfaces that have a curve to them and I added silver glitter paste to the Brocade stencil to get a sparkly effect on the glass, for more sparkle and glam I added a Licorice Jewel Flourish and the printed my quote onto strips which I then glued on with pop dots.
The lid of the bottle was made with some fimo and I sprayed it with Bronze Glimmer Spray which gives it an aged authentic look.
He is now all ready to sit in my Craftroom and watch over me as I create.

Bo Bunny Supplies:
Cardstock: Licorice Dot, Khaki Dot, Burnt Orange Dot, Shadow Dot, Sugar Dot
Patterned Paper; Dot/Rose Café
Jewel Flourishes; Licorice
Glitter Paste; Silver
Stencils; Brocade
Glimmer Spray; Bronze


Saturday, December 6, 2014

Cooking With Misc. Me!

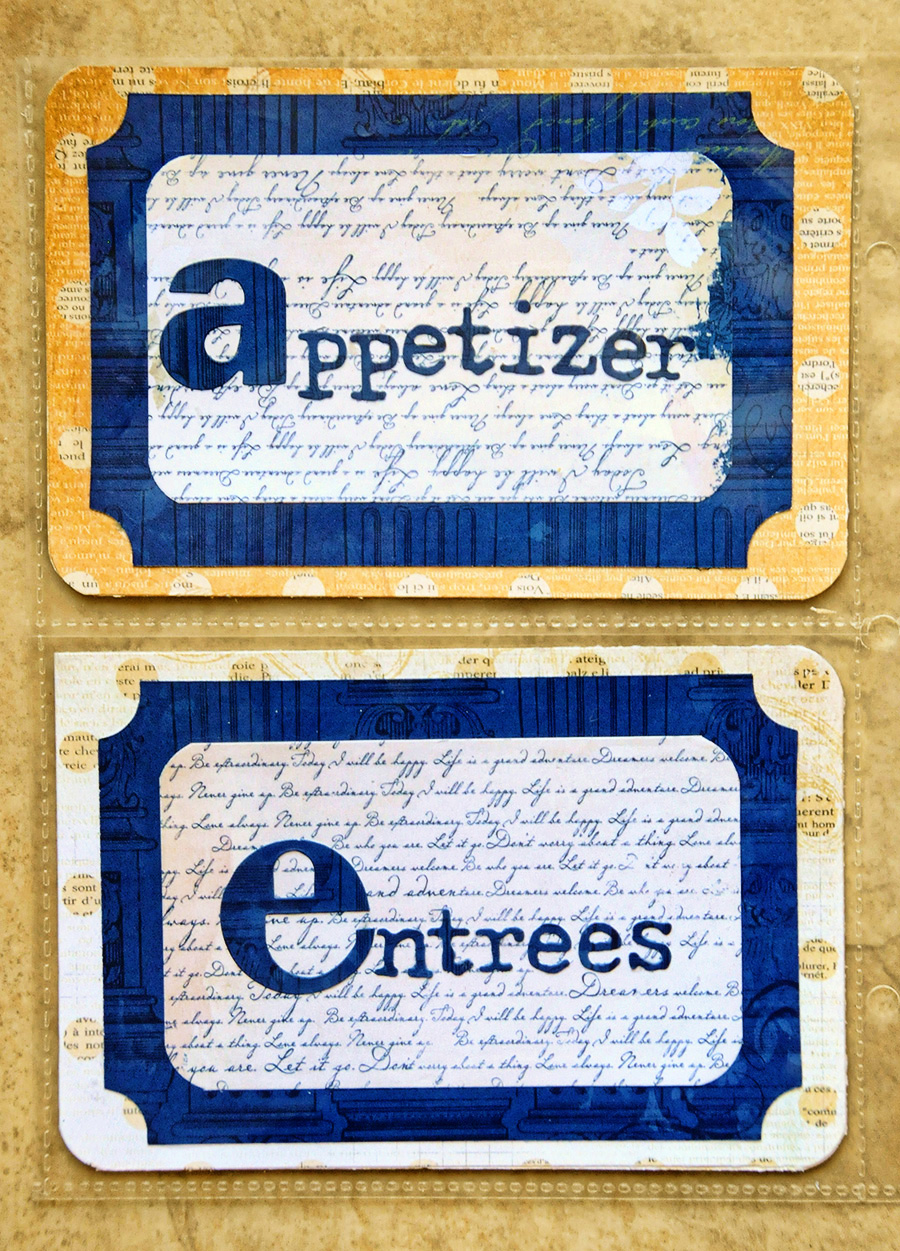
Hello all! It's Lisa today with.....Cooking with the Gregory Kids! I continued the tradition of the Misc.Me album I started last year.  Documenting cooking in my family. Both of my children inherited my love for cooking, and I am documenting moments in this Misc.Me album.

I created little booklets in which hold treasured family recipes. I found that Rose Cafe has similar colors that coordinate from the Collection. Each Booklet holds a different culinary category.


This particular page in the Rose Cafe collection has cut outs and one is 4x9 and fits perfectly in the page protector. I used it for my page base.


This is the second set of booklets.


 I originally wanted to dedicate the album to my daughter and her journey through school to become  chef, but realized I had many pictures of my son in the kitchen as well.


 This is a close up of the little flowering tree branches I created. The flowers were punched from scraps and the branch was die cut. I layered the little flowers and used pearls from one of the jewel flourishes by cutting it apart.


 This is one of the booklets opened up to reveal the recipe and a photo to illustrate the recipe. Each booklet has 6 pages.


Thank you for joining me today and allowing me to share another creation using Misc.Me that documents part of my family life.

Lisa

BoBunny Supplies:
Patterned Paper: French Roast, Heirloom/Rose Cafe
Doilies: small
Double Dot Paper:Sugar Chevron,Chiffon Chevron
6x6 Paper Pad: Rose Cafe
Bottons: Rose Cafe
Misc Me: 8x9 Page Protectors Variety Pack, Note Paper, 6x9 Kraft Binder
Jewels: Frosting Jewels

Wednesday, December 3, 2014

Luscious Gift Box!

Hello! Evgenia here today! This time I have played with my favourite collection out of this release-Rose Cafe, I love that it contains lots of colors and depending on your mood, the occasion, you can create in different colors.  I have madethe gift box. By using the die and the thick cardboard it came out very nice and it's quite a gift itself:) I went with more neutral background paper and then added a few embellishments in more pink colors (dark and light) and it all came together nicely.

Gift box by Evgenia Petzer
Gift Box by Evgenia Petzer uisng Bo Bunny Rose Cafe Collection

Let's check it from all the different angles

Gift Box by Evgenia Petzer uisng Bo Bunny Rose Cafe Collection

I made those pearl accents using our new product- Pearlescent Pen, really love the dimension and shimmer that it gives!

Gift Box by Evgenia Petzer uisng Bo Bunny Rose Cafe Collection


Gift Box by Evgenia Petzer uisng Bo Bunny Rose Cafe Collection

Love the BoBunny buttons- different shapes and materials.

Gift Box by Evgenia Petzer uisng Bo Bunny Rose Cafe Collection

I also did some fussy cutting and added those tiles to some of the corners of my box.

Gift Box by Evgenia Petzer uisng Bo Bunny Rose Cafe Collection


BoBunny supplies:
Patterned Paper: Posr, French Roast/Rose Cafe
Stickers: Combo Sticker/Rose Cafe
Buttons: Rose Cafe
Jewels: Tuxedo
Jewel Fourishes: Glaze Jewels
Chipboard: Layered/Rose Cafe
Pearlescent: Sugar

Wednesday, November 26, 2014

Beautiful Rose Cafe Cards!

Hello Friends! This time I was playing with new wonderful collection: Rose Cafe. It it just gorgeous and what I really liked about this collection that it has so many different colors to play with. As you will see from my 2 cards, I had achieved 2 totally different looks, one is more bright and another one is pure tenderness.

Pefect Day Card by Evgenia Petzer

Perfect Day Card by Evgenia Petzer using BoBunny Rose Cafe


Perfect Day Card by Evgenia Petzer using BoBunny Rose Cafe
Sometimes, when you need to add that little bit of softness, texture, you can use some gesso and just carefully apply it with your brush on some flowers and corners of paper, it also gives you more shabby look.

Perfect Day Card by Evgenia Petzer using BoBunny Rose Cafe

BoBunny Supplies:
Patterned Paper: Frames/Rose Cafe
Stickers: Combo Sticker Rose Cafe
Jewels: Mocha
6x6 Paper Pad: Rose Cafe

Wedding In Pink Card by Evgenia Petzer

Wedding in pink Card by Evgenia Petzer using BoBunny Rose Cafe

Wedding in pink Card by Evgenia Petzer using BoBunny Rose Cafe This collection has also some pastel shades in it, so my second card is more in wedding, soft tones.


I again want to share my little tip: when I use die cuts from noteworthy pack, such as roses and other things that I want to look a bit more dimensional, i just accuarately roll their ends a bit, and then as you can see on the photo below it has much more dimension.

Wedding in pink Card by Evgenia Petzer using BoBunny Rose Cafe

BoBunny Supplies:
Patterned Paper: Roast/Rose Cafe
Noteworthy: Rose Cafe
Jewels: Tuxedo
6*6 Paper Pad: Rose Cafe
Jewel Flourishes: Frosting Jewels