Showing posts with label Juliana Michaels. Show all posts

Saturday, December 13, 2014

December 2014 Sketch Challenge & Winner!

Hello BoBunny Fans! It's Juliana here. I want to welcome you to our BoBunny December Sketch Challenge! I don't know about you, but I love working with sketches. They always seem to help me pull a layout together a little more quickly and the sketch for this month was no exception.

BoBunny December Sketch Challenge

To create my page, I began by selecting this photo of our sweet Milo. This was his first winter with us and so of course I wanted to document it in a special way. The new BoBunny Altitude collection was a perfect fit to capture this happy memory.

When creating with sketches, I also love how you can take the sketch a make it your own by mixing it up a little to suit your style and photos.  I choose to use only one photo and I replaced the spots for the two smaller photos with some cut outs and embellishments.

Hello Winter Pet Scrapbook Page by Juliana Michaels for BoBunny using the Altitude collection and Leaky Shed Studio Chipboard

Speaking of embellishments, the snowflake embellishments that I used on my layout are by Leaky Shed Studio. They were just plain chipboard before I painted them white with acrylic paint. I then added some sparkle and shine by applying a coat of BoBunny Glimmer Paste in Silver. Once the paste was dry, I added a jewel to the center of each snowflake before attaching them to my layout.

Hello Winter Pet Scrapbook Page by Juliana Michaels for BoBunny using the Altitude collection and Leaky Shed Studio Chipboard

Hello Winter Pet Scrapbook Page by Juliana Michaels for BoBunny using the Altitude collection and Leaky Shed Studio Chipboard

I also used some of the new Film Sticker and Stamp Stickers to layer with and embellish my page.

Hello Winter Pet Scrapbook Page by Juliana Michaels for BoBunny using the Altitude collection and Leaky Shed Studio Chipboard

Hello Winter Pet Scrapbook Page by Juliana Michaels for BoBunny using the Altitude collection and Leaky Shed Studio Chipboard

Thanks for stopping by today! We can't wait to see what you create and share as you play along with our December Sketch!

HUGS!

Juliana

BoBunny Supplies:
Patterned Paper: Altitude/Blizzard, Bundled, Chilly, Polar, Rustic, Snowflake, Wonderland
Film Sticker: Altitude
Sticker: Altitude Combo Sticker
Noteworthy: Altitude
Stamp Stickers: Altitude
Jewels: Double Dot Jewels in Blue
Glitter Paste: Silver
Leaky Shed Studio Chipboard: Six Snowflakes, Snowflake Border Large

It's challenge time! Here's how it works in case you missed the last few months! Each month we will share a new sketch and how one of our designers was inspired to create with it. To play along all you have to do is create a project inspired by the sketch, using BoBunny products and then share it with us using the InLinkz widget below. When you enter, you will have the chance to be randomly selected to win this fabulous prize package full of BoBunny goodies featuring our gorgeous Star-Crossed line! 
Take a look at this months challenge! We can't wait to see what you create!

Now it's time to announce November's winner!! The winner is.....  #15 Nicole Doiron! Please email us your contact information so we can send you your wonderful Christmas Collage prize package! Congratulations Nicole!


Wednesday, November 5, 2014

Sparkling Holiday Home Decor

Hello BoBunny Fans! It's Juliana here to share with you a Christmas Decoration that I made using the new Christmas Collage collection and the new Double Dot Jewels. I love creating my own Christmas decorations and I can't wait to hang this up during the holidays!

Joy Christmas Tree Christmas Decor by Juliana Michaels for BoBunny featuring Christmas Collage and Double Dot Jewels

I began by taking a plain wooden Christmas Tree that I purchased from my local craft supply store. It is about 12 inches tall. I then cut, tore and layered different patterned papers from the Christmas Collage 6x6 paper pad to cover it.

A fun tip to share is that I used sand paper to remove some of the color from letter stickers. Once I sanded them, it brought out the white core of the sticker and helped them show up better against the die cut. 

Joy Christmas Tree Christmas Decor by Juliana Michaels for BoBunny featuring Christmas Collage and Double Dot Jewels

 To decorate the tree I added chipboard, die cuts, buttons and stickers from the Christmas Collage collection. The final touch was to add some of the jewels from the Double Dot Jewels in Ruby Red to various pieces on the tree. I love the festive touch that they add to the tree!

Joy Christmas Tree Christmas Decor by Juliana Michaels for BoBunny featuring Christmas Collage and Double Dot Jewels

Will you be making any Christmas decorations with the Christmas Collage collection? We'd love to see it, so make sure you share it with us on the BoBunny Facebook page!

HUGS!
Juliana

Joy Christmas Tree Christmas Decor by Juliana Michaels

BoBunny Supplies:
Patterned Paper: Glad Tidings / Christmas Collage
6x6 Paper Pad: Christmas Collage
Noteworthy: Christmas Collage
Stickers: Christmas Collage
Buttons: Christmas Collage
Chipboard: Christmas Collage
Jewels: Double Dot Jewels in Ruby Red

Monday, October 20, 2014

Stickable Stencils! The best thing since....well...ever!

Stickable Stencils...have you tried them? You have got to if you haven't! I can't tell you how much fun they are...it's the kind of thing you need to try yourself! Today you can learn a little more about them with a tutorial!

You Are Here by Juliana Michaels

You Are Here Scrapbook Page by Juliana Michaels featuring BoBunny Souvenir Collection, Stickable Stencils and Double Dot Ink Pads

Hello BoBunny Fans! It's Juliana here with you today to share a quick and easy tutorial on how to use the fabulous new BoBunny Stickable Stencils with their new Double Dot Ink Pads. I really love that they are stickable. Once you position them, they won't move around as you apply your ink and when you are finished and ready to remove them, they will not damage your paper. It really makes stenciling super easy and fun!


In the video, I share with you how to create a background similar to the one that I used on my You Are Here scrapbook page. I love the nuances that are achieved by applying the Double Dot Ink to the paper. In some areas the ink is darker because I applied more ink and in other areas it is lighter. After completing the stenciled background design, I then began adding the rest of my design elements.

You Are Here Scrapbook Page by Juliana Michaels featuring BoBunny Souvenir Collection, Stickable Stencils and Double Dot Ink Pads

I used several pieces from the Souvenir Noteworthy as well as a couple of the Souvenir Layered Chipboard pieces. This collection is ideal for all of your vacation and travel layouts.

The orange and blue papers are from the new Double Dot Chevron collection. The Brilliant Blue Chevron perfectly matched the color of the ponchos that we wore as we tried to stay dry during our trip to Niagara Falls this past summer!

You Are Here Scrapbook Page by Juliana Michaels featuring BoBunny Souvenir Collection, Stickable Stencils and Double Dot Ink Pads

I hope you enjoyed the tutorial and that it inspires you to get out your BoBunny Stencils and Ink Pads and start creating.

BoBunny Supplies:

Patterned Paper: Souvenir / Wanderlust
Chipboard: Souvenir Layered Chipboard
Noteworthy: Souvenir
Double Dot: Chevron in Brilliant Blue and Orange Citrus
Stencil: Brocade Stickable Stencil
Ink Pad: Double Dot in Blueberry

Saturday, September 13, 2014

Souvenir Layout

Hello BoBunny Fans! It's Juliana here with a Travel scrapbook page using the new Souvenir collection by BoBunny. This collection seriously arrived just in time for me to use to capture the memories of my recent trip with my family to Niagara Falls. We had never been there before, so we really enjoyed experiencing this marvel of nature together as a family.

Travel Scrapbook Page by Juliana Michaels featuring BoBunny Souvenir

To create my layout, I began by matting a large piece of white cardstock with a sheet of the Souvenir Journey paper. However, to save some of the paper, I cut a large 10 x 10 inch square from the center of the Journey paper and saved it to use on another project. I then added some sprinkles of the new Glimmer Spray in Bronze.

Travel Scrapbook Page by Juliana Michaels featuring BoBunny Souvenir

Next, I layered strips of patterned paper and cut out some of the post card images from the Sightseeing paper to create a mat behind my photo. To further embellish my layout, I added a few chipboard pieces and the "Our Adventure" tag from the Noteworthy packet.

Travel Scrapbook Page by Juliana Michaels featuring BoBunny Souvenir

I selected the "Travel" chipboard letters to use as my title and fussy cut the compass from the Navigation paper to place behind it. ( I used the Navigation paper on another layout and had some scraps still laying on my desk.) To finish it off, I used the new BoBunny Licorice Ink Pad along with the Captured and To The Point Stamp Sets. I did the stamping before I adhered the piece to the background paper.

Travel Scrapbook Page by Juliana Michaels featuring BoBunny Souvenir

So will you be using Souvenir to document your vacation memories? We can't wait to see them!


HUGS!

Juliana


Travel Scrapbook Page by Juliana Michaels

BoBunny Supplies:
Patterned Paper: Souvenir | Sightseeing, Journey, Explore, Getaway, Navigation, Wanderlust, This Way
Stamps: Captured, To The Point
Ink Pads: Licorice
Glimmer Spray: Bronze
Brads: Souvenir
Noteworthy: Souvenir
Chipboard: Souvenir
Layered Chipboard: Souvenir

Wednesday, August 27, 2014

Every Day Life Layouts Round 2

We are just loving this every day life theme! It is so fun to learn something new about the design team. Enjoy these fun layouts from Maria, Kaori, and Juliana! Could you create a page about the same things as any of these ladies?!


Everyday Routine by Maria Potapovich (mellpellmell)


Ahaha, my everyday life! My everyday life - is daily routine, even though it sounds very boring.
And every day my face looks that way - I do try to smile, but my eyes are closing themselves because I terribly want to sleep.


Fuss and a huge amount of work in progress, the cries and noise, the constant haste mail and e-mails, the Internet and the usual household chores - that's what my everyday life is!


BoBunny Supplies:
Patterned Paper: Endless Love/Head Over Heels, Periodical, Fantasy/Enchanted Garden
Kraft: Gift Bag Chevron
Washi Tape: Black & White Patterned 
Stamp: To The Point 


Coffee Layout by Kaori Fujimoto


I love coffee. I drink it every day.
I did not like it very much when I was a girl. But I was a veterinary medical student, studying for the national examination, I started drinking coffee to shake off my drowsiness. Now, coffee has become indispensable to my life.


I added  a little blue ink and white gesso to give a fresh feeling.

Cut some Balloons from "Balloons" paper and to add a three-dimensional effect, I adhered them using double sided foam tape.


BoBunny Supplies:
Patterned Paper: Balloons, Imagination, Keepsake, Passage, Timeless / SomewhereIn Time
6x6 Paper Pad: Somewhere In Time
Jewels: Autumn Song
Stickers: Somewhere In Time Combo Sticker
Stamps: Stitches Stamp, It Is Written Stamp, Wall to Wall Textures Stamp
Doilies: 4in Small Doilies
Kraft: Black & White Patterned Washi Tape, Kraft Patterned Washi Tape, Kraft Burlap Pleated Lace, Kraft Wood Shapes Camera, Kraft Wood Shapes Elegant, Kraft wood clocks
Flower: Natural Earth Daisy, Natural Earth Zinnia


Running Scrapbook Page by Juliana Michaels

Running Scrapbook Page by Juliana Michaels featuring BoBunny Modern Missa


As you can see from my journaling, I started running this past May. It has become a part of my weekly routine, as I run 3 times a week to keep in shape. The regular exercise has done a world of good for me in more ways than one and I plan to continue doing it.

I took all of these photos using my iPhone and I have been posting them on Instagram to keep track of my running routine. I thought it would be fun to select some of these photos and create a layout to help record my running and why I started. I selected one photo from each month since I started running, so these represent May through August.


Running Scrapbook Page by Juliana Michaels featuring BoBunny Modern Missa


The color of my shoes inspired me to use the Modern Miss collection for this layout. I embellished it with a combination of chipboard, Noteworthy, stickers and brads from the collection. I also included some of the new Kraft Wood Shapes to continue the theme of photographing and recording my running.


Running Scrapbook Page by Juliana Michaels featuring BoBunny Modern Missa
BoBunny Supplies:

Patterned Paper: Modern Miss / Authentic, Modern Miss, Party, Fascinating, Dramatic
Chipboard: Modern Miss 12x12 Chipboard
Brads: Modern Miss
Noteworthy: Modern Miss
Stickers: Modern Miss
Buttons: Modern Miss

Thursday, August 14, 2014

Kraft Gift Bags, Cards and Tags

Today we have some more fun projects created with the Kraft Gift Bags. You can use the gift bags as they are, or maybe you want to jazz them up a little with some paper and embellishments! Let's go one step further. What can you tuck inside? A tag? A card? Maybe some goodies??

Hello Gift Bag by Lisa Novogrodski

I love to come up with different ways to use products. How many ways can I use the BoBunny kraft bags? Here I created a gift bag with the plain kraft bags, then I layered two bags on the front. The first bag is adhered to the front and you are able to open it as the flap wraps around the back. You can use this for a gift card or treat. The second bag I layered over the first and left it open as a pocket on the front to slip a card or tag in.


I also used the kraft bags to create a rosette in the center of my bow as well as cutting strips of the bag itself to create my bow.


Oh and few curly cues too...


This little tag fits perfectly in the layered pocket on the front of the gift bag! A simple tag that acts as a card and can be saved by the recipient.


The tag was created by tearing off pieces of the Kraft Dot Bag and mixing it up with stamps, stickers, washi tape and ink!


Here is a close up of the back of the tag. This tag slips right in the pocket to complete your gift set.

BoBunny Supplies:
Pattern Paper: Somewhere In Time, Antiquity, Timeless, Evening Mist, Elegance/ Somewhere In Time
Kraft: Dot Gift Bags, Plain Gift Bags, Wood Shapes Elegant, Wood Keys and Butterflies
Brads: The Avenues
Jewels: Pop Quiz, Mistletoe, Modern Miss
Combo Sticker: Somewhere In Time
Stamps: Captured Stamp, Stitches Stamp, To The Point Stamp


Welcome Baby Card by Juliana Michaels


The BoBunny Kraft Bags come in a wide range of patterns, however, I thought it would be fun to pull out the Plain Kraft Bags and personalize them with some of the new BoBunny stamps. I used one Kraft bag to create an envelope and I used another one to create a gift bag. I choose to create a baby card and envelope along with coordinating gift wrap to give to my next door neighbor who is due with a baby girl in December! 


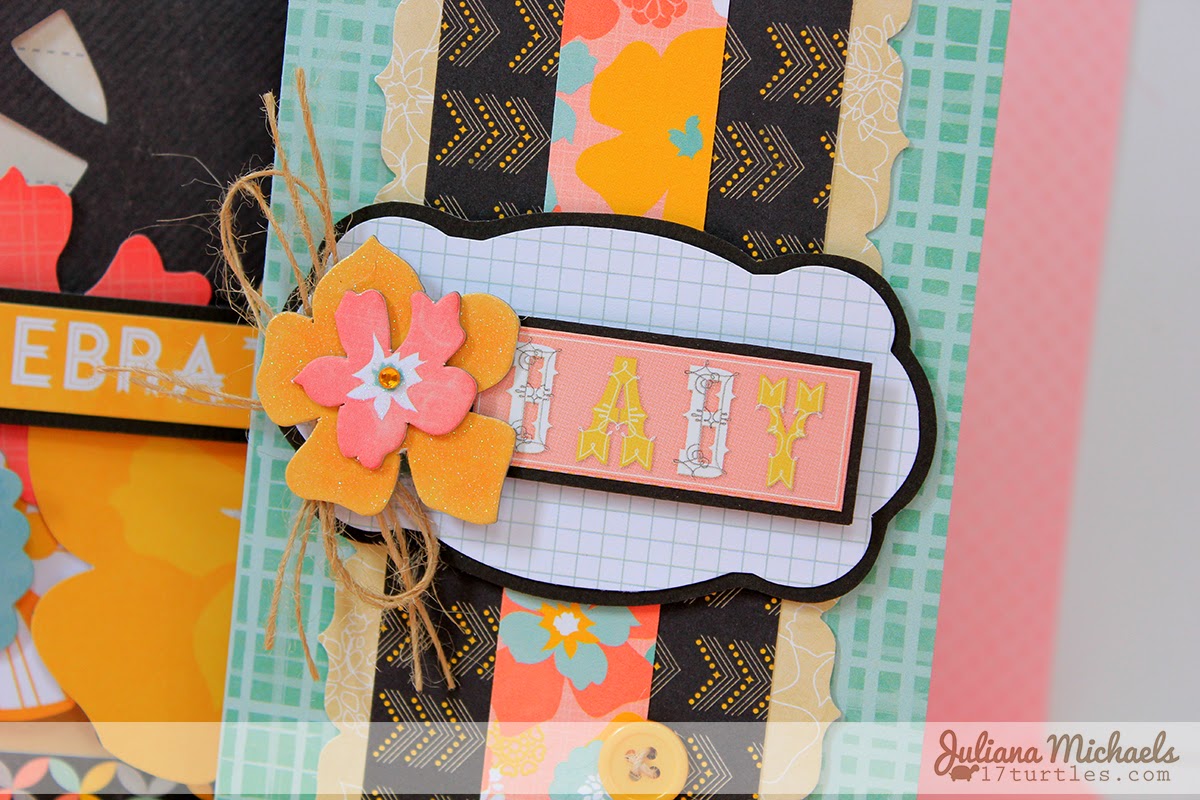
The card was created using paper from the 6x6 Baby Bump Paper Pad. I created the embellishment that I used on the front of the card by layering a Noteworthy shape and the Baby sticker on black cardstock. To create added dimension, I adhered them to my card using double sided foam tape. I then added the floral shaped chipboard, jewel, twine and buttons.


The envelope is a Plain Kraft Bag, that I stamped with one of the small button stamps from the Stitches Stamp Set. I then selected a label from the Baby Bump Noteworthy and layered it with some black cardstock before I attached it to the front of the envelope.

Celebrate Life Baby Gift Wrap by Juliana Michaels


To create my baby gift wrap, I selected the large Plain Kraft Bag. I again used the tiny button stamp to add detail to the bag. Next, I selected a variety of the Baby Bump Noteworthy shapes and layered them to decorate the front of the bag. I used double sided foam tape to give some of the flowers more dimension. The "celebrate life" die cut was layered on black cardstock before I attached it to my bag with double sided foam tape. I then cut a strip from the Bundle paper and attached it to the bottom of the bag.


I also cut a strip from the Oh Baby paper and cut it into a banner shape before attaching it to the top right hand side of the bag. To complete the embellishment of my bag, I added some jewels, twine, a chipboard button and some glitter glue. This was such a fun set to create and I really love how the stamped buttons added to the whole baby theme of my gift wrap. 


BoBunny Supplies:
Patterned Paper: Bundle, Oh Baby / Baby Bump
6x6 Paper Pad: Baby Bump
Noteworthy: Baby Bump
Chipboard: Baby Bump Layered Chipboard
Jewels: Baby Bump
Buttons: Baby Bump
Stickers: Baby Bump Combo Sticker
Cardstock: Island Mist Dot
Kraft Gift Bag: Plain
Stamps: Stitches Stamp

Thursday, July 31, 2014

Using BoBunny Stamps on Scrapbook Pages

Welcome back to another day of BoBunny Stamp inspiration. Today, our designers are sharing ways to use stamps on scrapbook pages.


Live Your Own Fairytale by Juliana Michaels

Live Your Own Fairytale Scrapbook Page by Juliana Michaels #bobunny #enchantedgarden #scrapbookpage #stampsWhen I first laid eyes on Enchanted Garden, I knew immediately what I would use this collection for...scrapbooking photos of my nieces! Especially the youngest one who still loves fairies and princesses!

To create my page, I began by selecting the new Lavendar Dot Double Dot as my background. I then trimmed and cut the Enchanted Garden Mosaic and Magic patterned papers to create the large strip behind my photo.  The sweet little fairies were just calling to me, so I knew I wanted to add some of them to my layout.  I fussy cut two of them from the Pixies patterned paper. The title piece was also cut from this paper.

Live Your Own Fairytale Scrapbook Page by Juliana Michaels #bobunny #enchantedgarden #scrapbookpage #stamps

Next, I used the new BoBunny Stitches Stamp to create a border around the outside edge of my layout and along the edge of the large strip behind my photos. It really gives the look of machine stitching and is perfect way to add a touch of texture to a project. I wasn't done stamping though. I also used the To The Point Stamp. The "bubbles" looking stamp that comes with this set seemed like it would be perfect for adding a touch of magic to the fairies. I stamped it with clear embossing ink, added Stampendous Frantage Embossing Powder in Shabby Blue and then heat set it to melt the powder. This added a fun shiny and sparkly touch to the layout. I added the fairies to my layout using double sided foam tape and then tucked in some of the Elegant Kraft Wood Shapes. I even cut one of them in half to make the most of my embellishments.

Live Your Own Fairytale Scrapbook Page by Juliana Michaels #bobunny #enchantedgarden #scrapbookpage #stamps

The final touch was to hand punch all the little butterflies from various colors of BoBunny Double Dot. I then hand drew a butterfly image on each of them with a black pen to give them a stamped feel as well.

Live Your Own Fairytale Scrapbook Page by Juliana Michaels #bobunny #enchantedgarden #scrapbookpage #stamps

BoBunny Supplies:
Patterned Paper: Pixies, Mosaic, Magic / Enchanted Garden
Double Dot: Lavender, Caribbean, Turquoise, Almond, Island Mist
Stickers: Enchanted Garden Combo Sticker
Kraft: Wood Shapes Elegant
Stamps: Stitches, To The Point


6 by Bernii Miller


I must admit when I first started this layout, I had a totally different layout in mind! I wanted to use the sweet Doily stamps, that have just been released and was toying with the idea of creating a bright and bold layout, But then as I was going through all my gorgeous BoBunny goodies the Enchanted Garden collection literally fell off the shelf! I think it was a sign from the scrapbooking Gods, so I went with it. And boy am I glad I did!! I love how this layout came together, so much so that I have a step by step tutorial on my blog to show you how I made it. 


I played around with lots of blossoms and the Enchanted Garden ephemera pack to mainly complete this layout. I love the little surprises that you get in the ephemera packets and how well they are coordinated. So the ribbon, petals, book paper and trinkets came from the pack. 


I used three different ink colours to add hints of stamped images to the back ground, using the doily and lattice work stamp. I love the subtle hints of colour it adds to the background. I then went bold and added in black ink some paint splatter stamped images using the stained textures stamp set. 


Then to add a little interest to the layout, I added pops of colour by adding in a couple of the Harvest Orange bouquet petals to each of the flower clusters. This helps to draw the eye across the page. Please if you did want to see a little more detail on how I created this layout then head on over to my blog for a closer look. 

BoBunny Supplies: 
Patterned Paper: Moonlight, Imagine, Spellbound/ Enchanted Garden.
Double Dot: Lavender. 
Stamps: Stitches , Gateway, Stained Texture, Countdown.
Jewels: Frosting.
Ephemera Pack: Enchanted Garden. 
Doily: 6,5" Medium. 
Blossoms: Denim Blue Pansy, Plum Purple Pansy, Denim Blue zinnia, Plum Purple Bouquet, Harvest Orange Bouquet.   


Love this View by Amy Voorthuis


I have to admit I'm afraid to use stamps most of the time but this time I just kept adding more and more stamps! I'm addicted now lol.
Dragonflies are my favorite insects next to butterflies this picture was taken on our holiday just one week ago. They are so delicate and this one was hugh and had the most amazing colors.
I took out the Fantasy sheet from the Enchanted Garden collection and just stamped the Wall to Wall texture stamp in a pattern.


I'm not a hugh fan of orange but when I found those awesome flowers at a local scrapbook store on my vacation trip I had to use them. I can't make a layout without washi tape anymore it's so much fun to do!


I love the way all BoBunny collections can be mixed & matched for this layout I used Enchanted Garden & The Avenues such a wonderful combination.


BoBunny Supplies:
Patterned Paper: Fantasy, Spellbound/Enchanted Garden, Clocks, Stripe/The Avenues
Stamps: Wall To Wall, Zip-A-Dee-Doodle, Prairie Chic, Powder Mountain, Stitches, To The Point, Alphabet Stamp
Jewels: Autumn Song, Frosting
Washi Tape: Black & White
Blossoms: Harvest Orange Dahlia, Denim Blue Pansy
Trinkets: Isabella