Showing posts with label BoBunny Wood Shapes. Show all posts

Wednesday, January 9, 2019

2019-01-09, Malin, Banner Year Calendar

Hi Everyone!
First of all I would like to wish you all a  
Happy New Year!!

I will start my first blogpost for you with a calendar that I made with the Banner Year collection. I made a big book of it with pockets for storing things for each month that you just want to save. I made small cards in the pockets where you, for example, can put  some photos from the months and so on. Decorate the calendars with stickers and so on when you write in it month by month. Nice memory album to keep as the year goes by.
I really hope that you will like this little calendar.

It was really fun to make since this was the first time i made a mini album this big and in this way. I have just made very simple and small minia lbums before so it was fun doing something new!
The paper from the Banner Year collection was perfect for this project since you already have all the months and note papers on them!

There are a lot of photos but, enjoy!


BoBunny Supplies:
Banner Year Paper collection and stickers
Craft Dies -Mandala #12839088
Wood shapes - clockwork
Butterflies - On this day in april from On This Day paper collection
BoBunny - white gesso

American Crafts: 
Thickers - Daiquiri White 4274

Have a nice day!!
Malin

Thursday, May 10, 2018

Once Upon A Lifetime Wall Decor Project with Ulrika

Hello BoBunny Friends! 

Today, I'm going to show you this wall decor piece I made using Once Upon A Lifetime from our favorite BoBunny. The distressed frame I found at the recycling station. It was perfect creative inspiration for this project and provided just the right starting place for what I wanted to create.


"Once Upon a Lifetime" Wall Decor Project by Ulrika Wandler


I decorated it, and now it hangs on my wall. The worn off color on the frame matches perfect with the color scheme in the Once Upon A Lifetime collection! I accented with glitter paste, fabric and ribbon flowers and copper tone beads, nails and brads.


For a close up, I used wax paste and Glitter Paste on the wood birdcage shape.


I attached the paper pieces with foam dots so they would look more 3 dimensional.


I hope you enjoyed seeing how this project was crafted as much as I enjoyed making it.  It's always so much fun to see something creative turn out, sometimes even betterr than originally envisioned!

Come back and see us again soon!

Ulrika

BoBunny Supplies:

Patterned Paper: Once Upon A Lifetime / Memories, Heritage, Grandparents, Pedigree, Relatives

Double Dot: French Vanilla Damask

Stickers: Once Upon A Lifetime

Chipboard: Once Upon A Lifetime Layered Chipboard

Dot Jewels: Mocha

Glitter Paste: Rose Gold

Wood Shapes: Birdcages


American Crafts:

Sticky Thumb Adhesive Foam Dots

Sticky Thumb Tape Runner


Sunday, March 4, 2018

Easel Fold Card Duo featuring Stay Awhile with Katherine


Hello Everyone, 

Katherine here with some really easy Easel Fold cards using Stay Awhile.  This sort of card is great because it folds flat which is great for posting.


My basic design is a 12" by 4" piece of double dot card stock which I fold at 6" and then 9", both of those fold are mountain folds.  To make the card stand up you add an area on foam pads (in the case above the flower square) on the inside of your card, so you can tuck the front of the card behind it.

To decorate my cards I added a 5 3/4" by 3 3/4" purple panel from the paper Welcome on the base of my card and then as there is a fold in the middle of the front cover I added 2 panels to the front of my card (you can see this best in the last photo where both cards are flat).  To disguise the fold I created my colourful hills and just stuck them to the bottom panel, the same with the house so that they pop-up when you fold the card.


I snipped the hills to make it look like grass and inked the edges of all the papers to add a little more definition.


Here you can see the square that the front cover tucks behind, I added some of the Double Dot Blue Hues jewels on the flowers to coordinate with the ones on the main card to tie the looks together.


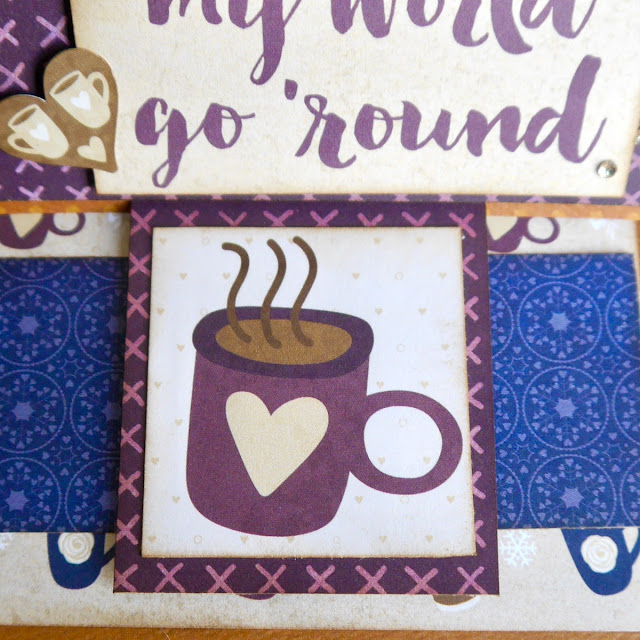
The same template, but this time I cut out lots of the coffee cuts, the perfect card for a coffee lover!  I stuck the coffee cups just to the bottom fold so that they pop up.


My sentiment is on foam pads which meant I could tuck all the cups behind it, and I added a few coordinating jewels for just a bit of shine.


Another coffee cup to provide the stop and hold the card up.


This should give you an idea of what the cards look like when flat, you can see the panel at the base and top on the front of the cards and how it  has been disguised with the hills and coffee cups.


BoBunny Supplies

Patterned Papers: Stay Awhile  - Welcome, Neighbours, Mugs,Cozy and Warm
6" Pad: Stay a While
Double Dot: Rust and Vintage Dot Kiwi
Stickers: Stay Awhile
Wooden Shape: Hears
Jewels: Blue Hues and Mocha
Paint: White Gesso

Friday, February 23, 2018

Ski and Sun - A 12 x12 Layout featuring Winter Playground - with Ulrika


Skidor Och Sol (Ski And Sun) by Ulrika Wandler

Hi! Ulrika here on the BoBunny Blog today to show you this winter themed layout using the cool and crisp Winter Playground Collection. These photos were taken after a fresh snow, making the title Winter Wonderland very appropriate.


Skidor Och Sol Scrapbook Page by Ulrika Wandler using BoBunny Winter Playground Collection

These pictures of my boys in their warm winter gear matched perfectly with the papers.


Skidor Och Sol Scrapbook Page by Ulrika Wandler using BoBunny Winter Playground Collection

I painted the wooden shapes with a thin layer of gesso. After drying I applied some Glitter Paste for an additional frosty textured look.

Skidor Och Sol Scrapbook Page by Ulrika Wandler using BoBunny Winter Playground Collection


Skidor Och Sol Scrapbook Page by Ulrika Wandler using BoBunny Winter Playground Collection

Thanks for stopping by for a peek at this cool Winter Playground layout!  Come by tomorrow for more fun scrapbooking layout ideas.

x Ulrika

BoBunny Supplies:
Patterned Paper: Winter Playground / Frolic, Children, Picturesque, Snowball
Double Dot: Country Blue
Die: Mandala
Wood Shapes: Snowflakes 
Sugar Glitter Paste
Gesso

Wednesday, January 31, 2018

Only You and Winter Playground-Handmade Cards


Ulrika here today to show you two super fun handmade cards I made for the blog today using Only You and Winter Playground.  Two very different themes, but with both have a true BoBunny type feel.

Thank You and Congratulation Cards by Ulrika Wandler using BoBunny Winter Playground and Only You Collection

I love the color schemes in these two collections!


Thank You and Congratulation Cards by Ulrika Wandler using BoBunny Winter Playground and Only You Collection

I used several of my BoBunny dies, some BB wood shapes and some glitter paste to sparkle things up a bit.  I also utilized some of my favorite jewel and pearl flourishes.  I just love the end result!

Thank You and Congratulation Cards by Ulrika Wandler using BoBunny Winter Playground and Only You Collection


Thank You and Congratulation Cards by Ulrika Wandler using BoBunny Winter Playground and Only You Collection

BoBunny Supplies:
Patterned Paper: Only You / Be Mine, Kisses, Happiness, Darling, Valentine
Winter Playground / Frolic, Children,
Double Dot: Charcoal
Blossoms: Denim Blue Bouquet, Denim Blue Zinnia
Jewels: Frosting Jewels
Wood: Snowflakes Wood Shapes
Dot Jewels: Mocha Jewels
Glitter Paste: Gold
Dies: Ornate Doilies Dies, Perfect Petals Dies, Flourish Dies, Flutter Dies
Stamps: Sentiments Stamp

Thanks for stopping by today!  We hope to see you tomorrow for more fun with BoBunny products.

Monday, January 29, 2018

Only You-A Valentines Mini-Book featuring Only You with Katherine


Hello BoBunny Fans, Katherine here and I wanted to share with you a mini-book that I created using Only You and some of the wonderful dies that BoBunny has in their die assortment.


My book is a straightforward 6" square book, I cut some of the 12" paper sheets to 6 by 12" then scored in the middle and stuck the b-sides of my papers together which helps the book hold together well, I also added in little flaps for extra journalling and notes.  There are lots of photos!


 For my first page I used the edge of the paper Darling and then added an angel from the Noteworthy cut apart paper.  I used the Love Squared die-cut frames for where my photos will be.


For the next page I added a flap using the Floral paper and punched along the edge, adding one of the 3 by 4" cards from Be Mine, they have some beautiful phrases, I finished it off with the lacy Sweetheart die.


The next page, and more Love Squared die cuts as well as the Happily Ever After phrase from the Ever After card dies.


I created a pocket with one of the 4 by 6" cards and added in some smaller cards for journalling and photos.


A different lift up flap for this page decorated with some natural earth lace and some of the Noteworthy pieces in the collection.


More lace, punching and pockets with hidden journal and photo spots.


This is another fold out page, and I used some of the wooden hearts which compliment the intricate die-cuts beautifully.


For this page I used the large Ornate Heart die, and I haven't properly affixed the front strip down as I want to place a large photo underneath it.


My final 6 by 4" pocket with a little Noteworthy cupid added and some jewels.


One of the beautiful phrases you can find on the cards as my last page.


I hope you have enjoyed a tour on my mini-album and it's encouraged you to sit and play with all your BoBunny dies - I start by cutting everything out and then assemble as I go and cut-out more as and when I need it.

BoBunny Supplies
Patterened Paper: Only You - Only You, Always, Be Mine, Cupid, Darling, Floral, Happiness, In Love, Kisses and Noteworthy
Double Dot
Jewels: Think Pink
Dies: Darling Doily, Ever After Card Dies, Love Squared, Ornate Heart Die, Sweet Heart
Lace: Natural Earth