Showing posts with label clear stamps. Show all posts

Friday, May 15, 2020

Family Heirloom Mixed Media Artist Trading Cards

Hello!

For todays blogpost I have created some mini projects for you!

This is a PERFECT way to also use up your paper scraps as I hinted at in a previous post on the blog.
This time I have made some ATC cards ( artist trading cards ).

I was entering a corona cybercrop on Facebook and made Artist Trading Cards for the first time and I really enjoyed it! So I just wanted to do more and since I have so many gorgeous pieces of small papers left this was a perfect way to use them. I used the same technique with layering paper pieces as I did on my tip post earlier on the blog. I love the colors in the Family Heirloom collection and it feels like I can use it all the time. I don´t want to throw anything away really!

For the ATCs I also used this cute butterfly stamps that I colored in different colors to the cards. I wanted them to match but also just be a little bit different from each other. Used some of the glitter washi tape and it really makes them pop with a little bit of glitter on them. Last I also used some white gesso mixed with a little bit of water and just did some splashes over the card. I really LOVE having this splashes on my projects.


I used my old typewriter for the text on the cards.


If you haven´t tried making Artist Trading Cards this is the time for you to try it out I think, using up some of your smallest pieces of papers and stuff.


BoBunny Supplies:

Family heirloom collection
Family heirloom washi tape #7311028
Celebrating freedom washitape #7310561
Butterflu kisses stamp #12105027
white gesso #12843486

Other:
white cardstock
white lace


Have a nice day!


Tuesday, May 5, 2020

Personalized DIY Mother's Day Card

Hello hello everyone!

Today I want to show you a Mother's Day card i made for my mother. I actually wanted to do a little bit of a different card this time so instead of using a colored digi or something like that I took a picture of my mother to use on the front side.

She also loves this heather color that is also similar to the color on this beautiful lilacs on the paper so this was a perfect paper to use for her. I did cut out some of the lilacs from the paper and use it as decorations on my card.

Some of the papers are perfect to cut out bits and pieces to use as decorations and so on and that is what I have done on this card. Also on the inside I decorated this card for her. Also used the sweet celebration stamps that has a lot of nice sentiment stamps for different occasions.

I hope you will like it.


Have a nice day!


Supplies used: 

BoBunny Time and Place Collection
BoBunny Sweet Celebration Stamp Set #7311086

Other:
Glitter Glue and a Doily 

Wednesday, March 4, 2020

Stamp Layout with Malin

Hello everyone.

Today I´m back with a layout for you. The theme is to use stamps so I picked out all of the stamps I recived from BoBunny and tried to make a layout with it, using as much of my stamp as I could to have a nice looking layout. I actually really like it and I think I will be doing many more in this style in the future. It was really fun to play around with the stamps and see, WHAT CAN I USE? I recommend you to take out your stamps and see what you can use, it will probably be so many more than you think!
Create backgrounds, use them as cutouts to decorate with and so on!

I hope you will enjoy it.


I have been using:
Sweet celebration stamp #7311086
Terrific textures stamp #7311082
Butterfly kisses stamp #12105027
Forest friends stamp #7310182
Stitches stamp #10105428
Gratitude stamp #7310500
Of time past stamp #7311087
Family heirlooms stamps #7311024 
Blush pearlescents #12040594

Other:
Grey distress inks

Have a nice day!


Monday, September 16, 2019

Stamping Tips with Malin

Hello everyone!

Today I will share with you a few scrapbooking tips from me.
I have some small simple tips using stamps today and using stamps to make decorations for your projects. I love using stamps om my projects and I hope you will do to.

The thing is that this is something you can do if you don´t have that much time for scrapbooking but still want to scrap a few minutes or half an hour or so when you can. As for example before christmas time when we have our hands full of preparing christmasgifts, decorate the house, meeting up with family and so on.


Prepare some 10x10 cm cardstock to be used for this, you will get 4 out of one cardstock and that is good! You can have them on your table to be used as you go. Or just the sizes you like!
I have then used the christmas stamps christmas treasures from this collection.

Tip 1. Use some basic monochromatic cardstock, stamp your stamps and then cut it out, and you have a decoration. On this picture I took brown cardstock and stamped some of the cones on. Perfect and I do not need to color them! And i have some decorations for my card!

Tip 2. Stamp on patterned papper. This will give the stamp more "life" in it even if you do not color it. I have on this one used patterned papper pieces from the collection christmas treasures and stamped some of the banners and text, cut it out and I have a decoration. Do this with all kinds of patterned papper that you have and you can do several and save for later projects. This is also fun and easy to do in front of the tv... Or if you cook or something just stamp a few during the time you are waiting and so on.

Tip 3. If you have a litte more time now and then stamp up your stamp and emboss it! You can emboss with all sorts of colors and it also looks nice to have an embossed picturestamp on a monochromatic paper to be used on a cas card and so on. Just play and try around what you like!


Tip 4. Do as usual and stamp up a lot of your small picture stamps and color them. You don´t need to color them all at ones, do some now and then when you have a little time left. Then when they are done start cut them out and you will have a lot of decorations for your projects when you have a little more time to be sitting down and scrapbook! I personaly think this is great to have been making and have them done when it´s time for scrapbook time!


Small tips from me today. Look around your stamps and you probably will have plenty to make decorations of!
So here it is then...
A small christmas card I did using the stamp set. The card is only 10x10 cm but perfect to send out as a christmas card or be put on the christmasgift you just wraped to write on to the person who is giving the gift.


Products I used:
BoBunny Christmas treasures stamp set # 7310902
Christmas treasures paper collection.
White cardstock

Other:
Differnet mediums for coloring and embossing.

Have a nice day!

Wednesday, September 4, 2019

Christmas Giftbox in September

Hi everyone!
Today I want to share with you an altered box I have made for Christmas. I saved a paperbox from work and thought this is a perfect little box to put some gifts in.

So I used the BoBunnys new Christmas collection, Christmas Treasures collection, it´s so gorgeous! I love that there are also some papers with different Christmas picture to be used on cards and things like my box for Christmas. Who doesn't already look forward to Christmas now??


So this is my little box and I hope you like it.


Items Used:
Christmas Treasures collection papers
Flowers Clover pansy #11411471
 Christmas Treasures brads #7310925
Wildberry Lace #11020444
Frosting Jewels # 10207766
Christmas Treasures stamps #7310902
Christmas Treasures noteworthy #7310921
Christmas Treasures stickers #7310920

Have a nice day!


Saturday, July 20, 2019

Graduation Scrapbook Layout from Malin in Sweden

Hello and welcome back!

Today I want to share with you a layout I made from my son's graduation day here in Sweden.
I used 6 images on this layout but when you first look at it you will only see one of them. I have been "hiding" the other ones on the layout since I wanted to have so many of them on it. So if you look at the pictures ( and the movie on youtube) you can see where I did hide the other ones.

I have been using the collection Boulevard that I just LOVE LOVE LOVE!! On this layout I useda lot of the papers in the collection that have blue and yellow because of our Swedish flag  and when the kids graduate here ,we put up a lot of balloons in our colors and have the flag on the tables and so on. You can see a little bit of it in the images if you look carefully.

I hope this gives you a little bit of inspiration to use more than one or two images on a layout. It is also perfect to do like this if you have some photos you want to have on it but just don´t want others to see directly ( or at all if you have it in a photo protector ), but you still want to have it there for your memories, and for you to pull out and look at whenever you feel like. Enjoy!


Products I Used:
Boulevard paper collection
One yellow paper from "On this day"  September , #22501254
Blueberry double dot paper  #12BD549
Thickers alphabet 7310599
Boulevard Washi tape #7310899
Boulevard noteworthy #7310591
Boulevard stickers #7310590
Balloon party dies #7310505
Balloon party stamps #7310498
Triple play numbers dies #7310509
Stiches stamp #10105428


Have a nice day!

Tuesday, August 8, 2017

Weekend Adventures Travel Journal with Katherine


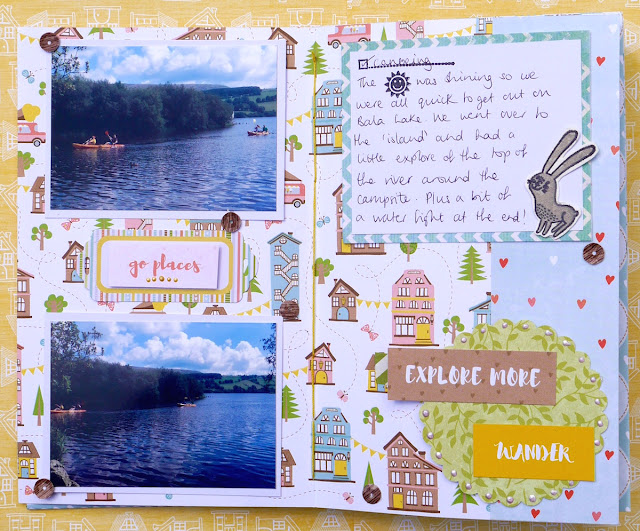
Hi BoBunny Fans, as the summer is under way I wanted to share with you my travel journal, it was a great little project that I could take away with me and meant I was able to scrap in my tent!

Katherine Sutton - Sunshine Travel Journal

Sunshine Travel Journal by Katherine Sutton using BoBunny Weekend Adventures

I made the book before I went and purposely kept the front cover clean and simple, so it was easy to store and nothing would get knocked off on it's travels.  I also had a go at some coptic binding.


Sunshine Travel Journal by Katherine Sutton using BoBunny Weekend Adventures

It's fairly straight-forward - the hardest part was sewing the covers on.  To make the covers I used some cereal box type card, and then covered it in paper.  I cut 7 papers to be 10 by 8", scored them in the middle (so my pages are 5 by 8") and added little pin-prick holes at 1",2",3" then 5",6" and 7" with a pokey tool.  With Coptic binding you tend to add 4 papers together into what makes a signature and bind them all together, as the BoBunny paper is nice and thick I only used one piece of paper for each signature.  The best bit about  this sort of binding is that you can very easily lay your book flat as you work.

Sunshine Travel Journal by Katherine Sutton using BoBunny Weekend Adventures

For my opening page I have a little pocket for receipts, tickets and other little bits from our travels, and then my first photo is our camp.  I haven't used much mixed media in this project because I was in a tent, but the pearlescents were a perfect embellishment to take with me.

Sunshine Travel Journal by Katherine Sutton using BoBunny Weekend Adventures

You can see the stitching down the centre of the page from the binding.  The Good Vibes paper has lots of phrases on it, and they feature throughout my journal.

Sunshine Travel Journal by Katherine Sutton using BoBunny Weekend Adventures

I also had lots of fun including lots of the icon stamps in my journaling - perfect for planners and journals alike.

Sunshine Travel Journal by Katherine Sutton using BoBunny Weekend Adventures

I created a triangular pocket so that I could keep some of the leaflets about the area in my journal.

Sunshine Travel Journal by Katherine Sutton using BoBunny Weekend Adventures

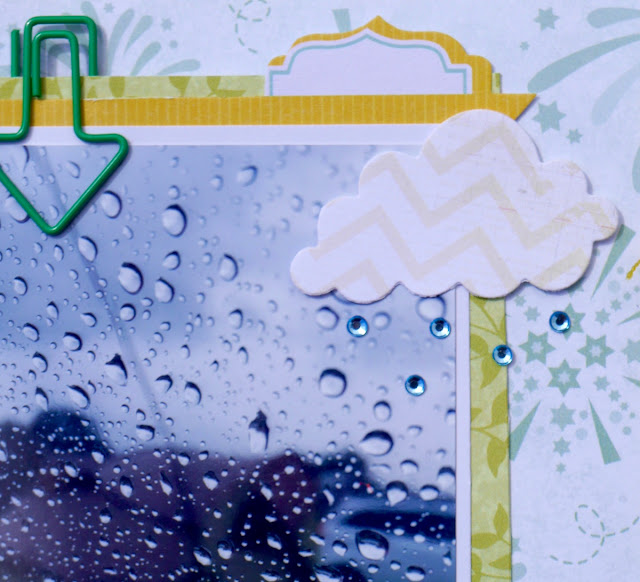
I used one of the cloud dies from the Fly Away die-set and added little gems to make rain drops....the weather wasn't perfect but we made the most of it!

Sunshine Travel Journal by Katherine Sutton using BoBunny Weekend Adventures

I pre-made these journal spots using the chevron 6" pad before we left - I just picked out some colours that went with the papers.

Sunshine Travel Journal by Katherine Sutton using BoBunny Weekend Adventures

I also added lots of stamped embellishments which I made before we left using the Woodland Critter stamp set.  I stamped and embossed them on watercolour card and then gave them a wash of colour

Sunshine Travel Journal by Katherine Sutton using BoBunny Weekend Adventures

I think the bear is my favourite!


Sunshine Travel Journal by Katherine Sutton using BoBunny Weekend Adventures

More bears in the form of the Bear Necessities die, and also some stamping from the Captured Stamp set - I cut out the This Week part and added it to one of the Noteworthy tags.

I hope you've enjoyed a little tour of my Travel Journal - it is a lovely project to take away with you and build up as you go - everything I needed fitted in a 12" box, and if you have a small photo printer then you can add the photos as you go.

BoBunny Supplies

Patterend Paper: Weekend Adventures - Weekend Adventures, Bear Hug, Blooms, Fly Away, Good Vibes, Picnic, Play Date, Road Trip, Stripe and Swing Set.
Double Dot: 6" Chevron pad
Noteworthy: Weekend Adventures
Dot Jewels: Blue Hues
Chipboard: Weekend Adventures
3D Chipboard: Weekend Adventures
Stamps: Captured, Icons, Woodland Critters
Pearlescents: Blush, Butterscotch, Coral, Gold and chocolate
Dies: Bear Necessities and Fly Away