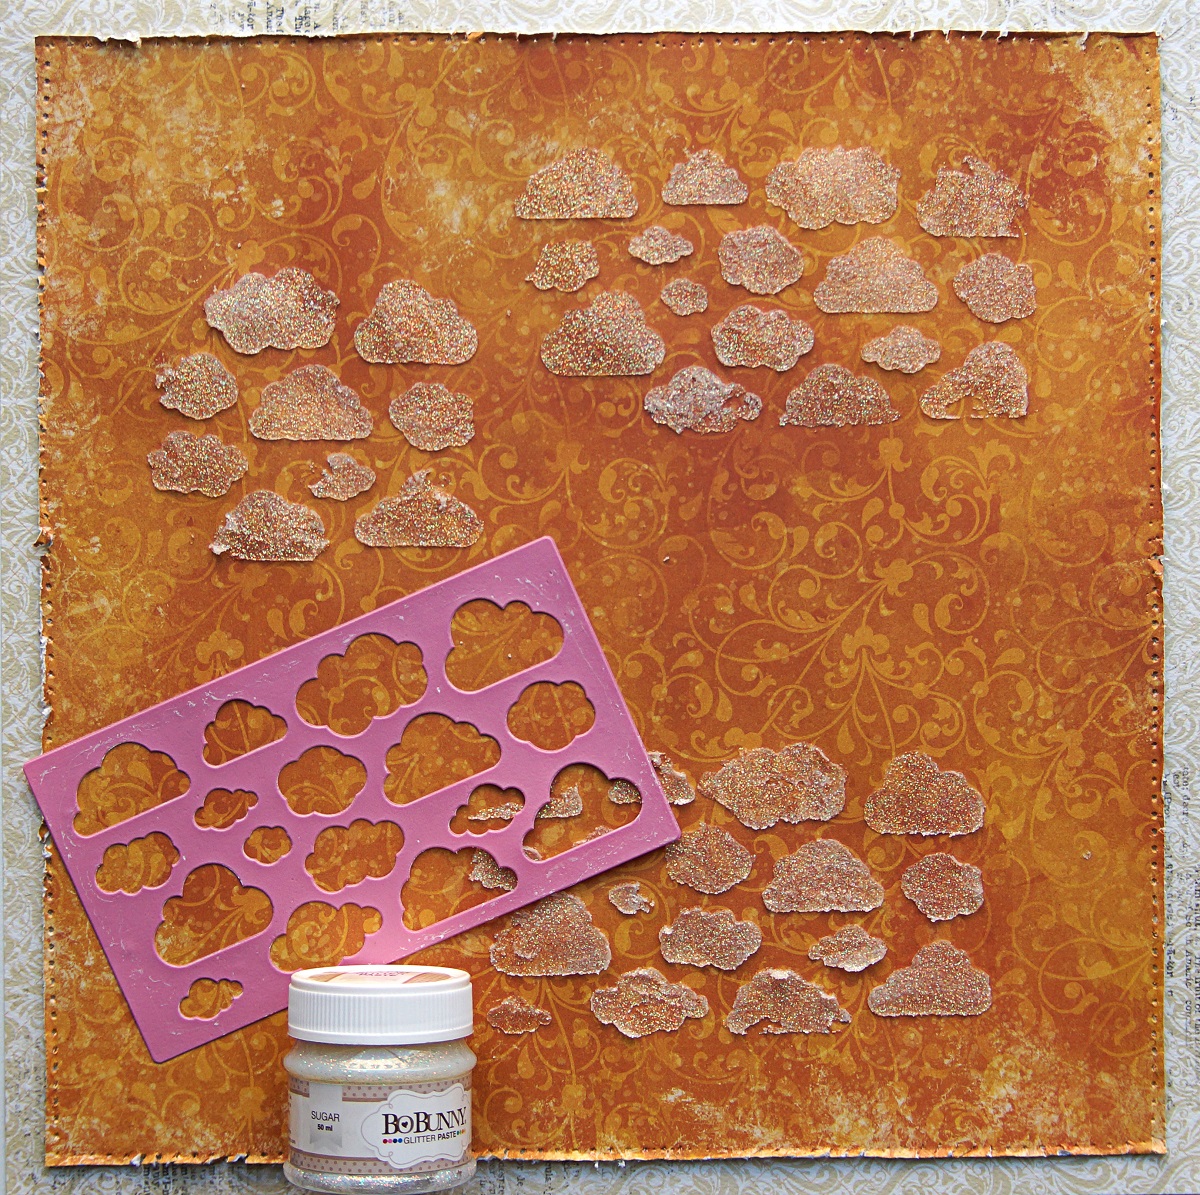
Emmy here with a brand new layout to share! This week the design team is sharing our favorite techniques and if you are familiar with my style, you've probably guessed that mine is stenciling. I just love BoBunny's Stickable Stencils - their designs are amazing and they are perfect in combination with BoBunny's Glitter Paste.

Sunday, September 30, 2018
Favorite Techniques: Stenciling with Emmy
Emmy here with a brand new layout to share! This week the design team is sharing our favorite techniques and if you are familiar with my style, you've probably guessed that mine is stenciling. I just love BoBunny's Stickable Stencils - their designs are amazing and they are perfect in combination with BoBunny's Glitter Paste.
Monday, May 21, 2018
Early Bird Spring Layout with Marilyn

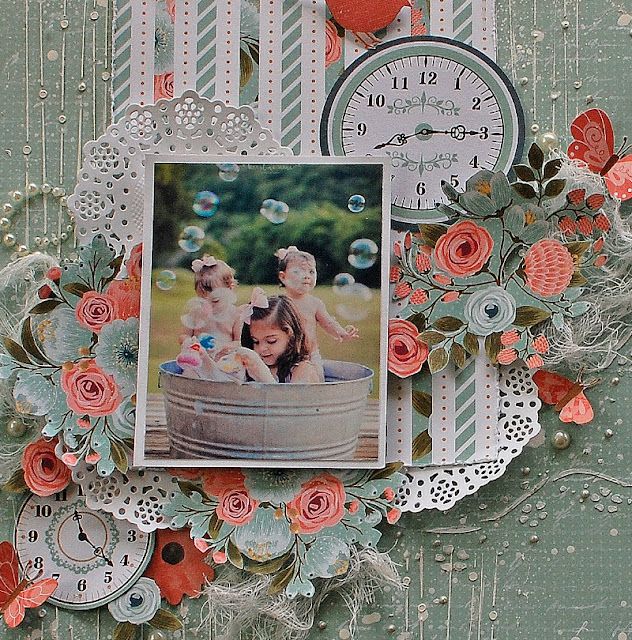
Spring is my favorite season. I love the flowers, the colors of the season, and all of the butterflies and birds flying around because they make me smile. The Early Bird collection shows all of this! It was hard to select the papers because I love all them, but I chose this green paper with the handwriting design, to which I gave textures with the stencil and modeling paste.

I cut out the butterflies and flowers from the papers.

These beauties are the granddaughters of a friend and I think the photo goes perfect with this collection.

Once I created the design on my page with the different die cuts pieces, doilies, etc.. I added some jewels swirls and some pearl dots for a feminine touch on my page.

I love giving dimension to my projects so I added adhesive foam dots on the back of the flowers and doilies so I can highlight these elements and give more interest on certain details.

Thanks for stopping by, I hope you find some inspiration.
Until next time!! xx
Marilyn
BoBunny supplies:
Patterned Paper- Early Bird- Clocks,Early Bird, Flutter, Arrival,
Noteworthy- Early Bird
Stickers- Early Bird
Dot Jewels- Frosting Jewels, Black Tuxido
Stickable Stencil- Serenity
Dies- Doilies
Pearlescents- Sugar
American Craft:
Sticky Thumb Adhesive Runner
Sticky Thumb foam dots
Tuesday, December 18, 2012
Warm and Cozy Layout Tutorial
~ Add textural fabric elements (here I used some burlap, and paper lace as well as some crocheted lace) to give the page a homespun feel.
~ Add buttons and machine stitching, it's a quick way to give a page a soft fabric look. And don't forget the little details like tying some kitchen twine through the button holes, it gives a nice finish to the flower centers.
Cardstock - Tutu Double Dot
Noteworthy - Powder Mountain
Stickers - Powder Mountain
Buttons - Serenity, Welcome Home
Stamps - Midnight Frost
Flowers - Blush Dahlia, Blush Bouquet
Tuesday, June 7, 2011
Card Challenge: It's all about the Flowers!
So, let's get to today's challenge! The challenge we have for you today, is all about flowers! Pre-made, handmade, punched or folded, we have a fabulous array of gorgeous flowers to share with and inspire you! Let's take a look at what our amazing design team has created.
Bo Bunny Supplies:
(The large flower was made from the Gabrielle Wraps and Jewels. The small flowers and vine/leaves were punched from Timepiece Dot and Clover Double Dot.)
Barefoot & Bliss 6 x 6 paper pad, Barefoot & Bliss Layered chipboard, Barefoot & Bliss Dimensional Stickers, Double dot ribbon 5/8" in Buttercup Dot, Double dot ribbon 3/8" in Sage Dot and Orange Citrus Dot, Gabrielle Puzzle album, and assorted Bo Bunny flowers
Tuesday, June 29, 2010
Fun Flower Flip Flops!
To create them, my daughter and I started with a couple pairs of dollar flip flops that can be found at many local craft stores. And it was kismet that we found some in the fun, vibrant colors of two of Bo Bunny's new collections - Sun Kissed and Petal Pushers.
First, we used a hole punch tool about 1/8" diameter that is strong enough to punch through the plastic material and punched a hole in the center of the strap.

She inserted a brad from the bottom up so that the prongs showed on top. We did this to avoid the prongs from scratching her feet. The smooth head of the brad can't be felt at all and won't cause any irritation. Then she layered various flowers on top of the brad prongs. Once she had the flowers in place, she opened the prongs and pressed them flat.
With the flowers secured to the strap, she then adhered the buttons and gems to the center of the flowers to cover the prongs. We used a strong adhesive to keep the embellishments in place. And voila! That's it! They take all of about 5 minutes to put together.

For these flip flops she used the coordinated colors within each collection, but she already has plans to mix and match colors from previous lines to create her own color combos. I may need to hide my supplies! :)

Aren't they adorable? I may need a pair for myself!
So whether you're looking for a rainy day project for kids or maybe a girly craft for an upcoming party, these flip flops are the perfect quick summer craft for the little divas in your house. And with Bo Bunny's colorful array of Fabric Flowers and Buttons & Bling you can put together these cute flip flops in a flash!
Tip: If you do not have a hole punch or choose not to use one, simply use a very strong adhesive to attach the flowers and other embellishments.
Have fun creating!
Patti
Tuesday, April 6, 2010
Are you ready for Summer?
I know I am. ;) One fun and super cheap thing I like to do is make myself matching accessories for my summer trips to the beach ect..
Last month I made a fun placemat purse. You can pick up a placemat for a few dollars, add some ribbon, and in about an hour have a fun little handbag.
Here's what I started with (adding the yellow ribbon):
Supplies: placemat, Bo Bunny button and double dot ribbon.
I wanted the scalloped edges to show so I sewed along the edges of both sides to close up the placemat. You can also turn inside out and sew that way as well. Once the sides are sewn up sew on your ribbon handles.
Next use Fabri-Tac to add a strip of ribbon along the top with buttons at each end. Finally, add the ribbon flowers adhering them with Fabri-Tac as well. For a tutorial one how to make the flowers see this post. :) Just adhere directly unto the purse instead of on the paper circle.
Here's my version from last month again:
And while I was creating the purse I thought I d a matching checkbook cover. Here's what I started out with:
Supplies: Flutter Butter Honey paper, double dot ribbon, and clear checkbook cover
Just cut the paper to fit inside the clear cover. Make two ribbon flowers & leaves
and adhere to front and you're done. :)
Have fun creating!
Tuesday, March 23, 2010
Easter fun with the kids...
I'm always looking for something fun to make with my son. Easter is an exciting time with Spring in the air so I thought we could make a fun little decoration for the table. Of course w always try to recycle and a peanut container made the perfect base for our project,. ;)
Supplies:
Large nut container
Styrofoam eggs & paint
Delilah (Here's 2 U paper) & Persuasion (Dot paper)
Tutu Dot cardstock
Tutu Dot ribbon
Bu Bunny flowers (various colors)
Double dot bodacious brads (various colors)
Bo Bunny buttons (various colors)
Begin by painting all the eggs and set aside. While the eggs are drying adhere yellow paper around nut container & cut small strips of green paper, curl and add to inside of container for your "Easter grass".
Once eggs are dry adhere coordinating flowers and brads to decorate, add to container. Adhere eggs, bunny, and Easter sentiment to the front and tie ribbon around top.
A fun & easy craft!
Smiles, Sherry
Wednesday, March 10, 2010
I'm a slightly obsessed...
Here is a card that I made earlier today featuring one of these flowers (made entirely with Kitchen Spice)...
Want to know how to make your own? Check out the following video...
I'd love to see what you all do with your flowers! Thanks for taking a peek!
Tonya Dirk


