Showing posts with label Craft Wood Shapes. Show all posts

Monday, March 19, 2018

Stay Awhile! 12 x12 "Paper Patchwork" Layout with Katherine


Hi All,

Welcome to the blog today.  It's Katherine here and I've made a page using Stay Awhile and some quilt like squares, showing of both sides of the papers, revesing the circles into kind of patchwork pattern.


It is sometimes hard to choose which side of the paper I like best, so this technique works really well for when you want to show both sides.  I cut out lots of 3" circles and then scored the edges and folded them in so the circles became squares and you get to see both sides of the papers!  You can watch what I do in the video below.


To further decorate some of the squares I added some of the intricately cut wooden hearts.


I used the Double Dot Damask paper French Vanilla as the base - it makes a beautiful vintage background.


I layered up some of the stickers for the title area and used the Let There Be Light stamps for the title.


I hope you enjoy the video.


Thanks for popping in today!

BoBunny Supplies

Double Dot - Damask French Vanilla

Patterned Papers: Stay Awhile - Neighbors, Relax, Thankful, Welcome, Cozy and Warm

Stickers: Stay Awhile

Blossoms: Natural Earth Dahlia

Wooden Shapes: Hearts

Lace: Natural Earth

Buttons: Beautiful Dreamer

Tuesday, January 30, 2018

Only You Mixed Media Canvas with Irit


Hello my dear crafty friends and welcome to my  second blog post made with BoBunny new and gorgeous Only you collection.

This time I decided to make a Mixed Media canvas as this is one of my most favorite ways to show the paper collection and to add more of BoBunny different products.

Only you Mixed Media Canvas by Irit Shalom


 The background was made in two parts. The right side was made with a piece of thin fabric glued over the canvas and then covered with gesso and crackle paste.

The left side was made with BoBunny stencils and texture paste.

Then the whole piece was misted and painted and some gold wax was added over the texture.


The main cluster was made with mostly hand cut cardstock pieces that were arranged into this composition full of hearts and love.


One big Mandala die cut was added on the back of the cluster and one smaller Heart die cut was arranged in 6 layers on the bottom of the cluster.


BoBunny Supplies List:

Only you collection 12x12'' cardstocks: Only you, Kisses, Cupid, Happiness, Darling, Noteworthy

Mandala die

Sweetheart die

Hearts wood shapes

Lots of Love Stickable stencil

Mandala Garden stencils

White 2 step crackle paste

White gesso
Double Dot Ruby Red jewels
Sugar Glimmer mist

Thanks for being here with me today and see you !


Sunday, November 12, 2017

Falala Scrapbook Layout with Katherine

Hello BoBunny Fans!

 Christmas is on it's way and I wanted to share I page that I made with FaLaLa, one of the Christmas collections released by our BoBunny this season.

Have a Jolly Holly Christmas by Katherine Sutton


I used the Shadow Double Dot paper for my base page, and then added strips of Fa la la and Holiday Hoot (stitched).  I layered up my photos on Wild Berry - the red matches perfectly with this collection.  Next I added some silver snowflakes using the Holly Jolly stamps and complimented it with some snowflakes from the Christmas Card die set.


There are loads of elements you can cut out from the paper, the Father Christmas is from one of the 3 by 4" journal cards, and I mounted him on some foam pads.


I used the To and From dies and the nesting scalloped circles as the base for the title, which is from the Noteworthy paper.


I added a little more sparkle with some Ruby Red Glitter paste on the Holiday laser-cut chipboard present, and used one of the beautiful wood veneers on top.  I like the fact that you can layer these elements and see all the papers through them.


Another wood veneer shape, this one I also coated in glitter, and you can see a few of the snowflakes up close.

Come see us again!

Katherine


BoBunny Supplies:

Patterned Paper: Falala - Holiday Hoot, Fa La La and Noteworthy

Double Dot: Shadow and Wild Berry

Wood Shapes: Christmas

Stamps: Holly Jolly

Dies: Christmas Card and Small Doily

Laser Cuts: Holiday


Wednesday, November 8, 2017

Shadow Box Frame Holder featuring Penelope with Irit


Hello My Dear Crafty Friends! Irit is here today and I welcome you to my new craft tutorial made with a video tutorial.

Penelope Shadow Box with Irit Shalom


 This shadow box is very easy to make and it can be used as a real gift box or as a gift card holder or even as a photo frame.
Just make one or many with the most gorgeous BoBunny new released Penelope collection as as you can see this project has no Mixed Media products or hard to get ones. On the other hand even if you only have this paper collection and a few BoBunny embellishments you can make this beauty in a really short time.
This is how it looks when opened:


 One side is just the embellished side and it should be pretty flat if you want to close the box after all.
The  deep box side is embellished just a bit as we want it to be ready for the small gift or photo or whatever you wish to add inside.


 As you can see the left inside has some depth, but not too much.


 The box right side has the space for anything  you want to add  inside.


 Here is another close- up to the left box side.
I used wooden heart shape, some hand cut from the cardstock flowers and a couple of die cut pieces (the parts of the larger die cut frame from Ever after cards dies.


The cover was embellished with the same hand cut flowers, die cut leaves and some paper and fabric flowers with the add on of the wooden birdcage and some rhinestones.

You can see all steps on this video link HERE:


And also the products list was added to the video, I add it here again  for the easier  future use.

BoBunny Supplies: 
Penelope collection 12*12'' cardstock: Moments, Abbey, Grace, Laugh, Live
Ever After card dies
Lovely Leaf dies
Double Dot Aqua jewels
Double Dot Emerald jewels
Licorice jewels
Heart wood shapes
Birdcage wood shapes


Thanks for being here with me today and for watching my video. I am still on my learning curve, but I think it's easy to understand tutorial and hope you would try to make the similar project some day.

Monday, November 6, 2017

Christmas CRAFTINESS! Reindeer Treats featuring FaLaLa with Rhonda


Reindeer Treats Shaker with Rhonda

Greetings and welcome to the blog today!  It's Rhonda here to share a holiday crafting project with you that is perfect when involving the kids. I've been wanting to switch things up a bit this year and give them a glimpse of holiday magic with some "reindeer food" for them to sprinkle out on the front lawn.  Usually we leave carrots but it's fun to switch things around right?


Reindeer Food Shaker featuring Falala.Collection by BoBunny designed by Rhonda Van Ginkel


Reindeer Food Shaker featuring Falala.Collection by BoBunny designed by Rhonda Van Ginkel

The idea came about because I had an empty shaker container and I put it aside to use for this special project!  The FaLaLa collection was perfect as the theme is fun and whimsical.

Reindeer Food Shaker featuring Falala.Collection by BoBunny designed by Rhonda Van Ginkel


First, I covered the decorated portion of the shaker with the back side of the Noteworthy paper. Then I cut the tag, deer and die cuts. I covered the snowflake with white gesso and set aside to dry, but sprinkled just a bit of fine glitter on top so it would adhere.

Reindeer Food Shaker featuring Falala.Collection by BoBunny designed by Rhonda Van Ginkel

Isn't this cute?  I'm so glad that I have this done now so later it's all ready to go on Christmas Eve!  I just put some oatmeal inside and sprinkled a bit more glitter to mix it up and give a bit of holiday glitz.

I hope you've enjoyed my project today.

Rhonda

BoBunny Supplies:
Patterned Paper: Noteworthy and Santa Stripe / Falala
Wood Shapes: Christmas
DoubleDot Jewel: Ruby Red
White Gesso
Glitter Paste: Sugar
Stickable Stencil: Winter Fun
Dies: Elegant Border Die

Thursday, October 26, 2017

Penelope Altered Wooden Printer's Tray Project - with Irit


Hello My Dear Crafty Friends!
It's Irit here and today I am going to share my altered wooden printers tray that I made with BoBunny new and most gorgeous Penelope collection.

 Dream- A wooden altered tray by Irit Shalom


This 12*12'' wooden tray was already embellished once and was dirty white.
I decided to make the new tray as my small tribute to our family trips to some not so known countries The first step was to paint it to dark brown with the touch of gold.
I used Pentart Primer for Dekor paint as the first layer and then painted with brown Dekor paint and added some top touches of Creamy Acrylic Baroque Gold and now the tray was ready to be embellished.
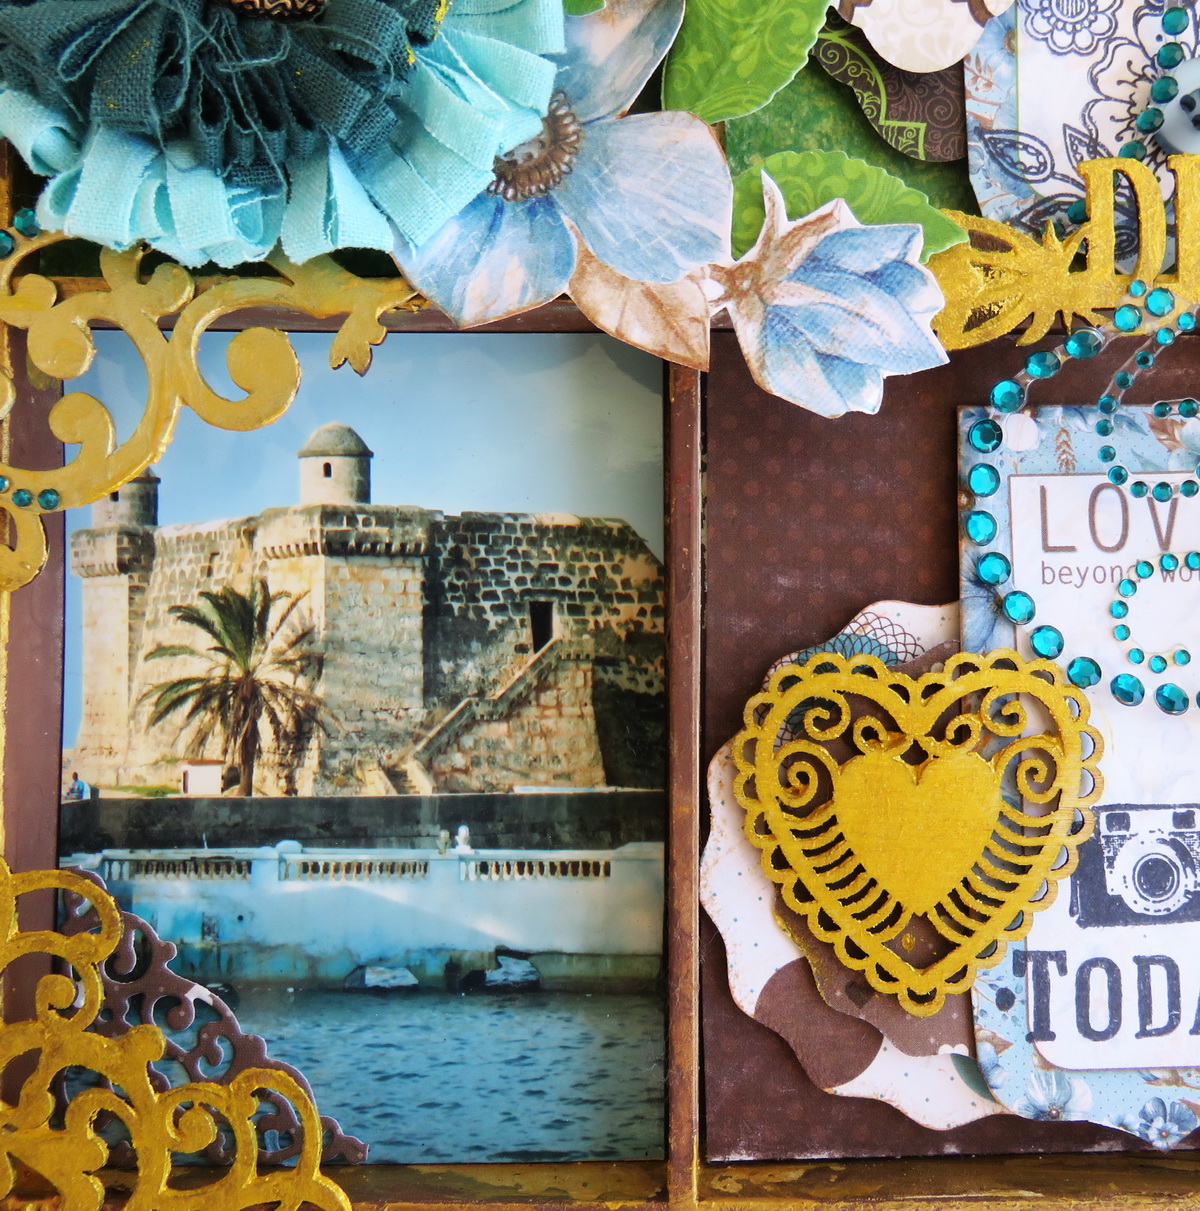
The printers tray is a kind of Project Life type "blank canvas". So I decided to make " a page" from our trip to Albania.
I am just going to show our own photos and a bit of the country around.
The colors of Penelope collection where just the perfect fit to my photos that were mainly natural, blue and green.
Each cardstock piece was cut to fit the tray slot and then embellished with die cuts, hand cuts, wooden shapes, flowers and rhinestones.
Here are some close- ups to the slots:


As you can see  I also embellished over the tray to add more interest and more texture to the simple designs of the slots.


 All wooden and chipboard shapes were painted with the same Baroque Gold Acrylic paint.


Small die cuts were added as  the extra over the tray embellishments.


 Here you can see the depth of the tray and the imperfect painting inside the tray that was made on purpose to imitate the old wood.


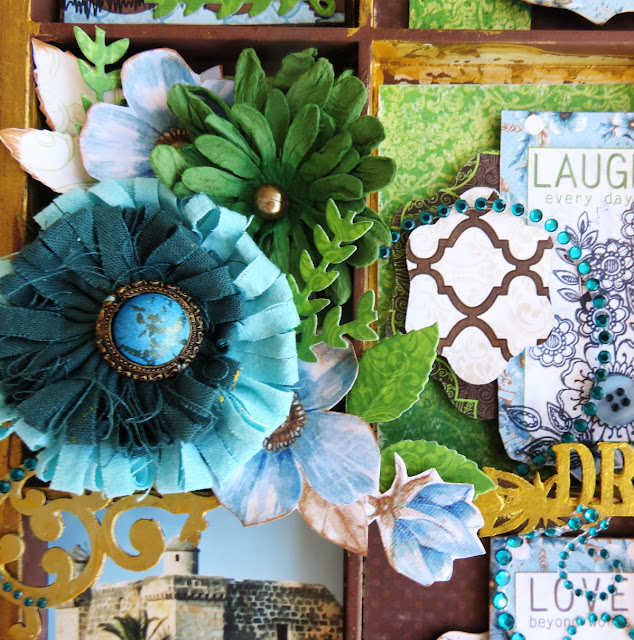
 BoBunny flowers and die cuts made the most beautiful edge spot on the whole tray.
Here is the full BoBunny and Pentart long product list:

BoBunny products:
Penelope collection- 12*12'' cardstock- Penelope Live, Penelope Love, Penelope Abbey, Penelope Grace, Penelope Laugh, Penelope Journal, Penelope Dots
Double Dot cardstock- Vintage Kiwi, Vintage Ocean, Chocolate
Fancy Tags Dies
Keeping Tabs Dies
Ever After card dies
Bear Necessities dies
Darling Doily dies
Lovely Leaf dies
Congratulations card dies
Family Recipes Ephemera- ribbons and buttons
Denim Blue Dahlia
Clover Daisy flowers
Double Dot Emerald jewels brads
Elegant laser cut chipboard
Dreamcatcher laser cut chipboard
Double dot Aqua flourish jewels
Hearts wood shapes
Birdcages wood shapes
Stitches stamps
Pocket full of Posies stamps
Captured stamps
Flower Garden stamps
Doodle frames stamps

Pentart products:
Primer for Decor Paint
Decor paint Brown
Creamy Acrylic Metallic Baroque Gold

I hope that you liked my travel tray and see you  next week with a totally different projects from another new collection named Fa La La.