Showing posts with label Pincushion. Show all posts

Tuesday, October 21, 2014

Your Happy Place

Everybody has a happy place....you know that thing or place that just calms your soul. Well, why not scrap it? Maria has done just that below!

Everyone has some kind of place in which they feel good, where they are always smiling...
It can be a city in which you spent your childhood, or the street where once there was something very pleasant, or even a tiny piece of land, which somehow heals the soul...

Today my LO is about this.


To give the impression of the old place, I used a dark and "gold" tones, as well as a little weathered in the form of bleaching with the gesso some places.


As always, I could not resist and used labels from paper sheets!
For example, here this: charcoal chevron;


Or this: NY - are two last letters from "Bo Bunny"
Or...maybe... Do you know what are the multicolored circles (dots)? ;)


And I would like to tell you what products I have used to create this scrapbook page. So...

BoBunny Supplies:
Patterned Paper:  Charcoal Chevron Dot, Madeleine: Tiles, Happiness and Pincushion
Double Dot Glimmer Spray: Bronze, Gold
Stencil: Brocade Stickable Stencil

...have a creative day!


Friday, June 20, 2014

Day 40 Giveaway and Off The Page Projects

One day left to enter to win the day 40 giveaway! Think of all the scrapping! GOOOD LUCK!

a Rafflecopter giveaway

 
Butterfly Printer's Tray by Ilene Tell


For me, "mixed media" equates to "fun". That's an opportunity to get all the cool stuff I have out and get messy :) And I definitely went all out with this little tray - which I got at the dollar store for... well, a $1. It started out as plain wood, and then I painted the whole thing with white gesso. Then, I applied "molding paste" to the background with a Popsicle stick - I have a whole ton of them from all the rub-ons.

Then, I sprayed with a couple different mists - first a peachy-orange, and then a brown, and then dabbed it in before it dried completely. I added dots with a "Pearl Pen", and I made the 2 butterflies using a little silicone mold and Crayola air-dry clay (I have a whole tub of it I had gotten for the kids). After they were dried, I painted the larger one with pink smooch ink.


I filled the little glass bottles with glass micro-beads, and then decorated the larger bottle with Bo Bunny washi tape and chipboard embellie.


Once I had the background done and completely dried, I had a blast filling the little box with all sorts of fun stuff and Bo Bunny embellies from a couple different collections. I even found a spot for a little light bulb from my kids' night light.


Bo Bunny Supplies:
Buttons: Primrose
Layered Chipboard: Baby Bump
Jewels: Baby Bump
Washi Tape: Baby Bump
Blossoms: Natural Daisy
Kraft: Wood Keys & Butterflies


Sew Cute Printer's Tray by Lisa Novogrodski

As soon as I saw the Pincushion collection I knew it would be perfect for a printers tray. All those little nooks and crannies to fill with sweet buttons, chipboard hearts, banners and dress forms!

The edges of my box were covered in a modeling paste and I used a stencil in some areas to get some raised bumps. I then coated it all in different mists, which I painted on, then used a gold leaf over it for shabby patina.
I made my dress form with a die and then applied her to BoBunny packaging which I created a tag out of. I also embossed it and used some inks. There are so many fun die cuts in the Noteworthy pack and lots of great images to fussy cut on the pattern papers and add to your little cubbies.


You can see here all the fun little details. 


I loved layering all the beautiful chipboards, buttons and banners. I enjoy adding cotton string to everything. It adds a beautiful shabby feel with delicate texture.

BoBunny Supplies:
Pattern Paper: Backstitch, Doilies, Thread Count, Seamstress, Toile/ Pincushion
Noteworthy: Pincushion
Layered Chipboard: Pincushion
Buttons: Pincushion
Cardstock Stickers: Pincushion
12 x 12 Chipboard: Pincushion
Combo Stickers: Pincushion
Jewels: Baby Bump
Doilies: Small
Brads: Baby Bump


Canvas Tag by Kaori Fujimoto

I have decorated the canvas tag for my assignment of Mixed Media. 
Stuck the papers, buttons, and wood embellishments on a canvas tag and applied Gesso to be white.

Space is filled with modeling paste. After dry, applied blue green mist and brown mist. furthermore, it dries, attaches a highlight by Gesso. Finally stuck the thread and Jewels.


Bo Bunny Supplies:
Paper: Slush, Cozy / Woodland Winter
Buttons: Woodland Winter
12x12  Chipboard: Woodland Winter
Jewels: Zip-A-Dee-Doodle
Kraft: Wood Keys & Butterflies, Wood Clocks
Doilies: 4in Small Doilies

Saturday, May 31, 2014

40K 40 Day Giveaways and Layouts

It's that time that we look forward to all week! Winner announcing time!

Are you a winner?! Check and see!

 
The Day 22 Winner - Randi M

 
The Day 23 Winner - Amber M
 
 
The Day 24 Winner - Sandi Brassard

 
The Day 25 Winner - Cheryl Gibson Poole


Thanks for playing along BoBunny fans!! Don't miss next week, we have a few tricks up our sleeve! You won't want to miss it!


Country Life by Gabrielle Pollacco


Gabrielle here with you today to share a mixed media style layout I made.  I've been on the Bo Bunny design team for many years now and have gotten to play with so many lovely papers and embellishments.  So for this project I thought I would pull together lots fun fun Bo Bunny embellishments, flowers, wood accents, buttons, chipboard and trinkets that I've had leftover from a lot of the collections.  I began by choosing a favorite patterned paper (for me), from the Happy Tails collection as a nice simple backdrop for my page design.


Then I started gathering together lots and lots of embellishments from a variety of Bo Bunny collections.
 
DESIGNER TIP: The beauty of this project was that I could use bits and pieces from any collection irregardless of the color of the piece because I was covering them all with Gesso (to get an even and porous work surface) and then misting it all with some aqua and brown inks and then finally giving it all a coating of gold paint.  See the two blooms with the green pearl centers?  They were orange fabric blooms that Bo Bunny put out many many years ago.   Here I was able to make them work by painting them to match my page.


Here is another view of the many blooms, buttons, metal trinkets, wood accents....even lace that I used to create loads of the deep texture on the page design.


I also layered in loads of chipboard, above you can see pieces from the Modern Miss collection (flourishes, large numbers etc.) and again, it didn't matter what colors they were as I was using a mixed media painting technique that blended them all together.  Once the project was dry, I added a few jewelled accents and some brads that were in complementary colors.
 
I hope you enjoyed my mixed media page and hope that I've inspired you to use up those odds and ends and create your own mixed media piece! 


Bo Bunny Products:
Patterned Paper: Happy Tails / Happy Tails; Miss Bold, Selfie / Modern Miss; Doors / The Avenues.
Chipboard: Modern Miss
Wood Embellishments: Kraft Wood Cogs
Washi Tape: Kraft Patterned Washi Tape
Trinkets: Serinade, Serenity, Apple Cider,
Buttons: Love Letters, Happy Tails, Modern Miss 
Brads: The Avenues, Primrose
Blossoms: Clover Daisy, Natural Earth Pansy, Natural Earth Bouquet, Fabric Blossoms (older collection)
Lace: Natural Earth Lace
Jewels: Modern Miss, Primrose


Live Beautifully by Lisa Gregory


 Lisa here today, sharing a layout that is sure to ring in summer. The coral colors in the Pincushion papers reminded me of  the beautiful hibiscus that grows at one of our homes. I love that BoBunny has the gorgeous Double dots collections that coordinate with the pattern paper collection papers. I love to create flowers with them! I even used a piece of the box my Design Team product came in. Upcycling can be beautiful!! I just primed the corrugated cardboard with white gesso and after it dried, sprayed it using my favorite mist sprays to match the papers.


I was able to achieve more dimension by layering using pop dots in between the layers. I cut pieces of the Kraft Burlap trim to tuck under some of the layers here and there.  It added beautiful texture to the layout. I learned this technique from my beautiful talented friend Gabrielle Pollacco. I also did a little machine sewing on the papers.


Sometimes a small title is all a layout needs.

 
I created some of the flowers with the papers I used in the layout. I mixed in some BoBunny blossoms for contrast. And the middles of the flowers were just pieces from the Kraft burlap trim that I just tucked in adhering with glue. The leaves were die cut and tucked under the flower clusters.  
Thank you for joining us today, and hope you are inspired to create your own projects using BoBunny product.

BoBunny Products:
Pattern Paper: Pincushion/Doilies, Seamstress, Tailored
Double Dots: Coral Vintage
Cardstock Sticker: Primrose
Blossoms: Wildberry Daisy
Kraft:Burlap Pleated Lace
Jewels: Frosted Jewels


Tuesday, May 27, 2014

The day 23 Giveaway and Layouts

Hope you all enjoyed memorial day!

We start another week of giveaways and bring you BoBunny Washi Tape! We also want to shout out our friends at Paper Crafts Magazine. They helped us get to 40K so we could bring you 40 days of giveaways! Be sure you head over and like their Facebook page, leave a comment, tell them BoBunny sent you and thanks for their support of the #40k40day giveaways!

a Rafflecopter giveaway

Our design team friends bring you some more fabulous project information with some fabulous BoBunny product.

Freestyle Layout "School is Cool" by Rhonda Van Ginkel


I was so excited to get assigned a "Freestyle" project!  This Preschool photo from LifeTouch has been at the top of my list for getting scrapped and the Pop Quiz collection was perfect for it!  


I used quite of bit of our Noteworthy here in my layers.  You'll also see our pretty brads and some machine stitching for texture.


Who else is in love with this collection?  I sure am and would love to see what you've created with it too!  Please share with us on Facebook.  


BoBunny Supplies
Patterned Paper: Bookwork, Chalk Board, Pop Quiz, Typing / Pop Quiz
Brads: Pop Quiz
Chipboard: Pop Quiz 12 x 12
Noteworthy: Pop Quiz
Buttons: Pop Quiz


Freestyle Layout by Lisa Novogrodski


Left to my own devices on this one I decide to use the glorious "Pincushion" collection to highlight this beautiful bridal photo. Loving the greens and peaches and I thought would add a darker contrast with the Blossoms.

I also created a video tutorial of how I put this layout together and you can find that by clicking on my name and visiting my blog.

I wanted to make this page vintage and romantic so I've added a lot of inking along the edges and on my BoBunny Doilies. I also added bits of Washi Tape not only to my page edges but to the photo as well.


A little bit of punching, stitching and modeling paste for some pretty details.


I wanted to mimic that bridal florals so I added a cluster of beautiful blossoms along with some leaves cut from Double Dot.


BoBunny Supplies:
Pattern Paper: Sew Fun, Patchwork, Handmade, Polka Dot Pattern, Seamstress/ Pincushion
Cardstock:  Decaf Vintage, Coral Vintage/ Double Dot
Blossoms: Wildberry Pansy, Clover Pansy
Buttons: Pincushion
Doilies: Small
Brads: Baby Bump
12 x 12 Chipboard: Pincushion
Washi Tape: Black and White


Saturday, May 24, 2014

40 K 40 Day Winners and Off The Page Projects!


We love Saturdays on the BoBunny Blog! We are excited to announce another 5 winners!

 
Day 17 Winner: Carla Peck
 
 
Day 18 Winner: Arielle Berceau

 
Day 19 Winner: Bethany Becker

 
Day 20 Winner: Vanessa Templet Babin

 
Day 21 winner: Nicki Dwyer Mooring


Hope you all have enjoyed our week of BoBunny pinspiration! The designers have created some incredible off the page projects with this board! Enjoy!


Spread Your Wings & Fly by Tracee Provis


With a great inspiration board to use for this project I was inspired by the soft pastel colours and the dreamy feel of the mood board, which lead me to creating this papermache Hot Air balloon that is a gift for my Granddaughter's 10th birthday and includes a secret photo pull out and surprises in the drawers.


The Primrose collection has some awesome embellishments and I pulled out a few from the Noteworthy pack to make a layered centre for the body of the balloon.


The Kraft Wood Shapes Elegant make a beautiful contrast to the pinks and browns of the Primrose Collection.


Fussy cutting is such fun and Bo Bunny always have lots of elements to enable this, here I cut lots of the butterflies from various papers in the collection and added them to the pole that holds the balloon stable. For a little added interest I attached some to wires so that they can float as if suspended.


The drawers old a birthday card and a Butterfly necklace gift, for the birthday girl.


Inside the crown there is an accordion album that pulls out to reveal the numbers 1 - 10 on the front and a picture of her in the corresponding age so she can see how she has grown.

I carefully cut the outer ring from one of the crocheted flowers to add some texture to both the top and bottom part of the Hot Air Balloon. I hot glued the star to a wooden button to make the pull handle for the mini album.


Bo Bunny Supplies
Patterned Paper: Polka/Pincushion; Bliss, Cottage, Dot, Garden, Memories, Smile, Primrose/Primrose;
Cardstock: Shadow Dot, Passion Fruit Stripe
Buttons: Primrose, Pincushion
Brads: Avenues
Jewels: Frosting Jewels
Stickers: Primrose
Noteworthy: Primrose
Kraft Wood Shapes: Elegant


The Wedding Cake by Ulrika Wandler


I was truly inspired by the beautiful Pinterest inspiration picture! I decided to use the fabulous colors and bake me a cake! The BoBunny collection The Avenues matched perfectly.


I started off by making the canvas brown. Then I used decoupage glue to put a background paper in place.


Then I cut the different layers on the cake and used more decoupage glue to adhere them to the canvas.


I finished off by adding some lace borders, rhinestones and did some stamping.

BoBunny Supplies:
Patterned paper: Antique, Dot, Stripe/The Avenues; Spunky/Modern Miss
Stickers: The Avenues Dimensional Stickers
Jewels: Pincushion
Stamps: Distressed Textures stamp
Blossoms: Natural Earth Zinnia

Saturday, May 3, 2014

National Scrapbook Day 2014

It's NATIONAL SCRAPBOOK DAY!
 
Oh boy do we have some fun things planned for you today!!
 
We are hosting a National Scrapbook Day 2 day contest on our Facebook page you are not going to want to miss! You could be the winner of all 72 papers from our Winter 2014 collections!
 
 
Go to our Facebook page for all the details!


Next, we need to announce our Day 2-6 winners of our 40K40DAY giveaways! It's a great day to be a BoBunny fan! Congratulations to all our winners, and thanks for playing in our 40K40DAY giveaway challenge! There are only a few more hours left to enter to win day 7! Starting on Monday we bring another week of giveaways!
 
 
Day 2 Winner: Migdalia Rodriguez


Day 3 Winner: Leslie Baro


Day 4 Winner: Mary Beth Isaac


Day 5 Winner: Debbie Siddle


 Day 6 Winner: Gayle Lindenberg


Now for some fabulous National Scrapbook Day inspiration from our design team!
 
 You Make Me Happy card by Lisa Gregory


Sometimes you want a card just to brighten someones day. I just love that the BoBunny paper collections can be used interchangeably. For this card I have used Pincushion, Baby Bump, and a touch of Autumn Song, The avenues and Primrose.


All of the flowers were handmade with the coordinating papers.


BoBunny Supplies:
Patterned Papers: BabyBump Precious, Pincushion Seamstress, Autumn Song Melody. 
6x6 Paper Pad: Primrose
Cardstock Stickers: The Avenues


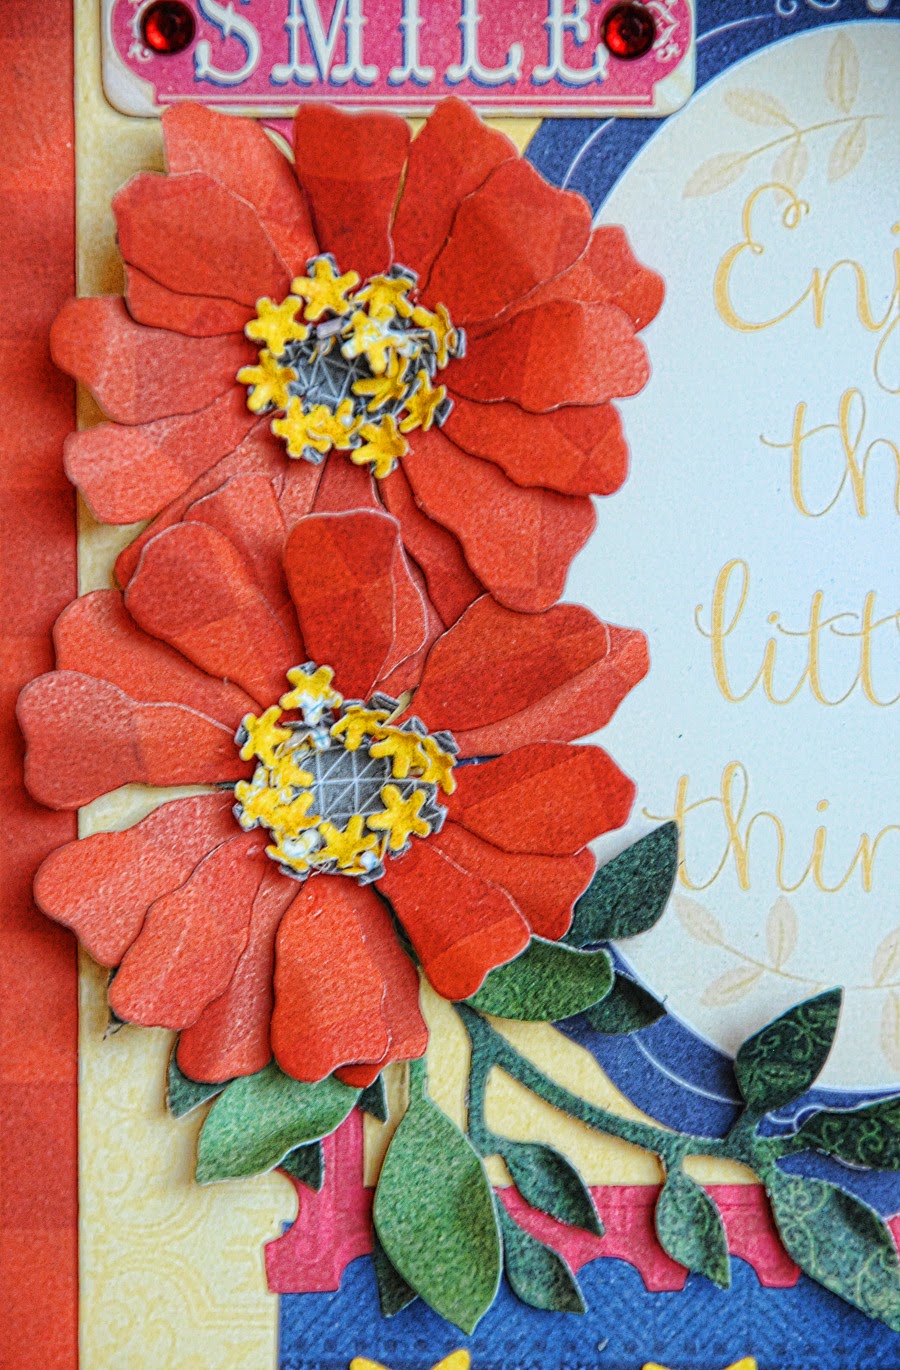
Enjoy The Little Things Card by Lisa Gregory


Mixing and matching collections to create a project helps you to stretch your possibilities with pattern and color.


Once again I have created the flowers and leaves with the coordinating papers.


BoBunny Supplies:
Patterned Paper: Lil Monster Mischief, Modern Miss Selfie, Autumn Song Melody
Noteworthy: Modern Miss
6x6 Paper Pad: Pop Quiz, Modern Miss
Jewels: Pop Quiz
Buttons: Modern Miss


Oh Happy Day by Tracee Provis


Whatever the occasion you can always rely on Bo Bunny to have a collection or two to fit the bill. In this post I have mixed up the collections and as you can see they all still match perfectly resulting in some cute cards.


Sometimes I like to create a card that can be used for a number of occasions, Oh Happy Day could mean a new baby, a birthday or simply a card to brighten someones day.

I have mixed papers and embellishments from the Baby Bump, Pincushion & Happy Tails collections to complete my card.


I added a couple of layers to the Pincushion Sew Fun paper from the collection and a little machine stitching completed the look it was that simple!

I cut the title from Happy Tails License paper for a good strong title to sit on all the different patterns in the background.


Bo Bunny Supplies:
Patterned Paper; Baby Bump, Miracle, Bundle/Baby Bump; License/Happy Tails; Measurements, Sew Fun/Pincushion
Cardstock; Shadow Vintage Dot
Chipboard; 12 x 12 Pincushion


Happy Birthday 2U by Tracee Provis


I wanted to make my second card using the same Green, Orange and Black palette that I used on the Oh Happy Day card. I drew out more of the Blacks which gives it a more fresh funky look.


I love that Bo Bunny has many elements in their papers that are just perfect for fussy cutting. Here I cut the camera from the Modern Miss paper and popped it up on foam dots to create a 3d embellishment. I anchored the chipboard balloons to a button from the Happy Tails collection along with some twine. I splattered a little mist around to give it an extra dimension.


Bo Bunny Supplies:
Patterned Paper: Backstitch, Toile, Measurements / Pincushion; License / Happy Tails; Modern Miss / Modern Miss
Chipboard: 12 x 12 Baby Bump
Cardstock: Sugar Dot
Buttons: Happy Tails