Showing posts with label Sweet Life. Show all posts

Sunday, May 24, 2015

Birthday Banner!


Hello Everyone! Today I would like to show you a fun project that I made with the beautiful 'Sentiments' clear stamps from Bo Bunny. I created a birthday banner using the lovely 'Sweet Life' collection.
This banner would be fun to hang on the wall for a birthday party or to give to someone as a gift.

Happy Birthday banner by Romy Veul


My banner consists of four tags, which are all decorated with papers from the mini paper pad, chipboard and embellishments from the Sweet Life collection. I also stamped the text 'Happy Birthday' on each tag with black ink. 


I also made sure to add some dimension to each tag by using chipboard pieces, both from the Sweet Life Chipboard package and from the Layered Chipboard set.


Bo Bunny Supply List:
6x6 Paper Pad: Sweet Life
Chipboard: Sweet Life Chipboard, Sweet Life Layered Chipboard
Noteworthy: Sweet Life 
Clear Stamps: Sentiments 
Double Dot Ink: Licorice 

Wednesday, May 6, 2015

Altered Awesomeness!

Hi There BoBunny Fans :)

Today I wanted to share an altered project with you that uses two of my favourite things to scrap with, rubons and butterflies :)

An Altered Globe by Megan Gourlay for BoBunny using Silver Foil Rubons

Rubons are making a come back - I was so excited to see these because when I first started scrapbooking they were my favourite thing! - and BoBunny have gone one step further and created some stunning Gold and Silver ones!!  I've used the silver ones to decorate my globe and create a bit of interest in the amongst the flight of my butterflies ;)

An Altered Globe by Megan Gourlay for BoBunny using Silver Foil Rubons

Here you can see how I've mixed script rubons with keys and large words to create a collage effect, with butterflies in amongst it.

An Altered Globe by Megan Gourlay for BoBunny using Silver Foil Rubons

What I love about them is that they look dimensional when you rub them  on - they actually look like you have embossed them with silver embossing powder.  Very clever!!  And they rub on easily too!

An Altered Globe by Megan Gourlay for BoBunny using Silver Foil Rubons

An Altered Globe by Megan Gourlay for BoBunny using Silver Foil Rubons

Along the bottom of my globe I have adhered some of the new alphabet stickers. the verse reads "Not All Who Wander Are Lost."

Give them a go you will not be disappointed!

BoBunny Supplies:
Noteworthy:  Sweet Life
Rubons: Silver Filagree Foil
Alpha Stickers: Aqua, Citrus

Monday, May 4, 2015

Beautiful And Delicious With Foil Rubons.....Sounds Perfect!

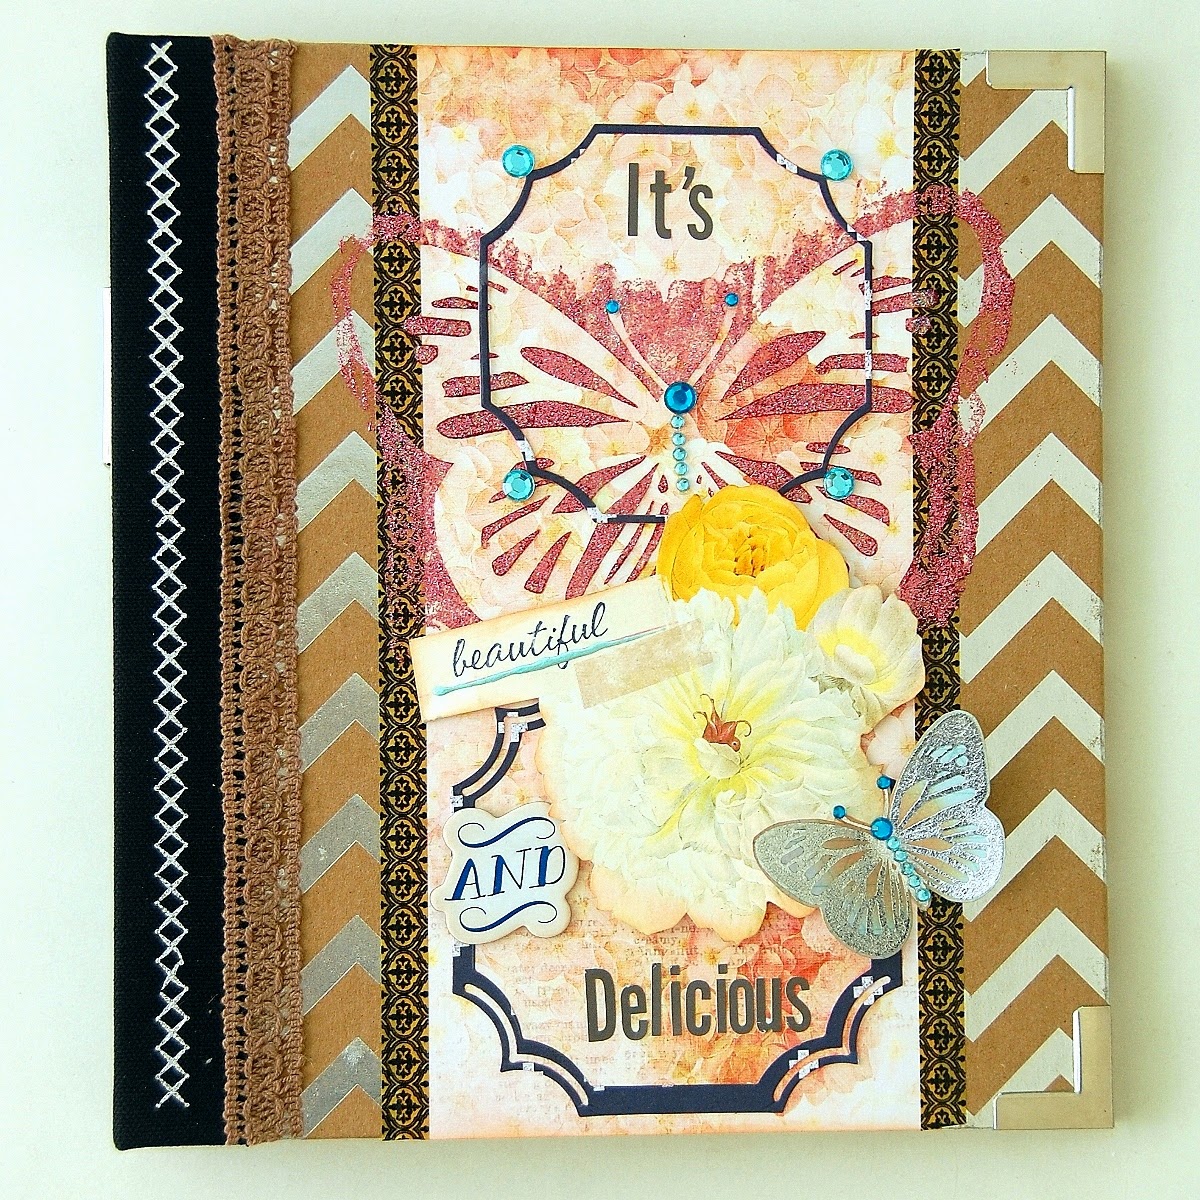
Hello everyone! It's time for me to share another 8 x 9 Misc Me project with you all. I've altered another gorgeous foil binder for these Misc Me Pages.

It's Beautiful And Delicious Binder by Irene Tan
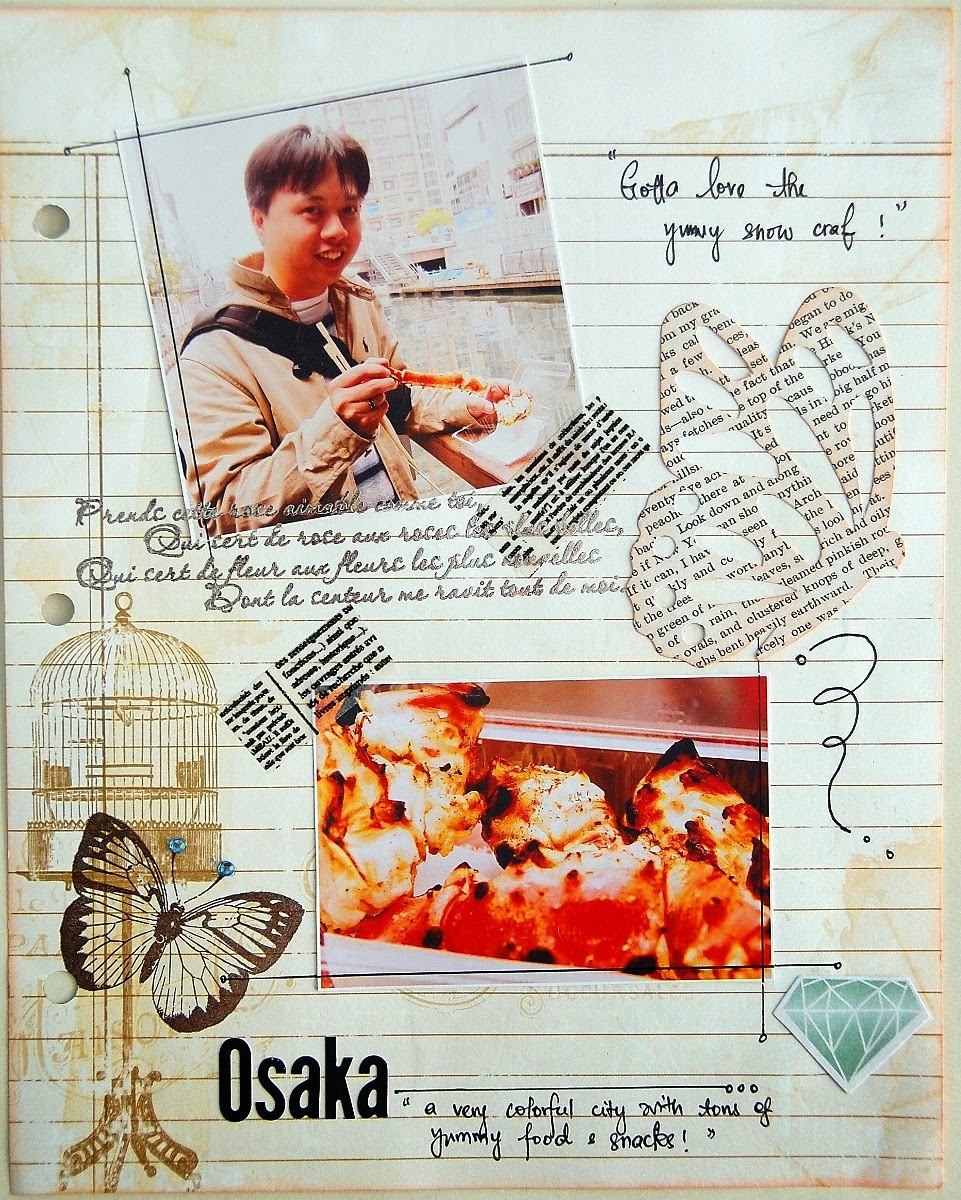
It's Beautiful And Delicious Misc Me Pages by Irene Tan Using BoBunny Sweet Life Collection

I've used the "Sweet Life" collection for today's project. My assignment for today's post is to showcase the used of silver foil rub-ons. On my binder, I've used a silver stitches foil rub-on on it's left edges. And to create the smaller butterfly, I've applied a butterfly rub-on on the pattern paper and later cut it out. I've decorate it with jewels.

It's Beautiful And Delicious Misc Me Pages by Irene Tan Using BoBunny Sweet Life Collection

Osaka And Kyoto Food Adventure Misc Me Pages by Irene Tan

It's Beautiful And Delicious Misc Me Pages by Irene Tan Using BoBunny Sweet Life Collection

It's Beautiful And Delicious Misc Me Pages by Irene Tan Using BoBunny Sweet Life Collection

It's Beautiful And Delicious Misc Me Pages by Irene Tan Using BoBunny Sweet Life Collection

It's Beautiful And Delicious Misc Me Pages by Irene Tan Using BoBunny Sweet Life Collection

It's Beautiful And Delicious Misc Me Pages by Irene Tan Using BoBunny Sweet Life Collection

It's Beautiful And Delicious Misc Me Pages by Irene Tan Using BoBunny Sweet Life Collection

Above are some pages in this binder. I've used three page protectors and a piece of vintage note paper.

It's Beautiful And Delicious Misc Me Pages by Irene Tan Using BoBunny Sweet Life Collection

On the above pages, I've used foil rub-ons to add details on each pocket and the note paper. The best thing about using rub-ons is that, you are able to apply them onto paper and any other surfaces such as the plastic page protectors. In the picture above and below, I've applied the rub-on onto the page protectors and detail them with pearlescent and jewels.

It's Beautiful And Delicious Misc Me Pages by Irene Tan Using BoBunny Sweet Life Collection

BoBunny Supplies:
Patterned Paper: Sweet Life, Enjoy/Sweet Life
Stickers: Tuxedo Alphabet Sticker, Citrus Alphabet Sticker
Rub-Ons: Filagree Silver
Chipboard: Sweet Life chipboard
Stamps: Flutter Stamp
6 x 6 Paper Pad: Sweet Life
Lace: Natural Earth
Misc Me Binder: 8 x 9 Silver & Kraft
Misc Me Page Protector: 8 x 9 Pocket Squares Page Protectors, 8 x 9 Page Protector Variety Pack
Misc Me Contents: Sweet Life Pocket Squares, Sweet Life Journal Contents
Misc Me Notepaper: Vintage
Washi Tapes: Black & White Patterned, Kraft Patterned
Dot Jewels: Aqua
Pearlescent: Island Mist
Ink Pad; Licorice
Glitter Paste: Sugar, Blush
Stickable Stencil: Butterfies
Dies: 4 x 4 Portrait Frame 

Tuesday, April 21, 2015

Blog Hop Day 3....Yippee!

Hello friends! Welcome to the Blog Hop Day 3! Are you just loving all this gorgeousness on all these blogs? We are drooling in BoBunny-land! Take a look at this awesome altered project! Don't forget to scroll to the bottom for your next hop!

You Got This Altered Clock by Rhonda Van Ginkel

Altered Clock featuring Sweet Life collection by BoBunny and Scrapbook Adhesives by 3L designed by Rhonda Van Ginkel

I am excited to share my project with you today featuring the Sweet Life collection. I've used a pocket square from our all new Misc Me Pocket Squares for my sentiment. This inspirational decor will adorn my work desk.

Altered Clock featuring Sweet Life collection by BoBunny and Scrapbook Adhesives by 3L designed by Rhonda Van GinkelTo begin, I used the Adhesive Sheets on my background paper to adhere to the circle base. Once this was attached, I added the Film Sticker, then attached my sentiment pocket square with 3D Foam Squares. The Blossoms were adhered to the bottom of the clock using the Dodz - Medium.

Altered Clock featuring Sweet Life collection by BoBunny and Scrapbook Adhesives by 3L designed by Rhonda Van Ginkel

I used the 3D Foam Creative Sheets - Mix and trimmed a piece to the size of my Flutters Die, adhered to a piece of the Enjoy patterned paper and ran through my die cutting machine. This created a custom dimensional butterfly embellishment. There are so many fun uses for this product!

BoBunny Supplies Used:
Patterned Paper: Sweet Life and Enjoy / Sweet Life
Misc Me: Sweet Life Pocket Squares
Noteworthy: Sweet Life
Blossoms: Clover Bouquet, Blush Pansy and Buttercup Zinnia
Buttons: Sweet Life
Jewels: Double Dot Blue Hues Jewels
Film Sticker: Sweet Life
Dies: Flutter Dies

Scrapbook Adhesives by 3L Supplies Used:
Adhesive Sheets - 4x6"
3D Foam Creative Sheets - Mix
3D Foam Squares - White Mix
Dodz - Medium
E-Z Runner

Hop #2:  https://www.scrapbook-adhesives.com/blog/

Enter below to win:
a Rafflecopter giveaway

Thursday, April 2, 2015

Oh So Sweet Home Decor!


Hello friends! Today, I wanted to share a little printer's tray I altered for my daughter to hang in her room. I think the vibrant and fun "Sweet Life" collection is perfect for a pre-adolescent girl, and she just loves this collection too.

Butterfly Altered Printer's Tray by Ilene Tell
Butterfly Altered Printer's Tray by Ilene Tell using BoBunny Sweet Life collection
I purchased the printer's tray at a dollar store, and it was plain wood. I then sprayed it with Tutu Glimmer Spray to give it a nice pink base, and then covered the whole thing with Blush Glitter Paste so the whole thing now looks like it's made of glitter.
Butterfly Altered Printer's Tray by Ilene Tell using BoBunny Sweet Life collection

I used various butterflies from the collection and cut some out of the paper, and then covered them with different colors of Glitter Paste to go along with the sparkly theme. There are so many colors to choose from, so all the pinks, blues, and the gold were perfect for this project.
I added a little laser-cut wood gear to the bottom middle spot and covered it with Pearlescents to give it the golden color and the thicker dimension. The smallest size of the Pocket Squares from the collection fit perfectly into the square sections of the tray.
Butterfly Altered Printer's Tray by Ilene Tell using BoBunny Sweet Life collection
 BoBunny Supplies:
Patterned Paper: Sweet Life / Dreams
Buttons: Sweet Life
Noteworthy: Sweet Life
Layered Chipboard: Sweet Life
Pocket Squares: Sweet Life
Glitter Paste: Blush, Pink Punch, Blueberry, Gold
Pearlescents: Butterscotch
Glitter Sprays: Tutu
Blossoms: Blush Daisy, Buttercup Daisy
Kraft Wood: Gears

Monday, March 30, 2015

Misc Me Tutorial!


Hello there BoBunny fans , Bernii here and welcome to Misc Me Monday.

I just love using my Misc Me 8 x 9 albums especially when I have a handful of photos that are just to much to put into a single or double layout, but I find it hard to only select a few photos. This was the case with these special photos of my daughter graduating Kindergarten a few years ago. When I first saw the pretty shine from the new Kraft and Gold 8x9 album I knew it would be perfect to house the precious memories from that day,


Adhering BoBunny Alphabet Stickers tutorial with Bernii Miller for Bobunny using the Sweet Life collection.

I teamed my photos with another new release from BoBunny - the Sweet Life Journaling Cards in the new 4x4 and 2x2 format and the super exciting new alphabet sticker sheets from the Double Dot range. 

These new alphas are just perfect to use on any project, but it is especially a perfect size to use in the Misc Me pocket squares. So today I wanted to share with you all a mini tutorial on how to perfectly line up your alphas every time on any project that you use! I promise.

So let's take a look at my process :

To start off with you will need a ruler . If you like to be precise with measuring from the edges of your photos, I would suggest that you use a ruler with a cm measurement like the one pictured below.

Adhering BoBunny Alphabet Stickers tutorial with Bernii Miller for Bobunny using the Sweet Life collection.

Then start to create the word or title that you want with the Alphabet stickers. If you would like you could also use the ruler measurements to make sure that each letter is perfectly spaced. When you place the alphas onto the ruler only attach the bottom half of the ruler - as you will need the top half to adhere it into the desired place.

Adhering BoBunny Alphabet Stickers tutorial with Bernii Miller for Bobunny using the Sweet Life collection.

Once you have all of the alphas that you would like to use, then using the ruler and the measurements line up the ruler to te exact place you want the stivker. Placing the alhpas onto the ruler is great, as you can look at what your alphas might look like in diferent parts of your layout or mini - before you adhere it down.

Adhering BoBunny Alphabet Stickers tutorial with Bernii Miller for Bobunny using the Sweet Life collection.

Then once you are happy with where you would like your your BoBunny alphabet stickers to go, simply lay the ruler down flat, adhere the top half of the stickers, and while holding down the top half, slowly twist out the ruler from underneath so that it comes away from the ruler.

Adhering BoBunny Alphabet Stickers tutorial with Bernii Miller for Bobunny using the Sweet Life collection.

Once you have removed the ruler simply pat down the bottom half of the alphabet stickers.

Adhering BoBunny Alphabet Stickers tutorial with Bernii Miller for Bobunny using the Sweet Life collection.

Adhering BoBunny Alphabet Stickers tutorial with Bernii Miller for Bobunny using the Sweet Life collection.

Then if you would like to add a little interest and some more adherence to your photos you could also run the stickers through the sewing machine.

Adhering BoBunny Alphabet Stickers tutorial with Bernii Miller for Bobunny using the Sweet Life collection.

So as you can see in just a few easy steps  you can get the perfect placement of your BoBunny Alphabet Stickers each and every time , with out the heartache of having to try and peel of stickers to re-position them . Here is another example from my album that shows how I used the same technique.

Adhering BoBunny Alphabet Stickers tutorial with Bernii Miller for Bobunny using the Sweet Life collection.

Well I hope this tutorial gave you an idea on how next time you might tackle in adhering your alphabet stickers to your project.

BoBunny Supplies Used:
6 x 6 Paper Pad; Sweet Life.
Chipboard: Sweet Life
Layered Chipboard: Sweet Life.
Noteworthy: Sweet Life.
Journal Contents: Sweet Life.
Pocket Squares: sweet Life.
Misc Me: White and Kraft envelopes.
Misc Me : 8 x 9 Pocket Squares page protectors.
Misc Me:  Gold and Kraft 8 x 9 Binder.
Dot Jewels: Think Pink.

Sunday, March 29, 2015

Girls Night Gift Bags!


Having some friends over for a little wine and cheese party and want to have them know how much you love hanging out? I've got just the ticket! A little linen bag filled with their favorite treats. Maybe chocolate? Know their favorite lipstick or perfume? Whatever their guilty pleasure they will be delighted that you thought to package it in these.

I put together a few little bags with special embellishments of lace and glitter pastes, buttons and butterflies and left them all a message with my "Sweet Life Pocket Squares."

I like a lot of fuss on my projects. I'm someone who loves to layer and really pile it on. I love that my friends get excited to see all the little details I put into my projects. (You know, the love is in the details.)

Girls Night In Gift Bags - Lisa Novogrodski


I adore ribbons, bows, buttons and little clothespins. I've attached my tags with rusty pins and added all those tiny details. I want my gals to know that "Dreams do come true" and I encourage them all to "Fly by the seat of their pants." That's the way I roll...


I'm a mixed media girl as well as a shabby one. I couldn't resist stamping over the Kraft tag with the "Romance Stamps" It looked lonely all by itself and I love the added interest. There might also be a little stenciling with gesso. 


You may like to keep it simple without so much fuss so think of making up these sweet little bags with the Pocket Square Tags and a little lace or just use one of the Flutter Dies as I did and attach it to a clothespin. Fill it with something your friends love and enjoy their joyful faces when they leave with something special created by you!

BoBunny Supplies:
Pattern Paper:  Sweet Life/ Blessed
Misc Me Journal Cards: Sweet Life
Glitter Paste: Copper
Glimmer Spray: Tutu
Pearlescents: Blush
Buttons: Sweet Life
Stamps: Your Invited, Romance
Stickable Stencils: Butterfly
Dies: Flutter
Jewels: Zip A Dee Doodle

Thursday, March 26, 2015

Misc Me Tutorial!


Hello there BoBunny fans , Bernii here and welcome to Misc Me Monday! I just love using my Misc Me 8 x 9 albums especially when I have a handful of photos that are just to much to put into a single or double layout, but I find it hard to only select a few photos. This was the case with these special photos of my daughter graduating Kindergarten a few years ago. When I first saw the pretty shine from the new Kraft and Gold 8x9 album I knew it would be perfect to house the precious memories from that day,

Adhering BoBunny Alphabet Stickers tutorial with Bernii Miller for Bobunny using the Sweet Life collection.

I teamed my photos with another new release from BoBunny - the Sweet Life Journaling Cards in the new 4x4 and 2x2 format and the super exciting new alphabet sticker sheets from the Double Dot range. 

These new alphas are just perfect to use on any project, but it is especially a perfect size to use in the Misc Me pocket squares. So today I wanted to share with you all a mini tutorial on how to perfectly line up your alphas every time on any project that you use! I promise. 

So let's take a look at my process : 

To start off with you will need a ruler . If you like to be precise with measuring from the edges of your photos, I would suggest that you use a ruler with a cm measurement like the one pictured below.

Adhering BoBunny Alphabet Stickers tutorial with Bernii Miller for Bobunny using the Sweet Life collection.

Then start to create the word or title that you want with the Alphabet stickers. If you would like you could also use the ruler measurements to make sure that each letter is perfectly spaced. When you place the alphas onto the ruler only attach the bottom half of the ruler - as you will need the top half to adhere it into the desired place. 

Adhering BoBunny Alphabet Stickers tutorial with Bernii Miller for Bobunny using the Sweet Life collection.

Once you have all of the alphas that you would like to use, then using the ruler and the measurements line up the ruler to te exact place you want the stickers. Placing the alphas onto the ruler is great, as you can look at what your alphas might look like in diferent parts of your layout or mini - before you adhere it down. 

Adhering BoBunny Alphabet Stickers tutorial with Bernii Miller for Bobunny using the Sweet Life collection.

Then once you are happy with where you would like your your BoBunny alphabet stickers to go, simply lay the ruler down flat, adhere the top half of the stickers, and while holding down the top half, slowly twist out the ruler from underneath so that it comes away from the ruler. 

Adhering BoBunny Alphabet Stickers tutorial with Bernii Miller for Bobunny using the Sweet Life collection.

Once you have removed the ruler simply pat down the bottom half of the alphabet stickers. 

Adhering BoBunny Alphabet Stickers tutorial with Bernii Miller for Bobunny using the Sweet Life collection.

Adhering BoBunny Alphabet Stickers tutorial with Bernii Miller for Bobunny using the Sweet Life collection.

Then if you would like to add a little interest and some more adherence to your photos you could also run the stickers through the sewing machine. 

Adhering BoBunny Alphabet Stickers tutorial with Bernii Miller for Bobunny using the Sweet Life collection.

So as you can see in just a few easy steps  you can get the perfect placement of your BoBunny Alphabet Stickers each and every time , with out the heartache of having to try and peel of stickers to reposition them . Here is another example from my album that shows how I used the same technique. 

Adhering BoBunny Alphabet Stickers tutorial with Bernii Miller for Bobunny using the Sweet Life collection.

Well I hope this tutorial gave you an idea on how next time you might tackle in adhering your alphabet stickers to your project. 

BoBunny Supplies Used: 
6 x6 Paper Pad; Sweet Life
Chipboard: Sweet Life
Layered Chipboard: Sweet Life
Noteworthy: Sweet Life
Journal Contents: Sweet Life
Pocket Squares: sweet Life
Misc Me: White and Kraft envelopes
Misc Me : 8 x 9 Pocket Squares page protectors
Misc Me:  Gold and Kraft 8 x 9 Binder
Dot Jewels: Think Pink