Hi everyone!
I have just come back home from a trip to greece with my partner and I can tell you I have A LOT of photos from this trip. Today I used one of them on a layout I have made that I want to share with you. We had a lovely time I can tell you!!
So I have been using the collection Harmony for this layot and I have been fussycutting a lot of flowers from some of the papers. I just love the colors and think it fits my layout perfectly!
I also used some stamps and dies to diecut some embellishments to the project and I hope that you will like it.
I also have a process video fro this project to you that you will be able to see in the end of this post as soon as it´s up on youtube. Hope you will have some inspiration and tips from it.
BoBunny suplies:
Harmony paper collection
doubledot paper
tea time dies #7310177
all occasion sentiments dies #7310504
it is written stamp #1010579simply flowers stamp #7310258
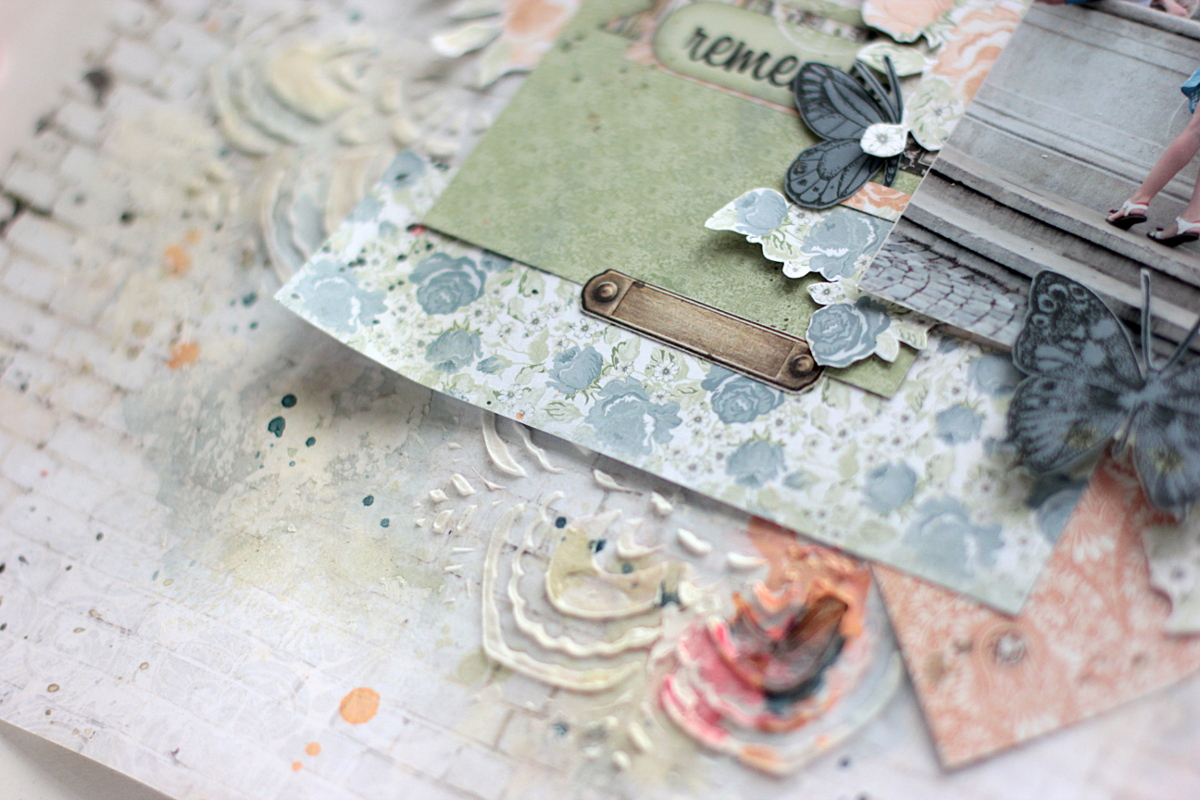
It's Elena here today to share the layout I made using Once Upon a Lifetime collection. I chose this collection to highlight a trip I took with my family.
Though this collection seems to be primarily driven by a vintage/heritage theme for me, I decided to create a mixed media layout in lighter tones. I wanted to feature this photo of my two kids to remember this day of sightseeing. They had so much fun, but you can tell from the story this photo tells, they were absolutely exhausted!!
I started with applying gesso and modeling paste on my background and then misted those areas with glimmer color sprays.
I also stamped the butterflies images on the patterned papers and cut them out for added depth.
I fussy cut the flowers and arranged my paper layers.
I like the soft pastel tones and used them for accent color and additional layers for my layout.
Thanks for popping by the blog today! Come see us again soon!
Elena
BoBunny Supplies:
Patterned Papers: Once Upon a Lifetime / Traditions, Ancestors, Generations, Grandparents, Heritage, Discoveries
I've got a new layout to share with you that I made using Summer Mood collection. This line is just FULL of bright happy colors, citrus accents, pinwheels and oodles of summery icons.
It's all about summer. It's the best, tasty, lazy and carefree time and I look forward to this season all year! That's why I decided to use the photo of my youngest son while he was enjoying his birthday cake. The picture coordinates so well with the color story in this paper line.
To start with I chose the background paper that matches the colors in my photo, and then arrange several layers.
I really love the lemons paper sheet and used it as a main background piece for my photo.
I also drew the lemon on the background page using my acrylic paints.
I am so looking forward for the summer and can't wait to create more with this fun collection! Stay tuned to the BoBunny blog for projects using Summer Mood!
Hello Friends! It's Angela here today to welcome you to the BoBunny blog.
It's finally springtime, and the daylight is slowly becoming longer. Here in Italy, the weather in my town is getting a bit warmer. Yeah!!
To worthily welcome spring, I created a couple of cards, using the BoBunny Floral Stamp set, but utilizing two different techniques.
For both cards, I started mounting all the flowers and the leaves of the stamp set on my Stamp Block, so that I could stamp them all in ones. For stamping, I used watercolor paper and then I heat-embossed with white embossing powder. Last, I colored each flower and leaf using watercolor pen brushes.
Then, with a bit of patience, I fussy cut all the pieces. It's worth the time for me to cut the pieces, because the end result is always beautiful.
The first card, the pink one, has a romantic style and a more clean look. It is created on a white square cardstock and mounted on a pink card.
All the flowers are mounted on a gold wire wreath that I made simply rolling the wire in a circle.
The sentiment Happy Spring is stamped and heat-embossed on a punched circle of vellum and stuck with a couple of glue dots in the center of the wreath.
A few other details like a tied ribbon and some dots and voilà, the card is finished.
The second card, the light blue one, has a mottled, watercolor look because I went for a mixed-media background.
I prepared the surface with white gesso, I colored it with the packaging technique, then I stenciled with structure paste.
For the rest, the method I used to make it is always the same, with the gold wire wreath in the center of the card and the flowers glued to the top of it.
This time the flowers are gathered on one side of the wreath and the sentiment is heat-embossed in black. As a finishing touch, I added a few drops of gold mist here and there.
I hope you like these two similar but different kind of card and I would be curious to know which one you prefer and why.
I used to cook a lot in the past, but now I prefer to create more than spending this time at the kitchen. However I always like making cookbook dividers and recipe notes for my friends, so I get to combine my hobbies!
Today, since I have a go-to Desserts Recipe book for all my favorite sweet recipes, I've added a few dividers to share that I've made for just this purpose.
For my background I used the new Double Dot Damask papers. It was so difficult to choose only one color from the range, but since I wanted to make several dividers , it was a good opportunity to use several at once.
For my embellishments and paper layers I used a lot of fussy cutting from the Stay Awhile papers. There are so many cute houses and flowers there to cut out, and lend itself nicely to the homey feel of the Stay Awhile paper collection.
However for my pages I made die cutting too , and used a few BoBunny dies, this beautiful Mandala Die that I topped with Emoji Die cut - just for a touch of fun.
Also I wanted to add some mixed media, so I primed my background with white gesso, then I applied the Stencil Texture Paste using Starling Stickable Stencil.
and misted with Gold Glimmer Spray and added the splatters of Frost Glimmer Spray with a brush.
I used the both sides of the Double Dot Damask paper. As you can see, one side is a classic subtle damask pattern, and the flip side has a medium scale, layered and antiqued dot patteen, so it was fun to mix them.
I wanted to maintain the desserts theme of my recipe book, so I played mostly with cupcakes and coffee dies. I made a few cupcakes die cuts using Cupcake Dies.
I like the color palette of Stay Awhile collection, it can be used for many occasions, but it really reminds me something cozy and warm, something about the kitchen
After all my dividers have been done, I added the coloring with my brush and the sprays, just to add some accents
I like how it looks on the Double Dot Damask papers
Not only cakes and coffee makes me feel like Sweet Tooth, an ice cream , this what all the kids adore.
I've added the ice cream die cuts that I made using Summer Picnic Dies
You can check my video if you are interested how I created one of my pages:
Hello everyone! Marilyn here to share a canvas with you today. I worked with the beautiful Charmed collection. Let's take a look...
I started out giving a coat of white gesso to all the canvas. Next, I added textures and created a design with the Serenity Stickable stencil and Primer Paste. I cut out six clocks with the Tick Tock Die and white cardstock, I adhered two clocks together to create a little of dimension. I made a design with all the pieces and adhered them on the canvas with gel medium. Then, I mixed some acrylics to paint the canvas.
Then, I cut some images and the sentiment from the Charmed Perfection paper.
I cut out the key from the Unlocked Die and painted it with acrylic paints.
I adhered 3D Balls, 3D Powder, jewels with gel medium to add more textures.


