Showing posts with label The Avenues. Show all posts

Saturday, February 14, 2015

Stencils and Two Exits!

Hi, it's Maria Potapovich (mellpellmell) here for you today.
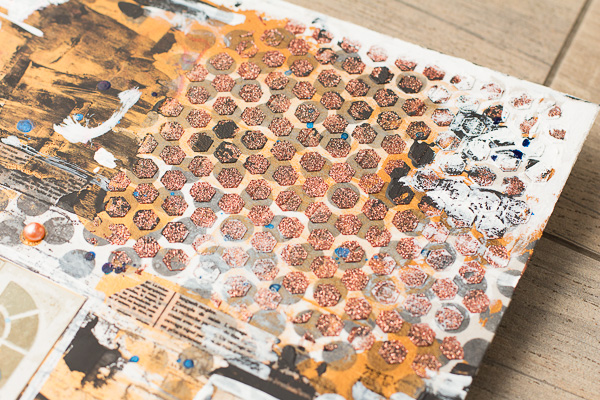
And I'd like to share with you my philosophical canvas.

There is a saying in Russian: any desperate situation has at least two exits (In Russian, the words "desperate" and "exit" have the same root It would be more correct to translate it like "any situation without exit has at least two exits".).
I do not know whether there is a counterpart in English, but I am sure that people of all nationalities know this truth!
There are three exits on my canvas - it's a reminder that no one should never lose heart!


As you can see, these doors are located on the old, dilapidated walls, whose appearance could take away any hope ... But otpimizm should be in every heart!


Masks and vintage colors (black, white, antique gold and copper) helped me achieve the look of an old wall. Pieces of paper tape with text added visibility of wall without age.


BoBunny Supplies:
Patterned Paper: Doors/The Avenues 
Glimmer Spray: Frost 
Glitter Paste: Copper 
Stencils: Brocade
Jewels: The Avenues
Ink Pad: Licorice
Textures Stamp: Wall to Wall Textures Stamp

Saturday, August 16, 2014

Kraft Gift Bag Layouts

Today is our last day of projects using the Kraft Gift Bags. I hope you enjoyed all the fun and fabulous projects our designers created. Today we are sharing layouts using the Kraft Bags. You can use them as a photo mat, or layer them, so many possibilities. Have you thought of some fun ways to use the Kraft Gift Bags?


Sweet Memories by Agnieszka Bellaidea


There are so many ways to use Bo Bunny gift bags but for today's project I used them as a place to hold more photos from the very same event my main photo from the page was taken. I also added more elements from our Kraft Collection, brads, chipboard and doilies.
This time I mixed elements from 4 collection but my main focus was on Somewhere in Time. This is such a special collection and I believe we all will use it in the future.
Talking about a future - are you also very excited about new products from Bo Bunny? I wonder what you like the most, I can not wait to use new stencils on my projects! How about you?


I always like to add stitching on my pages and this time I did it too matching colors with the rest of my page.
Below you can see my "pocket" holding more photos.


BoBunny Supplies:
Patterned Paper: Somewhere in Time, Chrononaut, Elegance / Somewhere in Time ; Periodical /Enchanted Garden ; Clocks /The Avenues
Buttons: Pincushion Buttons
Brads: Zip-A-Dee-Doodle
Doilies: 6.5in   Medium Doilies
Kraft : Kraft Gift Bag

My Girl by Kaori Fujimoto

  
I used BoBunny's paper gift bag as a pocket. For closing part, I used brads and string. To open the pocket, there is a tag.


I think pink and natural beige match well. I selected Head over Heels collection as a background.
 I add a little pink water paint to the paper to give a soft feeling. 

 
BoBunny Supplies:
Patterned Paper: Ever After/ Head Over Heels
Stickers: Combo Stickers/ Enchanted Garden
Washi Tape: Black & White Patterned Washi Tape
Doilies: 6.5in Medium Doilies
Jewels: Frosting Jewels
Kraft : Kraft Gift Bag Dots
Stamp: Stitches, Stained Textures
Wood: Kraft Wood Shapes Elegant
Brads: Lemonade Stand


42 by Denise van Deventer  


This is really a day that I will not forget easily, my 42nd birthday.  Not only was it my birthday, but my brother-in-law's wedding day! So 2 celebrations in one day! I really went to town on my outfit and also had my hair done, which I simply loved.


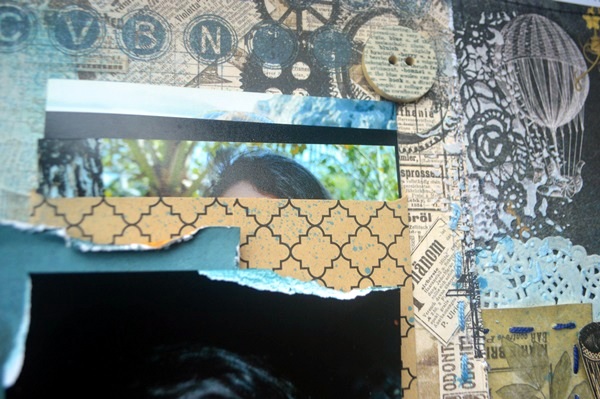
I folded my Kraft bag in half and then stuck it down to create a matting for my photo, as well as a little pocket for my journalling! At 42, one certainly has learnt a thing or 2 about life and so this little pocket contains a few of these learned things, as well as my thoughts about being 42.


I did some mixed media effects on my background and I am always so chuffed at how thick the BoBunny papers are and how well they respond to the mixed media. I also made use of some The Avenues chipboard numbers and they match perfectly in, with the Somewhere in Time Collection!

BoBunny Supplies:
Patterned Paper: Antiquity, Balloons, Passage, Imagination, Somewhere in Time/Somewhere In Time
Cardstock: Jade Dot, Khaki Double Dot
Noteworthy: Somewhere In Time
Jewels: Somewhere In Time
Chipboard: 12x12/ The Avenues
Stamps: It Is Written
Petals: The Avenues
Kraft: Gift Bag Clocks, Wood Shapes Camera


Monday, August 11, 2014

Bridal Shower Kraft Gift Bag Tutorial

As we continue projects using BoBunny's Kraft Gift Bags, we have a treat in store for you! Today Lisa is sharing a Bridal Shower Wishing Well project along with a tutorial. Wouldn't this be a fun project to do for any occasion? What great way to share recipes, thoughts or good wishes. What could you use this idea for??


Recipe Card in Kraft Bag for Bridal Shower Wishing Well... Tutorial by Lisa Gregory


 To cover the Kraft bag, cut a piece of patterned paper just slightly smaller than the surface of the bag, ink the edges and adhere the paper to the flap side of the bag.


For the flap,I used a die which happens to be the perfect size for the flap on the bag. I also cut  the same shape using thin chipboard as well. This will give the flap some weight when adhered to the paper. Ink the edges attach the trimmed die cut to the flap of the bag.


Attach a flower to the middle of the die-cut flap.


 This is the underside of the flap. Place a chipboard circle. behind the flower. This will give it additional weight to keep the flap down without the use of magnets. It also gives it a nice clean finish.


Using a hole punch, punch out a half circle in the top middle of the bag. Now trim a recipe card so that it slides in the bag with ease. The half circle punch out makes it easy to pull out the recipe card.


Now time to decorate the outside of the bag. Die cut a small tag and layer it. I placed some lined patterned paper to write a small sentiment on. Do some random stamping and add the letters to the side of the bag.


This is the finished Recipe in a Gift Bag, for a Bridal Shower Wishing Well. I think this is great idea to collect recipes for the bride to be. The concept could be applied to different themes. How about tips for new moms at a baby shower!!! The ideas are endless!!

BoBunny Supplies:
Patterned Paper: Antique/The Avenues
Stamps: Distressed Textures Stamps
Kraft:  Kraft Gift Bag Plain
Misc Me: The Avenues Recipe Contents/The Avenues Notepaper
Blossoms: Natural Earth Zinnia

Sunday, August 10, 2014

Kraft Gift Bag Greeting Cards

This week on the blog our designers will be featuring projects made with BoBunny's Kraft Gift Bags. There are so many fun ways to use them in your crafts. Today we are sharing some ideas on how to use the Kraft Bags to make Greeting Cards.You can make tags, embellishments, or use them in layers. The list is endless!!


August You Make Me Smile by Amy Voorthuis


My favorite month is the month August it's almost always good weather which I really love!
I used the whole Kraft Gift Bag plain as the base off my card it's a card 7,6 inch by 5,7 so that's kind off huge for a card. I love layering my cards so here I have about nine layers including the doily.


I can't get enough off  "The Avenues" collection so for this card it's all The Avenues & Kraft Gift Bag. On my last vacation trip about 2 weeks ago I went to a local scrapbook store and found some off that papers that where sold out at where I live.....so I was very pleased and bought them all.


BoBunny Supplies:
Patterned Paper: Dot, Clocks, Treasures/The Avenues
Double Dot Paper: Chiffon
Doilies: Small Doilies
Brads: The Avenues
Jewels: The Avenues
Blossoms: Natural Earth Zinnia, Blush Dahlia
Misc Me Cardstock Sticker: The Avenues
Kraft Gift Bag: Music Notes, Plain
Kraft Wood: Shapes Elegant


Thank You by Amy Voorthuis


For my second card I thought why not make my own flowers out off Kraft Gift Bags. I just separated the bags and cut out five circles cute the edges with a scissor sprayed them with water & shine glimmer mist to give it a sparkle! Then I wrinkled them and layered them on top of each other. I had so much fun!


This card is also huge, don't you just love the flowers BoBunny offers I never seem to have enough off them. For this card I used the pretty blues in the "Somewhere In Time" collection.


BoBunny Supplies:
Patterned Paper: Evening Mist, Antiquity, Chrononaut/Somewhere In Time
6 x 6 Paper Pad: Somewhere In Time
Double Dot Paper: Licorice
Brads: Somewhere In Time
Jewels: Somewhere In Time
Blossoms: Denim Blue Pansy
Stamps: You're Invited
Combo Stickers: Somewhere In Time
Kraft Gift Bag: Dots, Plain, Music Notes
Kraft Wood: Shapes Elegant


You Are Beautiful by Solange Marques


Kraft Bags are very practical and versatile, and have beautiful prints. I love the Kraft Bag Music Notes and I used it to make this card.


A added a little of watercolor for get a artistic touch.


I made the flowers using BoBunny cardstock.

BoBunny Supplies:
Patterned Paper: Pixies,Mosaic/ Enchanted Garden
Cardstock: Caribbean, Lavender/ Double Dot, Coffee Vintage, Licorice Flourish 
Stamps: Stitches Stamp
Kraft: Gift Bag Chevron Music Notes
Jewel Flourishes: Frosting Jewels


Thanks by Solange Marques


I used this Kraft Bag Chevron to make an envelope card.


I applied a little of Acrylic Gesso on the Kraft Bag and I decorated directly on it using Blossoms, wood shapes and alphabet stickers.

BoBunny Supplies:
Cardstock: Licorice Flourish 
Stickers: Licorice Alphabet Cardstock Sticker
Blossoms: Natural Earth Zinnia
Washi Tape: Black & White Patterned Washi Tape
Kraft: Gift Bag Chevrons
Kraft : Wood Shapes Elegant


4U by Romy Veul


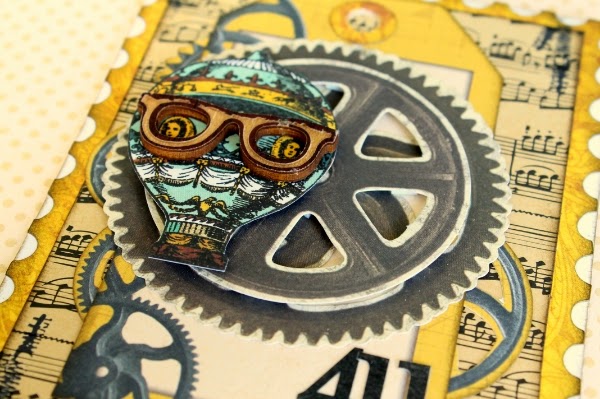
I think the beautiful Kraft bags suit a vintage style of scrapbooking perfectly and, therefore, make a great match with the wonderful Somewhere in Time collection. On this card I combined the beautiful papers from this collection with a Music Note Kraft gift bag. 


The central element on my card had to be the hot-air balloon and I simply couldn't resist putting it on a pair of wood glasses too as a funny twist. I layered the hot-air balloon on top of two die-cut gears and a tag to make it stand out more. 


I also added some faux stitching by stamping with the beautiful Stitches Stamps in the corners of the card. 

Bo Bunny Supplies:
Patterned Paper: Somewhere in Time, Balloons/ Somewhere in Time
Stickers: Somewhere in Time Combo Sticker
Noteworthy: Somewhere in Time 
Kraft Gift Bags: Music Note
Large Stamps: Stitches
Wood Shapes: Glasses and Mustaches 


Do You Love Me? by Romy Veul


For my second card I choose a rather uncommon combination of colours: pink, red and Kraft. I wanted to try something different and mixed the beautiful Head over Heels collection with a Music Note Kraft bag. Since the music note pattern looks very elegant, I thought they actually made a really great match. 


The central element on this card had to be the beautiful Head Over Heels chipboard sticker with the text 'Do you love me?' on it. I added a few chipboard flags underneath it and stapled beautiful hearts and a sentiment from chipboard on top of it. 


Bo Bunny Supplies:
6 x 6 Paper Pad: Head Over Heels
Chipboard: Head Over Heels 12x12 Chipboard, Head Over Heels Layered Chipboard 
Noteworthy: Head Over Heels 
Kraft Bags: Music Note 

Saturday, May 31, 2014

40K 40 Day Giveaways and Layouts

It's that time that we look forward to all week! Winner announcing time!

Are you a winner?! Check and see!

 
The Day 22 Winner - Randi M

 
The Day 23 Winner - Amber M
 
 
The Day 24 Winner - Sandi Brassard

 
The Day 25 Winner - Cheryl Gibson Poole


Thanks for playing along BoBunny fans!! Don't miss next week, we have a few tricks up our sleeve! You won't want to miss it!


Country Life by Gabrielle Pollacco


Gabrielle here with you today to share a mixed media style layout I made.  I've been on the Bo Bunny design team for many years now and have gotten to play with so many lovely papers and embellishments.  So for this project I thought I would pull together lots fun fun Bo Bunny embellishments, flowers, wood accents, buttons, chipboard and trinkets that I've had leftover from a lot of the collections.  I began by choosing a favorite patterned paper (for me), from the Happy Tails collection as a nice simple backdrop for my page design.


Then I started gathering together lots and lots of embellishments from a variety of Bo Bunny collections.
 
DESIGNER TIP: The beauty of this project was that I could use bits and pieces from any collection irregardless of the color of the piece because I was covering them all with Gesso (to get an even and porous work surface) and then misting it all with some aqua and brown inks and then finally giving it all a coating of gold paint.  See the two blooms with the green pearl centers?  They were orange fabric blooms that Bo Bunny put out many many years ago.   Here I was able to make them work by painting them to match my page.


Here is another view of the many blooms, buttons, metal trinkets, wood accents....even lace that I used to create loads of the deep texture on the page design.


I also layered in loads of chipboard, above you can see pieces from the Modern Miss collection (flourishes, large numbers etc.) and again, it didn't matter what colors they were as I was using a mixed media painting technique that blended them all together.  Once the project was dry, I added a few jewelled accents and some brads that were in complementary colors.
 
I hope you enjoyed my mixed media page and hope that I've inspired you to use up those odds and ends and create your own mixed media piece! 


Bo Bunny Products:
Patterned Paper: Happy Tails / Happy Tails; Miss Bold, Selfie / Modern Miss; Doors / The Avenues.
Chipboard: Modern Miss
Wood Embellishments: Kraft Wood Cogs
Washi Tape: Kraft Patterned Washi Tape
Trinkets: Serinade, Serenity, Apple Cider,
Buttons: Love Letters, Happy Tails, Modern Miss 
Brads: The Avenues, Primrose
Blossoms: Clover Daisy, Natural Earth Pansy, Natural Earth Bouquet, Fabric Blossoms (older collection)
Lace: Natural Earth Lace
Jewels: Modern Miss, Primrose


Live Beautifully by Lisa Gregory


 Lisa here today, sharing a layout that is sure to ring in summer. The coral colors in the Pincushion papers reminded me of  the beautiful hibiscus that grows at one of our homes. I love that BoBunny has the gorgeous Double dots collections that coordinate with the pattern paper collection papers. I love to create flowers with them! I even used a piece of the box my Design Team product came in. Upcycling can be beautiful!! I just primed the corrugated cardboard with white gesso and after it dried, sprayed it using my favorite mist sprays to match the papers.


I was able to achieve more dimension by layering using pop dots in between the layers. I cut pieces of the Kraft Burlap trim to tuck under some of the layers here and there.  It added beautiful texture to the layout. I learned this technique from my beautiful talented friend Gabrielle Pollacco. I also did a little machine sewing on the papers.


Sometimes a small title is all a layout needs.

 
I created some of the flowers with the papers I used in the layout. I mixed in some BoBunny blossoms for contrast. And the middles of the flowers were just pieces from the Kraft burlap trim that I just tucked in adhering with glue. The leaves were die cut and tucked under the flower clusters.  
Thank you for joining us today, and hope you are inspired to create your own projects using BoBunny product.

BoBunny Products:
Pattern Paper: Pincushion/Doilies, Seamstress, Tailored
Double Dots: Coral Vintage
Cardstock Sticker: Primrose
Blossoms: Wildberry Daisy
Kraft:Burlap Pleated Lace
Jewels: Frosted Jewels