Showing posts with label Enchanted Garden. Show all posts

Wednesday, October 29, 2014

Gorgeous Cards!

Hello, hello everyone! You are going to love these gorgeous cards today! So intricate and detailed...they will have you running to grab some paper and start some of your own!

Happy B Day You by Amy Voorthuis


When I saw I was designing in the stamp week I got really excited! I love stamping especially with the BoBunny stamps. The base of my card is made with the Coffee sheet from the Double Dot range this card has four layers.


I made this card for my husband he was born in 1971 don't you just love those circle number stamps?

Distressing the borders of the four layers is what I think makes it all look very shabby.


The flower with the hash-tag brad was handmade using the plain Kraft Gift bags. I took out my It Is Written stamp and just randomly stamped on my cut out circles. Then I sprayed them with water & gold glimmer spray and wrinkle my six circle {in three different sizes} up and you have a flower.

BoBunny Supplies:
Patterned Paper: Passage, Antiquity, Evening Mist/Somewhere In Time
Double Dot: Coffee
Stamps: Stitches, It Is Written, You're Invited, Inline Alpha, Captured
Doilies: Small
Kraft Gift Bag: Plain
Kraft Wood: Clocks
Blossoms: Buttercup Bouquet, Denim Blue Zinnia
Brads: Somewhere In Time
Glimmer Spray: Gold, Sugar

Hello You by Amy Voorthuis


The design of this card is quite similar to my first card; it also has four layers. When I got my DT package with the Enchanted Garden collection in it, it was the first collection I cut into which is sometimes really hard to do. I cut out the butterflies first then I didn't look at it for a long time and they were laying all around my scrap room but now they finally have a purpose were it should be on a card.


The three squares are made with a Cheery Lynn Designs die. I stamped on the squares with the music stamp & stitch stamp, then I took out my stickable stencil and pasted on top of the squares then I finished it of with the mint, gold and sugar glimmer spray.


On the right side of the squares I stamped the largest Curly Q stamp and went over it with the butterscotch pearlescents pen to make little pearls.

BoBunny Supplies:
Patterned Paper: Enchanted Garden, Pathway, Fantasy, Periodical/Enchanted Garden
Double Dot: Island Mist
Double Dot Jewels: Emerald
Stamps: Stitches, It Is Written, You're Invited, To The Point, Curly Q
Glimmer Spray: Gold, Sugar, Mint
Pearlescents: Butterscotch
Stickable Stencils: Brocade

Wednesday, September 24, 2014

Magical Altered Notebook!

This gorgeous sparkly notebook is to die for! BoBunny Mixed Media ads the perfect touch of 'magic' to this project!
 
Altered Notebook by Ilene Tell
 
Altered Notebook Mixed Media Project by Ilene Tell using BoBunny Enchanted Garden Collection
 
I was thrilled when I found out that BoBunny came out with all the mixed media supplies and mediums, and my hands were itching for the chance to put them to good use. I was lucky enough that one of my first assignments was for a mixed media project, and that was all the motivation I needed! I had altered a notebook before, a couple years ago, and it was so much fun - to turn something so ordinary into a work of art that was also practical and usable was really amazing. A beautiful cover on a notebook really pulls you and makes you want to fill it up with all sorts of secrets. Why spend $10 to $20 at a bookstore on a journal when you can take a $1 notebook and personalize it and make it be exactly what you want it to be? Added bonus is that when it's all full, you keep it forever. And these notebooks make the best gifts!
 
Altered Notebook Mixed Media Project by Ilene Tell using BoBunny Enchanted Garden Collection
 
I used pretty much all the new mixed media supplies to create this... that always makes it more fun :) I really loved working with the new Glitter Paste in conjunction with the new stencils - that's how I got the beautiful, raised, glittered script writing on the bottom of the cover. I also used the new Pearlescents to add the little dots on the bird fountain for some fun details.
 
Altered Notebook Mixed Media Project by Ilene Tell using BoBunny Enchanted Garden Collection
 
I also used the new stencils up top, along with the Glitter Paste, to create the sparkly dots, and stencils with the Glimmer Spray for the color and the slight doily pattern that's visible.
 
Steps to Create Altered Notebook:
1. Choose a good quality notebook - don't use the really flimsy 15 cent ones. Make sure you get one with a thick enough cover to take some abuse. The original brand name Mead ones work well.
2. Cover with white gesso, including the binding.
3. Add chosen paper and glue it down.
4. File along the edges to trim excess paper and file some of the gesso off the binding.
5. Add BoBunny washi tape along the binding. Add a strong glue to secure it well.
6. Decorate - use the new stencils, along with the Glimmer Sprays, Glimmer Pastes, inks, Pealescents, etc for an artsy effect.
Tip: To create a fade-out effect when using stencils with Glimmer Pastes, simply tap at the edges of the design with your finger while the paste is still wet to blend it out.
7. Decorate with the details - embellishmets, dot jewels, wood embellishments, etc. BoBunny is also great for fussy cutting elements out to add to your project - I did a lot of that here, using a few different collections.
8. Depending on the final effect, mist over the finished piece with a little more of the Glimmer Spray to blend everything in - this is especially useful if you do use a few different collections and want to harmonize the overall look.
 
BoBunny Supplies:
Patterned Paper: Enchanted Garden / Moonlight, Pixies; Somewhere in Time / Imagination, Timeless; Madeline / Grace
Dot Jewels: Aqua
Washi Tape: Baby Bump
Wood Shapes: That's Life
Stickable Stencils: Lace, Brocade
Pearlescents: Island Mist
Glimmer Spray: Frost
Glimmer Paste: Silver
 

Sunday, August 31, 2014

Mix & Match Layouts

Alright BoBunny fans, we have a challenge for you! We are mixing and matching this week on the blog! So it's time to test your BoBunny knowledge, can you look at these layouts and name all the collections the designer has mixed and matched?? No Cheating! Ready go!


Remember - by Megan Gourlay


One of the things I love about scrapbooking is being able to mix and match different collections and brands.  Today I'm sharing a layout I have done of my Mum when she was about 5-6yrs old during the time she was Highland Dancing, and I've used The Avenues, Enchanted Garden and Somewhere in Time.  The muted shades of aqua, grey and cream work so well together I think!


I've randomly stamped on my background paper with an archival ink because its waterproof, and then used my fingers to blend together pearlescents and glitter paste!


I've also used those gorgeous pearlescents to create the 'pearl' centres on my flowers and then added a lot of fussy cutting from various patterned papers to create a cluster of elements.  Some elements are popped up to create depth.  I have journaled behind my photo some of the stories Mum has told me about her days dancing, those stories need to be kept!


BoBunny Supplies:
Patterned Paper: Spellbound / Enchanted Garden; Antiquity, Chrononaut, Timeless / Somewhere in Time; Clocks, Doors, Stripe, Trellis / The Avenues
Noteworthy: Somewhere in Time
Stamps: It is Written, Distressed Textures
Pearlescents: Sugar, Island Mist
Glitter Paste: Gold


Bridesmaid Layout by Evgenia Petzer

BridesMaid Scrapbook Page by Evgenia Petzer uisng BoBunny Enchanted Garden Collection
 
I found that quite an old photo of my friends wedding, and decided to give it a go. I focused mainly on Enchanted Garden collection, but also used bits and pieces from three other ones. Did lots of fussy cutting and layering on this layout.

BridesMaid Scrapbook Page by Evgenia Petzer uisng BoBunny Enchanted Garden Collection


BridesMaid Scrapbook Page by Evgenia Petzer uisng BoBunny Enchanted Garden Collection

Bo Bunny Supplies:
Patterned Paper: Moonlight, Mosaic, Periodical, Pixies/Enchanted Garden
Buttons: Prairie Chic, Primrose
Brads: Baby Bump
6x6 Paper Pad: Lemonade Stand

Monday, August 25, 2014

Monday Tutorial - Altered Clock

Being crafty is not an easy task. Every day life consists of taking the most ordinary products and turning them into beautiful creations.

Today we have a quick fix for those clocks in your home that you have been meaning to beautify!

An Enchanted Clock - by Megan Gourlay


Its not secret that I love to alter things, taking something, anything really and giving it a new purpose in life.  Today I thought I would share how to turn a perfectly ordinary clock into something beautiful, in a few quick and easy steps.


Step 1:

Remove all the pieces that make up the clock, and carefully set aside.


Step 2:

Use the glass cover of the clock face as your template.  Pick out part of the design from your chosen piece of paper, set your glass template over it, draw your circle and cut it out.


Step 3:

Adhere the paper circle onto your clock face and reattach all the pieces of the clock back together.


Step 4:

At this point you need to decide how you want to decorate the outside of the clock.  I have fussy cut the lily's and adhered them to the base of my frame to begin my cluster of elements.


Step 5:

Fussy cut any further images from your patterned papers and layer them together with some blossoms until you have the effect you want.


Designer Tip:
Curl your paper elements to give them more definition and shape so that they look like they 'flow' over the side rather than remaining flat.


Step 6:

Once you are happy with placement you can stick things down - I have used a strong tacky adhesive to hold all of my elements down, Helmar 450 Quick Dry Adhesive.


Stand back admire your work of art and then decide who the lucky recipient will be :)


BoBunny Supplies:
Patterned Paper: Enchanted Garden, Pixies / Enchanted Garden
Blossoms: Plum Purple Daisy, Plum Purple Pansy

Saturday, August 23, 2014

August Mood Board Cards

Hey card making friends! Today is the day you have been waiting for, the August mood board inspiration in card form.

If you are feeling inspired by the August mood board, be sure to post your creations on the BoBunny Facebook page! #BBAugustMoodBoard

BoBunny August Mood Board


Love card by Maria Potapovich (mellpellmell)


This card about love. What is love? What is it? She quickly flies into our lives, just like a dragonfly - you do not have time to look back, and she's right in your heart! But it also is constant ... and it lasts as long as our clock is ticking - the heart ... This card about the fact that love is in our hearts always and every second!


BoBunny Supplies:
Patterned Paper:  Keepsake/Somewhere In Time, Endless Love/Head Over Heels, Periodical/Enchanted Garden 


Hello card by
 Maria Potapovich (mellpellmell)
 

This card is very simple. I used stamps cut paper circles and vellum to reduce the level of "roughness" here to create the background. This card is made just to say hello.

Ah, yes! Here again, a lot of different colors of pens - I like these light hints of color!


BoBunny Supplies:
Patterned Paper: Dramatic/Modern Miss, Dot/PrimroseVintage Dot/Shadow 
Doilies: 6.5in Medium
Jewels: Happy Tails


Fairy Card by Evgenia Petzer


It's no secret that I prefer dimensional cards, one easy way to get this effect is to stick the papers (layers) only in their middle and to leave the sides loose, you can see below the detailed shot and the doily has this effect and it brings extra air to my project.


Bo Bunny Supplies:
Patterned Paper: Pixies, Enchanted Garden, Spellbound/Enchanted Garden
Jewels: Enchanted Garden
Jewel Flourishes: Frosting Jewels


You Are Beautiful Card by Evgenia Petzer


What I absolutely love about the majority of BoBunny lines is that they have lots of papers for fussy cutting, it really provides you with so many options, you can create your own fairy tales with this line.


Bo Bunny Supplies:
Patterned Paper: Pixies, Enchanted Garden, Fantasy, Spellbound/Enchanted Garden
Stickers: Combo Sticker/Enchanted Garden
Jewels: Primrose
Jewel Flourishes: Frosting Jewels

Thursday, August 21, 2014

August Mood Board - Canvas and Layout

Welcome back to another creative day on the BoBunny blog! The August Mood board is our inspiration this week, enjoy crafty friends!

BoBunny August Mood Board


Whimsical Canvas by Gabrielle Pollacco


Hello, it's Gabrielle here with you today to share with you a canvas I made using the August Mood Board as inspiration.  This was such a fun Mood board, the colors in it are some of my all time favorite combinations.  I decided to create a little vignette using the reverse side of an art canvas.


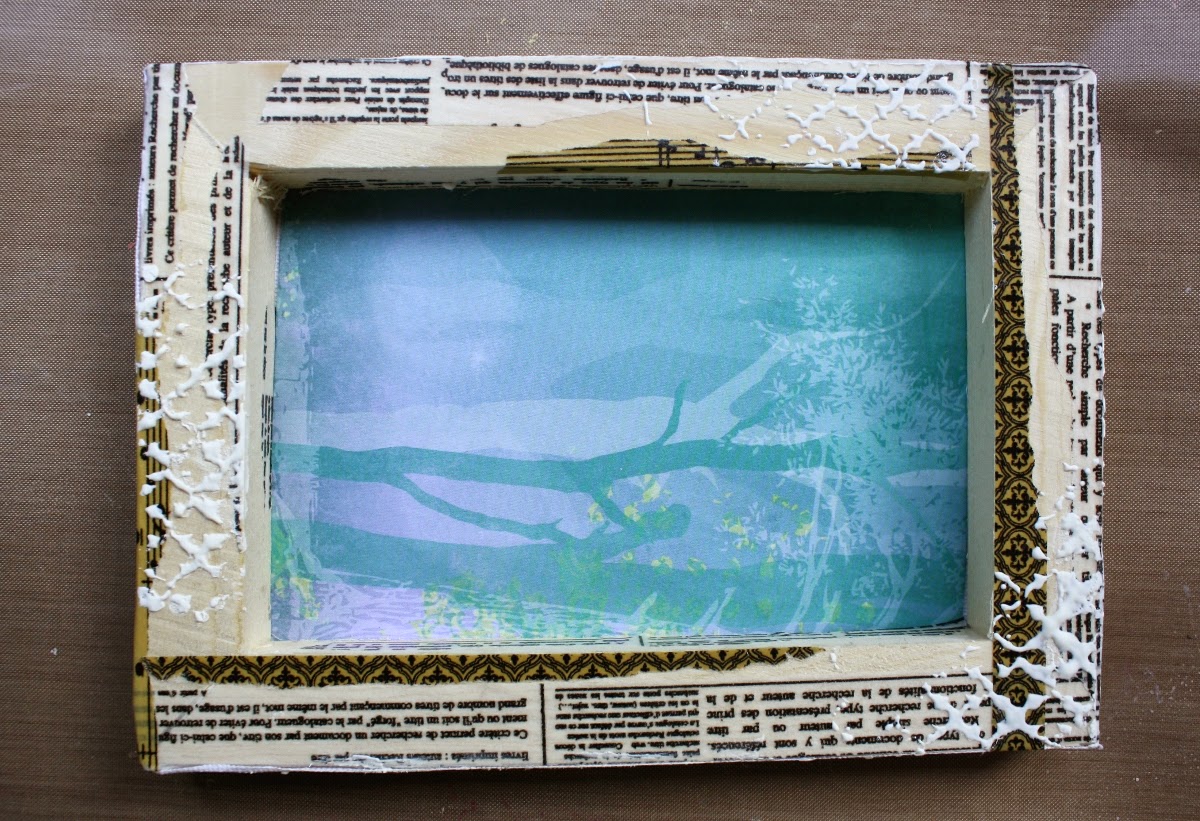
I began by began by tearing bits and pieces off of my Bo Bunny Washi tapes (I used tape from the Black & White, and Kraft collections).  After that I added a little texture with home-made texture paste and a stencil.  I cut a piece of background paper from the Enchanted Garden paper. I continued by dry brushing a bit of Gesso in a thin coat over the texture and taped area.


I then chose some flourished and scroll chipboard from Et Cetera collection to decorate my frame with.  I added some trinkets and buttons from other Bo Bunny collections and glued them to the frame work.  I gave the added items a coat of  Gesso and when it dried, I misted and painted the frame with the blues and purples in the paper collection.


I created a little nest with some Spanish Moss (found in the floral dept of your local craft store) and made little eggs with air dry clay, and tucked it into the corner of the frame.


I did a little fussy cutting from the Enchanted Garden patterned papers (flowers, mushrooms etc.) to add a few more whimsical embellishments to the framework.  I gave the whole frame a final gilded finish by dry brushing some gold metallic paint to bring up details.


Bo Bunny products used on this project:
Patterned Paper:  Enchanted Garden / Mosaic, Enchanted Garden, Periodical, Fairies, Pixies.
Chipboard:  Et Cetera
Trinkets: Et Cetera, Gabrielle, Serenity
Jewels: Apple Cider


Nature's Beauty by Rhonda Van Ginkel

Nature's Beauty Scrapbook Page by Rhonda Van Ginkel using BoBunny Enchanted Garden Collection

Greetings, it's Rhonda here to share with you my take on the Mood Board. I loved the dreamy and soft feel of the colors and the element of time all together. It inspired me to use these sunset photos from the campground of our recent vacation.  

Nature's Beauty Scrapbook Page by Rhonda Van Ginkel using BoBunny Enchanted Garden Collection

This was the perfect opportunity to work with our all new Glitter Paste and Stickable Stencils. I have to share with you that the results are more vibrant and so stunning, it is beyond amazing! It reminds me of bedtime fairy dust really. ha! I've done quite a bit of fussy cutting and added some cuts using dies and my cutting machine.


Nature's Beauty Scrapbook Page by Rhonda Van Ginkel using BoBunny Enchanted Garden Collection

I used the Pearlescents in Chocolate to accent the rivets on the door. They were also used along with a Stickable Stencil on my Doily in Island Mist and a touch of Brilliant Blue. These dried very fast. Once dry completely, I spritzed the Doily with water, then used Glimmer Spray in Frost and Gold.


I really love that with Mixed Media you can make your project extremely artistic or simply add hints of it all to your taste and what the project calls for. BoBunny's new products make the process fun and easy.


BoBunny Supplies:
Pattern Papers: Enchanted Garden, Imagine, Magic, Moonlight, Mosaic, Pathway, Periodical, Pixies, Spellbound  / Enchanted Garden
Stickers: Enchanted Garden Combo Sticker
Chipboard: The Avenues 12x12, Somewhere In Time Layered Chipboard
Stamps: Gateway Stamp
Brads: Enchanted Garden
Blossoms: Plum Purple Bouquet, Plum Purple Zinnia
Doilies: 6"Medium
Kraft: Wood Clock
Pearlescents: Chocolate, Sugar, Island Mist and Brilliant Blue
Ink Pad: Sugar
Glimmer Spray: Frost and Gold
Glitter Paste: Silver
Stencils: Bliss Stickable Stencils

Monday, August 18, 2014

BoBunny August Mood Board Inspiration - Mini Album Video Tutorial

We continue our BoBunny August Mood Board Inspiration week with a tutorial by Designer Lisa Novogrodski. She made a mini album using a unique combination of BoBunny collections and is sharing a video tutorial on how she created it.

This was probably one of the most fun projects I have ever created! The mood board this month was so inspiring my imagination simply took off! I pulled the color theme of my project from the board- focusing on the purple, blue and white. The "You Are My Sunshine" pillow inspired me to incorporate Zip A Dee Doodle along with Enchanted Garden. I wanted a "Happy" "Fun" project theme and photos to pull it all together. I show you how to put this little mini album together below in my video tutorial.

Accordion Fold Tag Pocket Mini Album by Lisa Novogrodski using BoBunny Enchanted Garden and Zip A Dee Doodle Collections

I've created this Accordion Fold album with lots of little pockets for you to tuck in tags, tickets, photos and journaling. I've used the tags for my "Photo Mats" and also for journaling spots. You just have to love little pockets. This type of project can be used not only for "scrapbooking" but you could create one and do art journaling on your tags and have an artsy little file to store them in.

Accordion Fold Tag Pocket Mini Album Mood Board Tutorial by Lisa Novogrodski using BoBunny Enchanted Garden and Zip A Dee Doodle

I was also inspired by the doilies in the mood board and I incorporated some in most of my tags. I chose a Spellbinder Die to mimic a "frame" shape picking up on that beautiful blue frame in the mood board. The clock and globe prompted me to use Kraft style tags as my base. I like the "earthy" appeal mixed with the feminine blues and purples.

Accordion Fold Tag Pocket Mini Album Mood Board Tutorial by Lisa Novogrodski using BoBunny Enchanted Garden and Zip A Dee Doodle

I hope you enjoy the video and can't wait to see what you all make with this mood board as your jumping off point!


Accordion Fold Tag Pocket Mini Album Tutorial- Lisa Novogrodski

BoBunny Supplies:
Pattern Paper: Somewhere In Time/ Somewhere In Time, Passage;
Enchanted Garden/ Fantasy, Imagine; Zip A Dee Doodle/ Zip A Dee Doodle, Creative
Stickers: Zip a Dee Doodle
Chipboard: Zip A Dee Doodle 12 x 12, Pop Quiz 12 x 12, Zip A Dee Doodle Layered Chipboard
Doilies: 4" Small
Stamps: To The Point, Stained Textures
Buttons: Woodland Winter
Blossoms: Denim Blue Dahlia

Sunday, August 17, 2014

BoBunny August Mood Board | Misc Me 12x12

This week we are featuring our August Mood Board. It was created to inspire and delight our BoBunny fans as well as our designers.  Today, designer Solange Marques shares a 12x12 Misc Me spread that she was inspired to create using the Mood Board.

BoBunny August Mood Board

You Make Me Happy 12x12 Misc Me by Solange Marques


It's time to share with you more two pages of my Misc Me. I am using my Misc Me to keep memories of moments with my grandchildren and I love to use a lot of photos of them. They really make my days better.
I love this mood board, it is very inspirational. I've inspired on the colors and some elements such as doilies, clock, flowers, frame and phases on the pillow! I used Enchanted Garden collection.


I stamped some works from the pillow on this journal card using Kraft Wood Alphabet Stamp.


When I saw the frame on the Mood Board I wanted to make one to use on these pages. I used a resin frame and applied Copper paint and Turquoise spray ink. I altered the butterfly using watercolor.


BoBunny Supplies:
Patterned Paper: Fairies, Imagine, Mosaic, Periodic,Pixies/ Enchanted Garden;
Cardstock: Lavender Dot, Deep Sea Dot, Lemonade Dot.
Stickers: Somewhere in Time Combo Sticker
Jewels: Our Lil's Monster, The Avenues
6 x 6 Paper Pad: Enchanted Garden
Blossoms: Denim Blue Pansy, Plum Purple Bouquet
Misc Me Binder 12x12: Baby Bump
Misc Me Journal Cards: Pop Quiz
Mis Me Page Protector: 12x12 Page Variety Pack
Doilies: 4” small
Kraft: Wood Shapes Elegant, Kraft Wood Alphabet Stamp