Showing posts with label Cardstock stickers. Show all posts

Tuesday, February 11, 2020

Our Favorite Memory Layout with Count the Ways

Hello BoBunny fans!

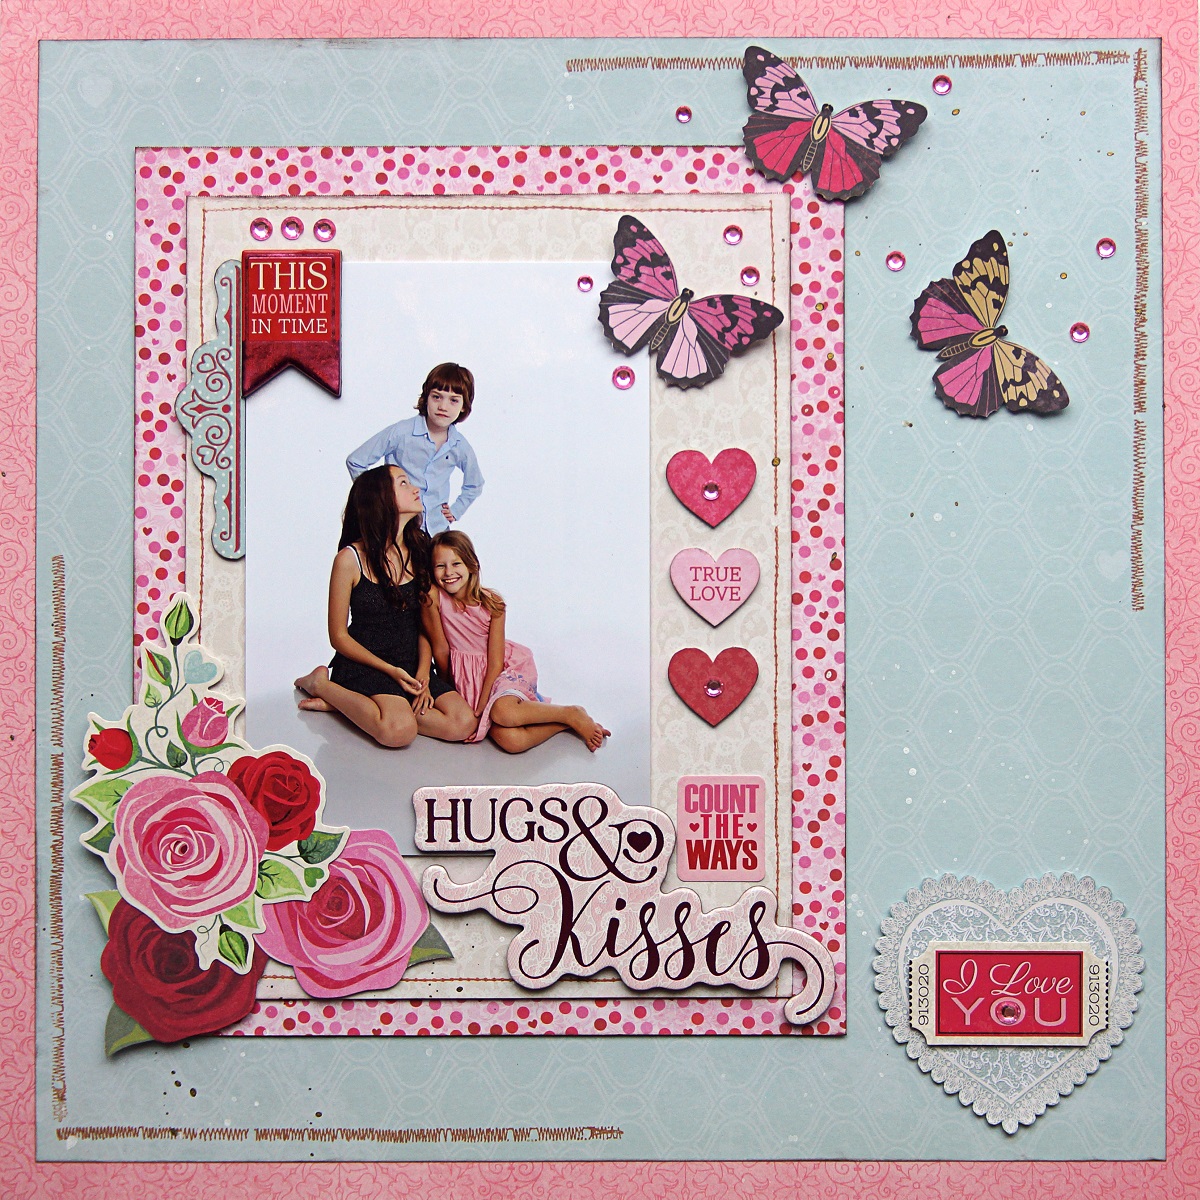
Emmy here today sharing my first project for February. Since it is the week of St Valentine, I thought I would use the amazing Count the Ways collection from BoBunny and a picture I really like of me and my two kids.


For my background I used two different pattern papers. I cut off 1 cm from each side of the lighter paper, inked its edges with brown ink and adhered it on top of the darker pattern paper.

To soften the colors of the paper design, I used white gesso on a large area in the middle of it. Once the gesso has dried, I added extra pattern using clear stamps and brown ink pad. As a final touch I sprinkled glimmer mist on top.


I layered my picture on a slightly larger panel of pinkish pattern paper and used different fussy cut images to create the layers under it.


I fussy cut a lot of cute images to decorate my page further. The banner under my picture I created from snippets from different pattern papers.


As a final touch I added rhinestones and chipboard stickers from the sticker sheet matching the paper line.


I hope I managed to inspire you today!

Come back soon for more inspirational projects from our design team!


BoBunny Supplies: 
12 x 12 Paper Pad: Count the Ways
Pattern Paper: Be Mine, Valentine, Red Roses, I Love You, Kisses / Count the Ways
6 x 8 Paper Pad: Count the Ways
Chipboard Stickers: Count the Ways
Cardstock Stickers: Count the Ways
Resin Hearts: Count the Ways
Double Dot Jewels: Think Pink
Clear Texture Stamps: Wall to Wall

Other: 
American Crafts Permanent Tape Runner and Refill
American Crafts Foam Dimen Dots
Ink pad - brown
Pink Shimmering Mist
Bronze Shimmering Mist
White Gesso

Sunday, February 9, 2020

Count The Ways Layout with Emmy

Hello BoBunny fans!

Emmy here today sharing another project I created for BoBunny's blog. To design this layout I used one of BoBunny's newest collections - Count the Ways. I just love the colour palette and all the cute embellishments of this paper line.


I cut off 0.5 cm from each side of the pattern paper, inked its edges and adhered it on top of the pink cardstock. Using clear stamps set and brown ink I created the 'frame' around my design. Then I splashed some shimmering mist on top.


I layered my picture on a sheet of pattern paper from the 6 x 8" paper pad and a slightly larger panel of 12" pattern paper. I adhered all the layers using mounting foam tape.

To decorate my page I used fussy cut embellishments from pattern paper, chipboard and cardboard stickers.


For my title I used a chipboard phrase sticker.


As a final touch I added pink rhinestones.


I hope I managed to inspire you today!

Have a great week!


BoBunny Supplies: 
12 x 12 Paper Pad: Count the Ways
Pattern Paper: Be Mine, Forever, Hearts, Count the Ways / Count the Ways
6 x 8 Paper Pad: Count the Ways
Chipboard Stickers: Count the Ways
Cardstock Stickers: Count the Ways
Double Dot Cardstock: Flamingo lace
Double Dot Jewels: Think Pink
Clear Stamps: Stitches

Other: 
American Crafts Permanent Tape Runner and Refill
American Crafts Foam Dimen Dots
Ink pad - brown
White Shimmering Mist
Bronze Shimmering Mist

Friday, February 22, 2013

What's your FAVE Embellie????

Most of us have agreed that it's really hard
to pick a favorite embellishment.....
but, most of us also seem naturally drawn to
the same things over and over.

Good thing it's okay to LOVE it all.
Here's what the DT girls have to say...

Follow Your Dreams Tag

"Although I adore ALL BB products, my absolute fave has to be the Noteworthy. But its just 'paper' you say?? No...nono... Noteworthy are tiny pieces of shaped and die cut patterned papers that match seamlessly with each collection for which they are created. I am in love! I created this tag with nothing but the Noteworthy Collection and 1 piece of chipboard...."
 Bo Bunny Supplies:

Noteworthy: C'est la Vie
Dimensional Stickers: C'est la Vie


Follow your dreams

"Favorite embellishment.

How impossible to choose is that?
I love flowers.. (apart from a lot of other things)
But I do love love love flowers.. lots of them.. 
so I had to do a flower-layout.. because spring is on my mind."


Bo Bunny Supplies
Patterned Paper: C'est la vie/ panache, 12", art nouveau

Dimensional stickers: C'est la vie
Jewels: C'est la vie
Noteworthy: C'est la vie
brads C'est la vie
Lace: C'est la vie
Chipboard: C'est la vie
Blossoms: Buttercup daisy, Buttercup bouquet


Home Cards

 "My favorite embellishments are the layered chipboard packages. I like to use lots of layers and these beautiful embellishments are already layered by themselves. Plus they have such a nice glittery touch and will make every creation 'sparkle and shine'."
 Bo Bunny supplies:
Patterned papers: Calico, Wanderlust, Yard Sale, Market Finds, Chevron/ Prairie Chic

Layered Chipboard: Prairie Chic
Noteworthy: Prairie Chic
Jewels: Prairie Chic

Y'all have a great weekend, ya hear???

Thursday, January 31, 2013

Stickers, Stickers, Stickers

Once upon a time, the world of scrapbooking started and two of
the first 'supplies' we all had to have were paper & STICKERS!

Over the past 20 years, stickers have never lost steam....
they are a staple that will never grow old.

Snow Day Tag

Pad 6x6: Snow day

Buttons: Snow day
Stickers: Dimensional Stickers, 12" Combo Stickers/ Snow day; 12" Combo Stickers Powder Mountain
Jewels: Powder Mountain
Blossoms: Natural Earth Zinna


Happy Birthday
By: Lynn Shokoples
 Designer TipMy little nephews birthday is coming up and he loves books where you open the flaps and find a surprise, so I thought I would make him a birthday card just like his book. So many fun stickers to choose from in the "Surprise Collection". I just adhered a separate piece of patterned paper to the inside, cut out the flaps and used a circle punch so he could open them up. 

Patterned Paper: Confetti, Banners, Dots,Hooray/ Suprise
Stickers: Combo Stickers/ Surprise
Chipboard: Layered Chipboard/Surprise
Buttons: Surprise
Noteworthy: Surprise 


Always & Forever Card
 Designer Tip: With Valentines Day right around the corner, the Love Letters Collection is perfect for crafting and creating the perfect Valentine for your special someone!
Bo Bunny Supplies
Patterned Paper: Tiles /Love Letters
6x6 Paper Pad: Bold & Bright
Stickers: Love Letters Combo Stickers, Love Story Cardstock Stickers
Jewels: Enchanted
Brads: Love Letters 


Special Delivery Card
by Juliana Michaels

Patterned Paper: Keys and Air Mail/ Love Letters
Noteworthy: Love Letters
Stickers: Love Letters Combo Stickers, Love Story Cardstock Stickers, 
Love Letters Layered Chipboard Stickers
Jewels: Love Letters


 Designer Tip: Use large stickers in place of traditional letter titles.
Desinger TipFor more detail and to add colors that might not be included on the sticker, place them on top of cardstock and cut around them leaving a bit of the new color showing on the edges. For the border sticker, I used a tiny circle punch to punch pink circles to place behing the sticker.
Patterned Paper: Prairie Chic, Prairie Chic Dot, Prairie Chic Laundry and Stonewashed Denim
Stickers: Prairie Chic Combo
Chipboard: Prairie Chic 12x12
Brads: Prairie Chic
Noteworthy: Prairie Chic
Blossoms: Blush Dahlia, Natural Earth Dahlia
Glaze Jewels
Small Doilies


Always a Princess
By Sarah Eclavea

Designer Tips: To make stickers more dimensional adhere them with foam tape. To create a scalloped border, punch circles from stickers and adhere down page overlapping.

Patterned Paper: Art Nouveau, Decoupage, Deja Vu, Ephemera, La vie en Rose/ C'est La Vie
Stickers: Combo Sticker, Dimensional Stickers/ C'est La Vie
Jewels: C'est La Vie
Chipboard: 12x12/ C'est La Vie

You gotta love stickers!!!  I hope these layouts were as inspiring to you
as they were to us.... Happy Thursday!

Wednesday, January 30, 2013

Are you ready to be AMAZED???

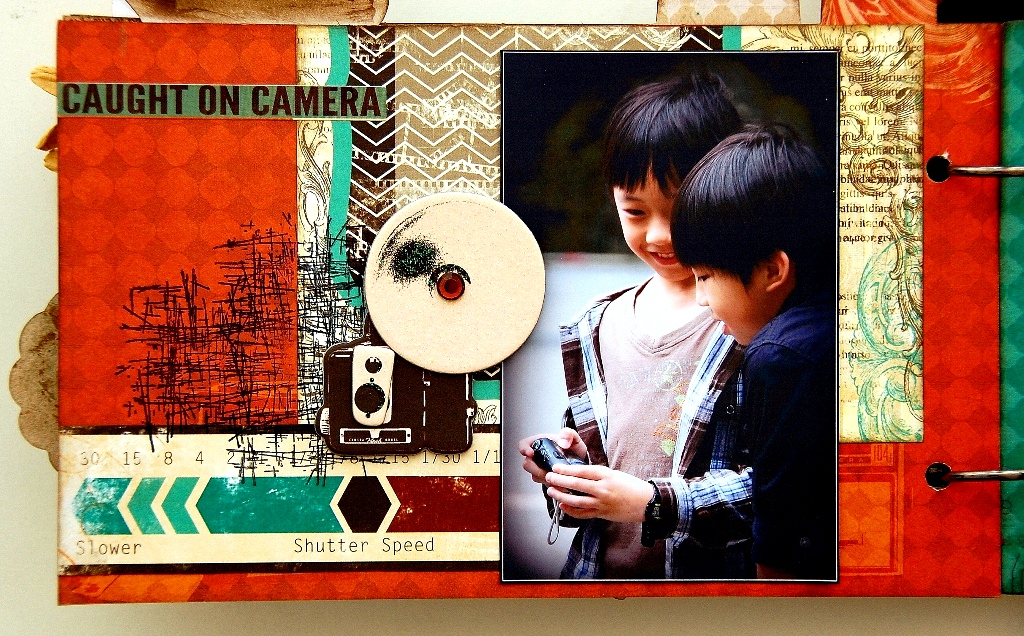
Irene created a mini album with our new Mama-razzi² collection
and it is incredible!  I'm so in love with this album.

 Click
Irene Tan
 Designer note: I've used the pop up technique to transform this camera into an SLR with zoom lens...LOL!


 Designer Note: This Mama-Razzi 2 collection is not just perfect for any travel or vacations pictures, it's album can also be used for pictures of random shots taken or liked what I've done here, documenting people behind the cameras.


Bo Bunny Supplies:
Patterned Paper: Contrast, Darkroom, Oh Snap/Mama-Razzi 2
Cardstock: Double Dot in Licorice Dot
Stickers: Mama-Razzi 2 Combo Sticker; Mama-Razzi 2 Dimensional Stickers
Noteworthy: Mama-Razzi 2
Brads: Mama-Razzi 2
Jewels: Mama-Razzi 2
Trinkets: Mama-Razzi 2
Buttons: Mama-Razzi 2
Flowers: Natural Earth Daisy, Clover Zinnia, Apple Cider Petals
Chipboard: Mama-Razzi 2 12 x 12; Mama-Razzi 2 Layered Chipboard
Mini Album: Mama-Razzi 2
Clear Stamps: Mama-Razzi 2, It Is Written, Stained Textures

Tuesday, June 19, 2012

SuBWaY aRT

Hey, Howdy & Hello!!!
Today's post is brought to you by "Subway Art"
I searched and searched to find the definition of 
Subway Art and couldn't really come up with much.

So here is my definition
subway art, n. 1. placing and arranging related words, in random fonts to form art.

Our FAB DT has been playing with this topic and I can't wait to show you what they've come up with.

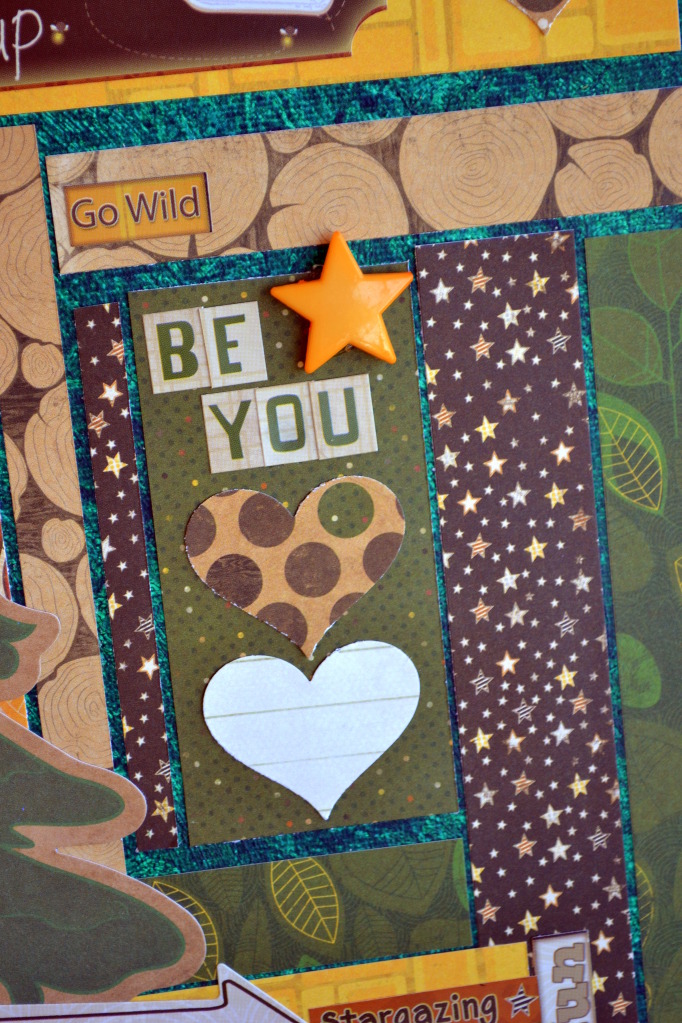
BE YOU
Julie made this adorable  Camp-A-Lot Canvas.  
She says she loves Subway Art and the personal meaning behind it.  
What a fun project to display and brighten up your home this summer!!
Julie also gives us a GREAT TIP and said...
"Don't always grab the unused papers in your scrapbook stash! For my canvas, I mostly made this using scraps I had left-over from a layout and cards I had made using this collection!"

Supplies Used
Pattern Paper: Camp-A-Lot 6x6 paper pad, and
Camp-A-Lot 12" Fireflies,  Sunset, Squares, Starry Night 
Noteworthy: Camp-A-Lot
Stickers: Fireside Fun, 
Nature's Playground, Combo
Buttons: Camp-A-Lot

GIRLS OF SUMMER

Robbie said, "Although this layout has a lot going on, it is really quick and easy to put together."
See below for tips to making this layout quick and easy....

1. To start, I used an electronic cutter to cut out my title. I wasn't really picky about where it ended up, because I planned to just work around it. I did make a point to leave the center of my layout empty.

2. Using lots of stickers makes layouts quick and easy to put together. To add intrest and make layering easy, just use lots of foam dots. You can see this in the close-up pictures.

3. Use the cut outs to add instant shapes. Since they already have such neat shapes printed, 
just choose one and cut along the edges.

4. The yellow banner piece of paper was one that I had cut to small for another layout. I save my large scraps, so I just pulled it out and added it to this layout.

5. Finally, to get the look of stitching or bordering without taking much time, just add holes at the corners and stopping points instead of actually making a lot of stitches.


Supplies Used:
Patterned Paper: Hello Sunshine Little Things, Daydream and Cut Outs
Cardstock: Double Dot Designs Chiffon Dot
Ribbon: Double Dot Designs Burnt Orange
Stickers: Hello Sunshine Combo, Lazy Days and Hot Hot Hot
Petals: Hello Sunshine

I hope you all enjoyed the layouts today as much as I did.  Show these cute girls some love with a comment and be sure to share your SUBWAY ART layouts with us on facebook!!!