Showing posts with label Gold Pearlescents. Show all posts

Sunday, April 1, 2018

Happy Easter 12 x 12 Layout features Cottontail and BoBunny Essentials with Marilyn


Hello Everyone!

It's Marilyn here today to share with you an Easter page that I created with the beautiful new Cottontail collection.  I'll take this opportunity to wish you a Happy Easter!


I took this beautiful neutral ivory paper from the collection I find it's easier to highlight soft colors if you use a neutral base like I did in this page. I cut from the papers the different images like the adorable eggs, flowers, fence and tag then I adhered them with Sticky Thumb adhesive foam dots to create dimension, and a nice focal point for the right side of this page.


I gave textures and design on the background with a Flower Power Stickable Stencil and white gesso. After it was dry, I traced the shapes of the flowers with gel pens in colors similar to the papers, to make the flowers pop! I placed some mint colored craft grass and some 3D balls for a taste of mixed media, and some extra Easter flavor!


I distressed all the eggs with ink and added a dot of Pearlescents in Butterscotch color in the center of each flower.


I love the simple title I chose here. It's the adorable Happy Easter layered chipboard from the same collection.


Finally,  I added some pearls here and there for the final touch!! I hope you find some inspiration...Happy Easter!!!

BoBunny Supplies:
Pattern Paper- Cottontail Collection- Gardening, Festive, Cottontail
Layered Chipboard- Cottontail
Stickable Stencil- Flower Power
Double Dot Jewel- Tuxedo
Pearlescents- Butterscotch

American Craft
Sticky Thumb- adhesive foam tape, tape runner

Thursday, March 1, 2018

Sweet Treat Bakery Boxes featuring BoBunny Essentials with Irit


Hello My Dear Crafty Friends and welcome to my new BoBunny post today.

It's Irit here today.  This month we are going to share some projects made with BoBunny basic products, such as Double Dot cardstock, flowers, jewels, stamps, stencils, dies and mediums.

I think you all will like to see ho make this fun and EASY 3-D papercraft.  His and Hers Bakery Treat Boxes.  I thought this would be a crafty twist to make something totally unique today  made with all possible BoBunny basics.

I used a non branded die to make the basic shape, but you can find a lot of web tutorials with the cutting instructions and to use them.


I made two " cakes" in the very same colors, but one was embellished in a shabby style and the other in a kind of a Steampunk style.  A sort of His and Hers feel...

Let me show you the shabby box first....

This box was made with  two pieces of Double Dot cardstock  and then embellished with hand cut cardstock triangles first.

Then the die cut doily was added  with one large BoBunny flower, one chipboard heart and a stamped piece.

The stamping was made with black ink and heat embossed with clear powder and then 2 colors of BoBunny Pearlescents were added on the top.


 And this is how this box looks from the side: some scalloped strip and some lace were added for the cake layers and then I added generous layer of Pearlescent paint on box sides of the box.


And this is how the steampunk'd box looks from the top. This time I used the same cardstock, but in reverse way- brown box and light sides and triangle.

It was embellished with a piece of old lace and metal trinket and then a key and a key hole were die cut with BoBunny dies several times and arranged in a kind of a chipboard looking pieces.

I used embossing powders and waxes to add this copper colors.


 And this is the same box from the side and it really looks like a piece of cake.


So here are both boxes together again and they look very pretty together.


Until next time . . .

Irit

BoBunny Supplies List:

Double Dot Passion Fruit vintage, Chiffon, Chocolate

Belief Dies

Darling Doily die

Royal dies

Pocket full of Posies stamp

Blush Zinnia flowers

Hearts laser cut chipboard

Denim blue lace

Copper glitter paste

Butterscotch Pearlescent paint

Coral Pearlescent paint


Saturday, February 24, 2018

Stay Awhile - Over-sized Layered Tag Trio with Katherine


Hello Everyone, Katherine here with a trio of tags made with the gorgeous Stay Awhile collection.  I love the color combinations in these papers and the designs are beautiful.  Truly a well designed "all occasion" line with warm and cozy feel.


Here are all three tags layered together, they are all 6 by 4" and can be used on presents, cards, a scrapbook page, or a decorative seasonal shadow box.


I used the damask side from the new chocolate brown damask paper as the base for this tag, then layered up the Together paper - both the blue and the rust side (the blue just pops with the colours in this collection).  I also used one of the sticker strips down the edge, and some of the purple sticker banner.  In this collection are several beautiful houses that you can cut out and add to your projects and I made this the focal point, then added lace, buttons and a doily to complete all the layers.


I did add a little wash of white gesso behind my central mounts and lots of brown ink around the edges of the papers.


 For the next tag I started with Relax as the base, and used a mixture of the papers and stickers.  I cut out the mugs from the Warm paper and layered them together on foam pads.  I used several of the sticker ribbon strips - the roses and little line of coffee cups.


I used the large polka dot side of the new Damask Double Dot paper as the base for this tag, layering up a mixture of Relax and Together, then cutting out the journal card "Warm and Cozy" - I finished this with some of the Pearlescents in butterscotch and I cut out a little bouquet of flowers to add to the corner.


I love how all the colours work in this collection and there are lots of elements that you can cut out and use too.

Thanks for checking out the blog today!

Katherine


BoBunny Supplies

Patterned Papers: Stay Awhile  - Neighbours, Together, Relax and Warm

Double Dot: Damask - chocolate

Stickers: Stay Awhile

Pearlescents: Butterscotch

Lace: Natural Earth

Paint: White Gesso

Saturday, August 12, 2017

"My SUN"-a mini book


Hi there, it's Angela here and I'm very proud to be with you for another year of fun and crafts!
My project today is a mini album dedicated to my son Francesco and I've chosen the BoBunny Down by the Sea collection because it has lots of blueish colors, perfect for a boy project.

My Sun Mini Album by Angela Tombari using BoBunny Down by the Sea Collection

It's basically a one sheet mini album, , yes just one sheet of paper and bunches of little bits and pieces to make up the embellishment on the album.

Particularly, I've taken the 12 x 12 Down by the Sea Cardstock, cut it into 3 stripes of 4 inches height and scored each stripe at 4 inches again.

I folded each stripe like an accordion and glued them back to back.

My Sun Mini Album by Angela Tombari using BoBunny Down by the Sea Collection

It was a pity to waist the inner parts of the cardstock, so I fussy cut all the mermaids and I ended up with a bunch of them. I didn't want to use them for a boy theme, but I will incorporate them in future projects for sure!
My Sun Mini Album by Angela Tombari using BoBunny Down by the Sea Collection

Then, I made the cover with a strip of acetate wrapped around the mini.

On the front I sewed a beautiful button and a gold elastic on the back. Inside the elastic I put a charm made of a couple of shells, something I found in my stash, that helps opening and closing the mini.


My Sun Mini Album by Angela Tombari using BoBunny Down by the Sea Collection

Many of the pages are embellished with BoBunny Gold Pearlescent around the wreaths. That gives a precious effect to the photo and lights up the project with a beautiful visual effect.
My Sun Mini Album by Angela Tombari using BoBunny Down by the Sea Collection

To give variety to the mini I filled in some of the pages with embellishments as you can see above.

I also included a 'shaker page' filled in with gold and aqua sequins.
My Sun Mini Album by Angela Tombari using BoBunny Down by the Sea Collection

I leave you with a short video where you can see a walk-through of the entire album.


If you like my project, please leave me a comment down below and thanks so much for stopping by.

Love,
Angela

BoBunny Supplies:
12" Down by the Sea paper
Noteworthy: Down by the Sea
Chipboard and Layered Chipboard: Down by the Sea
Brads: Aqua
Pearlescent: Gold


Sunday, April 2, 2017

Faith and Patina Effects by Pentart with Ulrika


Easter Party by Ulrika Wandler

Hi! I'm inviting you to an Easter party! I have lots of eggs and some candy for you! Let me show you what I made for the party using BoBunnys gorgeous new collection, Faith.

I would also like to show you the Pentart products to use for making a patina effect.

Easter Party Alter by Ulrika Wandler using BoBunny Faith Collection

To make the egg and the small wooden tray look aged I used these great products.

First apply a good layer of white gesso and immediately dust a very small amount Patina Effect Powder on it. The easiest technique is to load just a teeny bit of the powder on the tip of the spatula, then tap it very very gently so just a light dusting of the powder falls onto the wet gesso. It can be evenly distributed but is actually not totally necessary since the finished look is somewhat uneven when done. Use a spatula to spread the powder in the gesso, again, unevenly is best. Then use the droppers of reagents to make the final touch. There are three colors, so use some of each to achieve the right look and feel

Easter Party Alter by Ulrika Wandler using BoBunny Faith Collection

You can watch this tutorial (after you see the rest of the blog, of course!) on how to use these products:  https://www.youtube.com/watch?v=IOM2VRufVYs


This is my egg. I added some Gold Antique Paste and Gold Glitter Paste on it once it was dry.

Easter Party Alter by Ulrika Wandler using BoBunny Faith Collection

The wooden tray turned out perfectly, with a gorgeous antique copper patina.  Wasn't that simple and fun?
Easter Party Alter by Ulrika Wandler using BoBunny Faith Collection

These sweet candy bags got that little extra special touch with some die cut butterflies!

Easter Party Alter by Ulrika Wandler using BoBunny Faith Collection


This is a carrot... Can you see it? It's orange, and it has that green stuff on top. A carrot! *giggle*

Easter Party Alter by Ulrika Wandler using BoBunny Faith Collection

Thanks for dropping in for this fun project today!  See you all soon!

Ulrika


BoBunny Supplies:
Patterned Paper: Faith / Light, Rejoice, Heaven Sent, Peace
Stickers: Faith Clear Sticker
Dot Jewels: Emerald
Pearlescents: Gold
Dies: Flutter dies
Glitter Paste: Gold
White Gesso

Pentart Supplies:
Patina Effect Powder
Patina Effect Reagents
Gold Antique Paste

Thursday, March 23, 2017

Petal Lane and Pentart Antique Paste with Elena O.


Hello BoBunny friends, it's Elena here today.

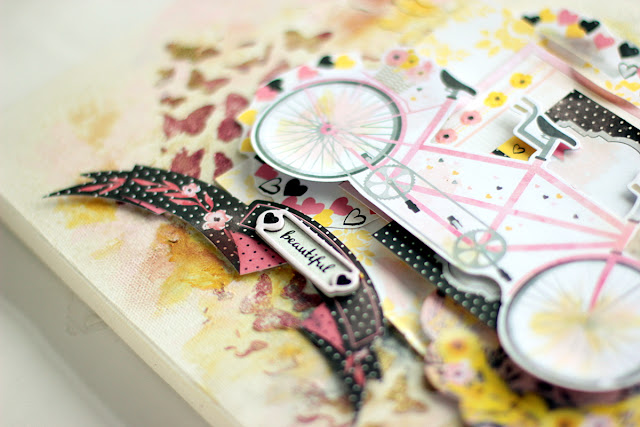
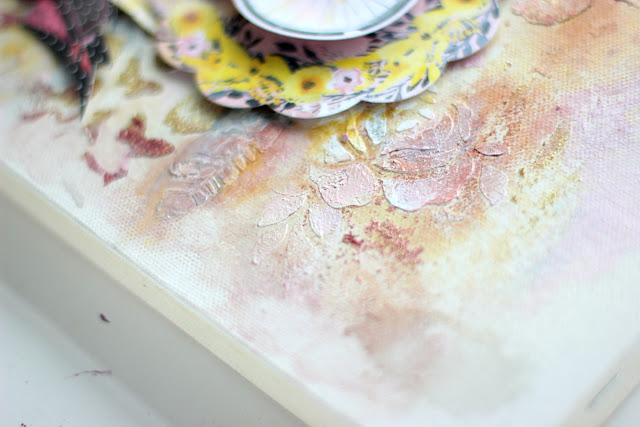
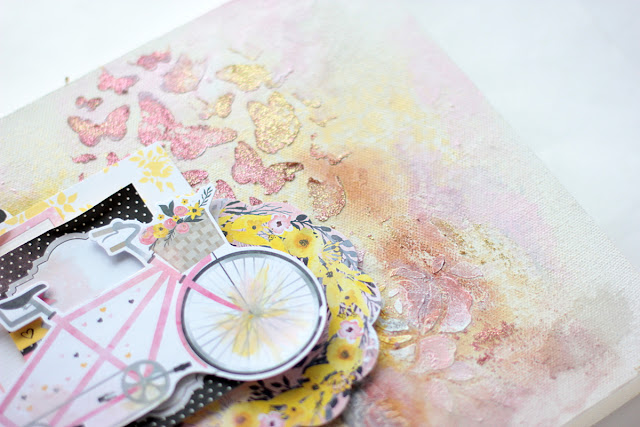
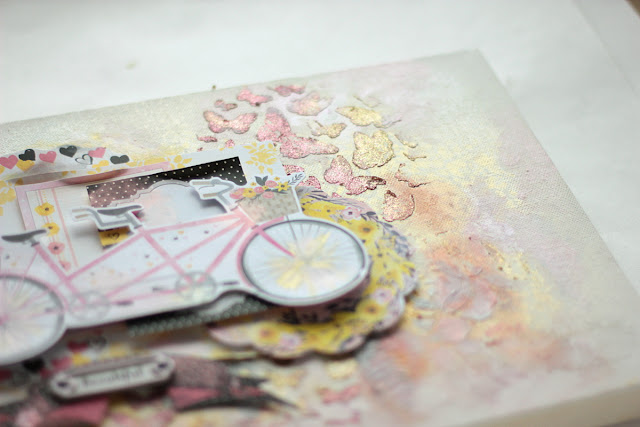
I've got to share with you a fun canvas I made using the beautiful Petal Lane collection and many fun Pentart mixed media products.

Beautiful Life Canvas by Elena Olinevich using BoBunny Petal Lane Collection

It's exciting to create your own background with the sprays and acrylic paints.

Beautiful Life Canvas by Elena Olinevich using BoBunny Petal Lane Collection

But, actually the glitter pastes and wax pastes are great products to add the shimmer and shine to your project.

Beautiful Life Canvas by Elena Olinevich using BoBunny Petal Lane Collection

The wax paste works great on porous surfaces, such a canvas especially on textured surfaces It has a smooth color and shade, it's best to apply it with your finger tips. Start with just a little then apply more as needed.  It goes pretty far!

Beautiful Life Canvas by Elena Olinevich using BoBunny Petal Lane Collection

You can also combine 2-3 colors to achieve a more gradient look. And the same can be done with the glitter paste- simply add/mix 2 colors while spreading them on the surface through the Stickable Stencil.

Beautiful Life Canvas by Elena Olinevich using BoBunny Petal Lane Collection

To add more colors I used the acrylic paints, they help you to make it look more even.

Beautiful Life Canvas by Elena Olinevich using BoBunny Petal Lane Collection

You can find the process of my creation from start to finish in my video

Beautiful Life Canvas by Elena Olinevich using BoBunny Petal Lane Collection

I also mounted the paper layers on the card board pieces, to give the canvas somegreat dimension.

Beautiful Life Canvas by Elena Olinevich using BoBunny Petal Lane Collection

These are some of the Bo Bunny and Pentart mixed media products I used to create my canvas.  Glitter Pastes not pictured.

Beautiful Life Canvas by Elena Olinevich using BoBunny Petal Lane Collection and Pentart

Hope you have liked my canvas end enjoyed watching the tutorial.

Thank you for stopping by!


BoBunny Supplies: 

12" Petal Lane Love Notes, Hooray, Sunshine.

Petal Lane Noteworthy and Layered Chipboard

Cascade and Love Stickable Stencils

Blush, Gold Glitter Paste

Gold Glimmer Spray, Sugar Glimmer Spray

Gold Pearlscents


Pentart Supplies:

Graphite, Baroque Gold , Rose Acrylic Paint Metallic

Rose Acrylic Paint Semi-Gloss
Wax Paste Chameleon Peach

Metallic Wax paste Copper

Primer paste White

Monday, December 12, 2016

BoBunny and 3L Blog Hop-with Denise and Elena S.


See what 3l Scrapbook Adhesives is up to this week for this Blog Hop: https://www.scrapbook-adhesives.com/blog/2016/12/12/2016-blog-hop-with-bo-bunny-day-1/

GIVEAWAY!! Be sure to leave a comment on this post for a chance to win one of three $25 prizes. Winners announced the week of December 19-23, 2016.  Good Luck!

Hello and welcome to the 3L Scrapbook Adhesives and BoBunny Blog Hop.  It's Denise here and I've created Misc. Me! spreads using Merry and Bright and I am also featuring some of my most favorite goodies from 3L!

 Here is the first spread:

Misc. Me Spread by Denise van Deventer using BoBunny Merry & Bright and 3L Scrapbook Adhesives

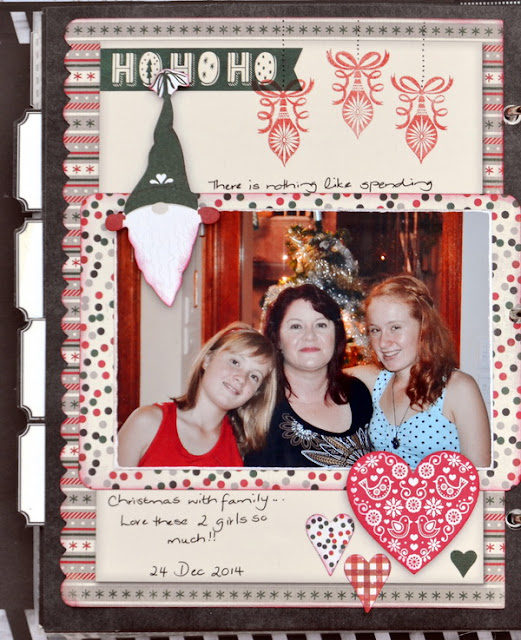
This binder is half journal and half pocket scrap booking with years worth of my most cherished Christmas moments.


Here are the individual pages:

Misc. Me Spread by Denise van Deventer using BoBunny Merry & Bright and 3L Scrapbook Adhesives

Misc. Me Spread by Denise van Deventer using BoBunny Merry & Bright and 3L Scrapbook Adhesives

I used some of the super 3L goodies to adhere everything down.  
I love to add stamping on Misc. Me! projects because it adds interest without adding bulk. 

Misc. Me Spread by Denise van Deventer using BoBunny Merry & Bright and 3L Scrapbook Adhesives

Here's a look at the second spread:

Misc. Me Spread by Denise van Deventer using BoBunny Merry & Bright and 3L Scrapbook Adhesives

Here are the individual pages:


Misc. Me Spread by Denise van Deventer using BoBunny Merry & Bright and 3L Scrapbook Adhesives


Misc. Me Spread by Denise van Deventer using BoBunny Merry & Bright and 3L Scrapbook Adhesives

Again, I added some stamping. I also added some Pearlescents in Gold to add interest and dimension and a touch of sparkle too!

Misc. Me Spread by Denise van Deventer using BoBunny Merry & Bright and 3L Scrapbook Adhesives

Thanks so much for stopping by the BoBunny blog today and hope you will be back again tomorrow for some more blog hopping!

Have a super day!
Denise x


BoBunny Supplies:
Noteworthy: Merry and Bright
Layered Chipboard: Merry and Bright
Stamps: Feeling Festive, Holiday Icon, Icons

Misc Me Binder: Black
Misc Me Dividers: Black 8x9
Misc Me Journal Contents Merry and Bright, Pocket Squares Merry and Bright

Pearlescent: Gold

3L Scrapbook Adhesives:
E-Z Runner
3D Foam Squares


Hello, friends! This is Elena S. here and I want to show you a quite wonderful Christmas canvas that I have created with Tis the Season! This is a multilayered project and it has a lot of bling and shine! Honestly, I could not do this project without the wonderful 3D Foam Squares!  They give everything such a cool depth and dimension!
I used these on each part of the canvas. for the embellishments, and the rest. These are wonderful!  They are great glue and keep the details!
This canvas will be a good addition to Christmas gifts!

At first I have taken a dense cardboard and have applied on it white gesso. next, I sprinkled a little glimmer spray in three colors. The background in style of a mixed media has turned out very nicely.

Then, I pasted together several layers of paper. Beautiful multiple layers have turned out. I wanted to add still more detail and I have added a lot of jewels and bling which I pasted on 3D Foam Squares!   then, I strewn lightly everything with artificial snow. My canvas is ready!


BoBunny Supplies:
Tis The Season-various papers 
Tis the Season Combo Stickers
Sugar Pearlescents
Glimmer Mists: Sugar/Gold/Frost

Pentart Supplies:
3D Balls Small
Primer Paste White Gesso

3L Supplies:
3D Foam Squares


Thanks for stopping by the blog today!  Come back throughout the week to see fun and new ideas!